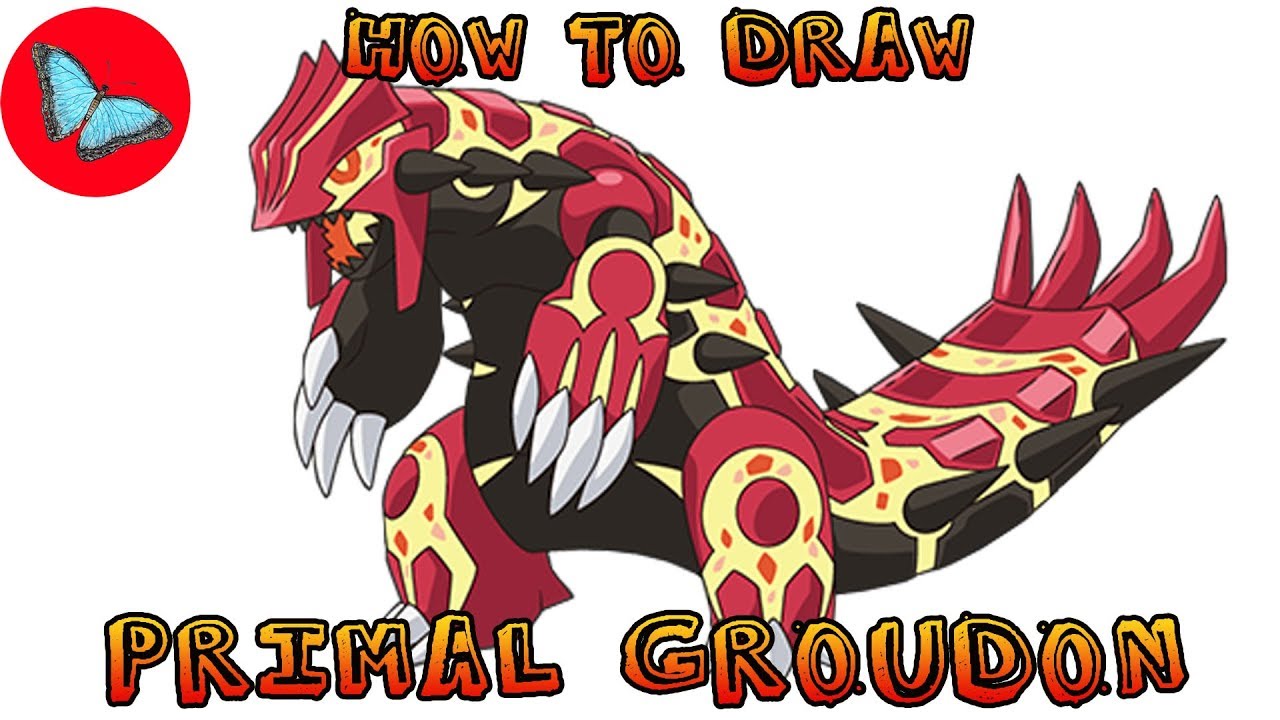
How To Draw Primal Groudon Step By Step

Ever wanted to unleash the earth-shattering power of Primal Groudon on paper? Let's be honest, who hasn't? This iconic Pokémon, with its fiery aura and immense strength, is a fantastic subject for any aspiring artist. Whether you're a seasoned drawer or just starting out, this step-by-step guide will help you bring this legendary creature to life. Drawing Pokémon is not just a fun hobby; it's a great way to improve your artistic skills, unleash your creativity, and connect with a beloved fandom. Plus, imagine the look on your friends' faces when you show off your impressive Primal Groudon artwork!
The purpose of this guide is simple: to provide you with a clear and easy-to-follow method for drawing Primal Groudon. The benefits are plentiful! You'll learn about basic shapes, proportions, and shading techniques, all while creating a cool piece of fan art. Think of it as a mini-art lesson disguised as Pokémon fun! By the end of this guide, you'll not only have a Primal Groudon drawing you can be proud of, but you'll also have sharpened your drawing skills for future artistic endeavors.
Step 1: The Foundation. Start with basic shapes. Sketch a large oval for the body and a smaller oval for the head. These are just guidelines, so don't worry about making them perfect. Next, add a rough outline for the legs, arms, and tail using simple lines. Think of it as building a stick figure before adding details.
Must Read
Step 2: Defining the Form. Now, let's flesh out those shapes! Connect the ovals for the body and head, adding curves to give Groudon its powerful physique. Refine the lines for the legs and arms, indicating the large claws and thick limbs. Remember, Primal Groudon is all about strength, so emphasize those muscles!
Step 3: Adding the Fiery Details. This is where Primal Groudon really comes to life. Sketch in the distinctive plates on its body, paying attention to their placement and size. Add the jagged edges and cracks that give it that magma-infused look. Don't forget the large, powerful claws and the intimidating spikes along its back and tail.

Step 4: Facial Features and the Omega Symbol. Time to give Groudon its fearsome expression! Draw the eyes, nose, and mouth, capturing its intense gaze. Carefully add the Omega symbol on its chest and hands; this is a key identifying feature. Remember to keep the lines sharp and defined to reflect its power.
Step 5: Refining and Shading. Erase any unnecessary guidelines. Now, it's time to add detail and shading. Use light and dark strokes to create depth and dimension, emphasizing the contours of the muscles and the texture of the plates. Think about where the light source is coming from and shade accordingly. Darker shades will make parts recede while lighter shades will bring parts forward.
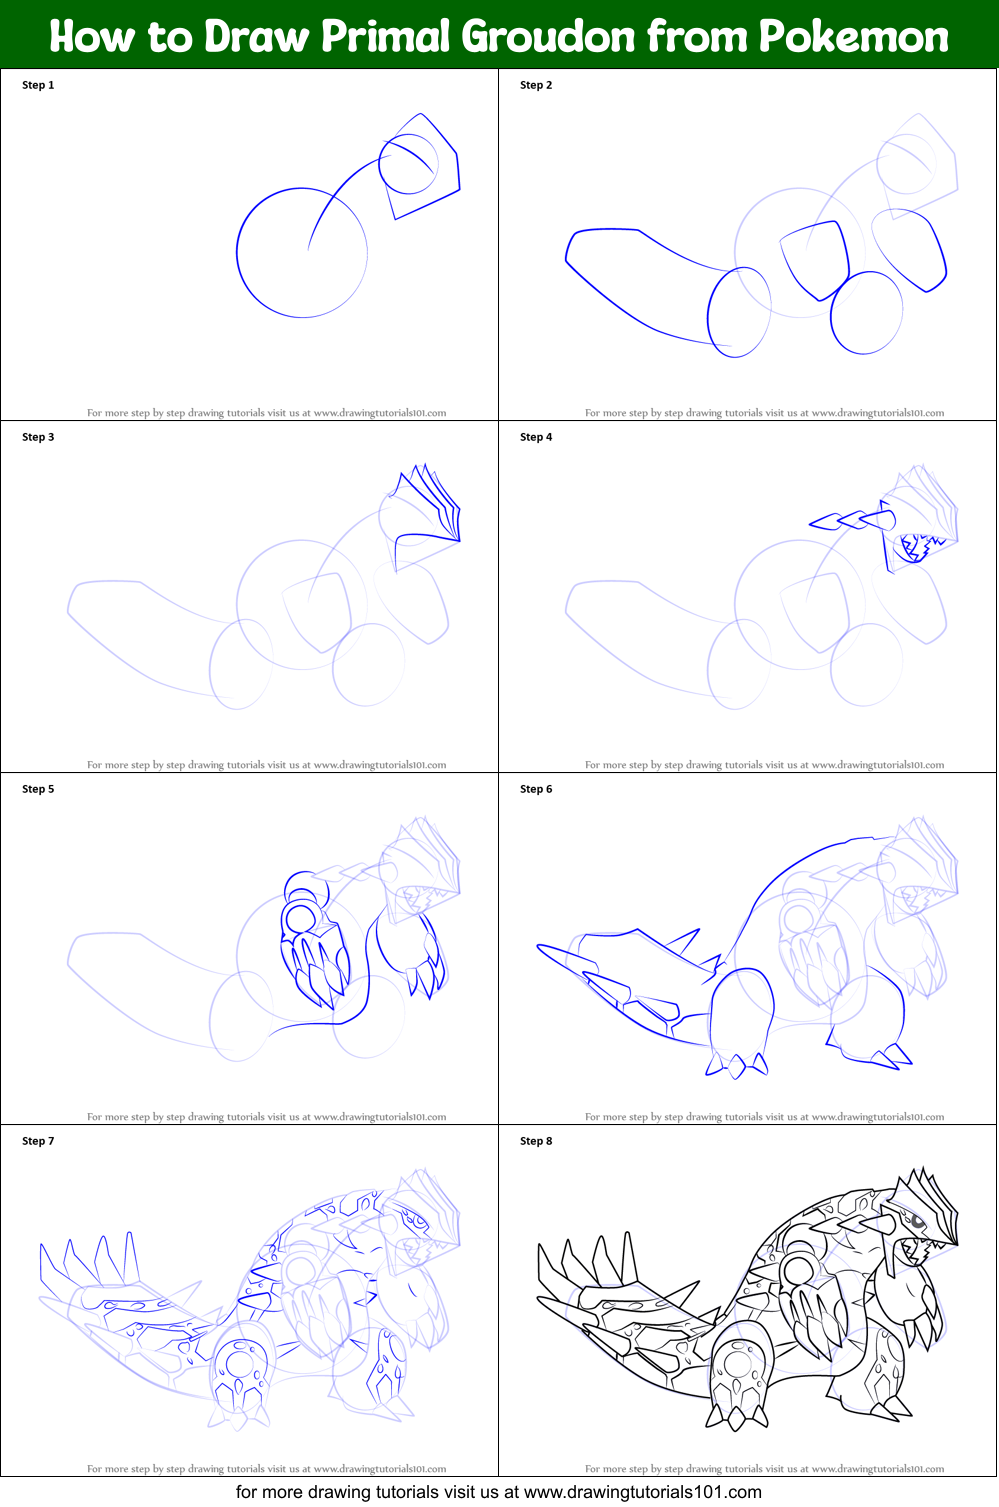
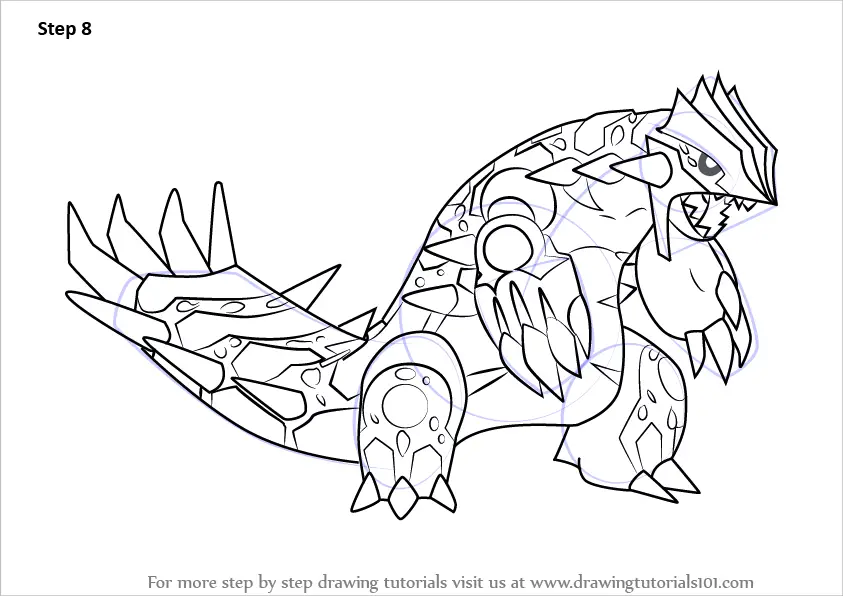
Step 6: The Finishing Touches. Review your drawing and make any final adjustments. You can add more detail to the magma cracks or experiment with different shading techniques. Finally, you can outline your drawing with a darker pen or marker to make it pop. And there you have it! Your very own Primal Groudon, ready to dominate the landscape.
Congratulations! You've successfully drawn Primal Groudon. Remember, practice makes perfect, so don't be discouraged if your first attempt isn't exactly what you envisioned. Keep drawing, keep experimenting, and most importantly, keep having fun!