How To Add Motion Blur In Davinci Resolve
Hey everyone! Ever watch a movie and get that super smooth, almost dreamy feeling when something moves fast? That's often motion blur, and guess what? You can totally add it to your videos in DaVinci Resolve! It's easier than you might think, and it can really level up your projects. Ready to dive in?
Why Even Bother with Motion Blur?
Okay, so why should you even care about motion blur? Think of it this way: your eyes naturally see motion blur in the real world. When you film something with a high shutter speed, you're essentially freezing time, and that can look a bit...staccato. Motion blur helps bridge the gaps between frames, making the movement look more natural and pleasing to the eye. It’s like the difference between a choppy flipbook and a smooth animation. Which one would you rather watch?
Plus, it can add a touch of cinematic flair. It's that subtle, almost subconscious cue that tells your brain, "Hey, this looks professional!" Ever notice it in action movies during those super fast car chases? It's a key ingredient to making those scenes feel exciting and dynamic. It creates a sense of speed and impact. Boom!
Must Read
Let's Get Blur-ry: Adding Motion Blur in Resolve
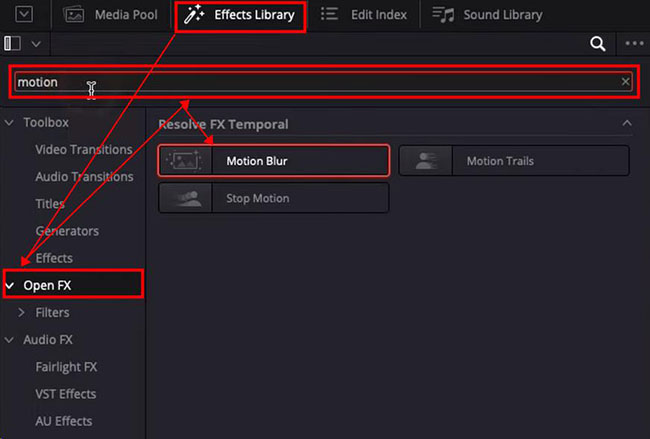
Alright, let’s get down to the nitty-gritty. Resolve offers a couple of ways to add motion blur, depending on what you're trying to achieve. We'll focus on the most common and straightforward method: using the Motion Effects setting.
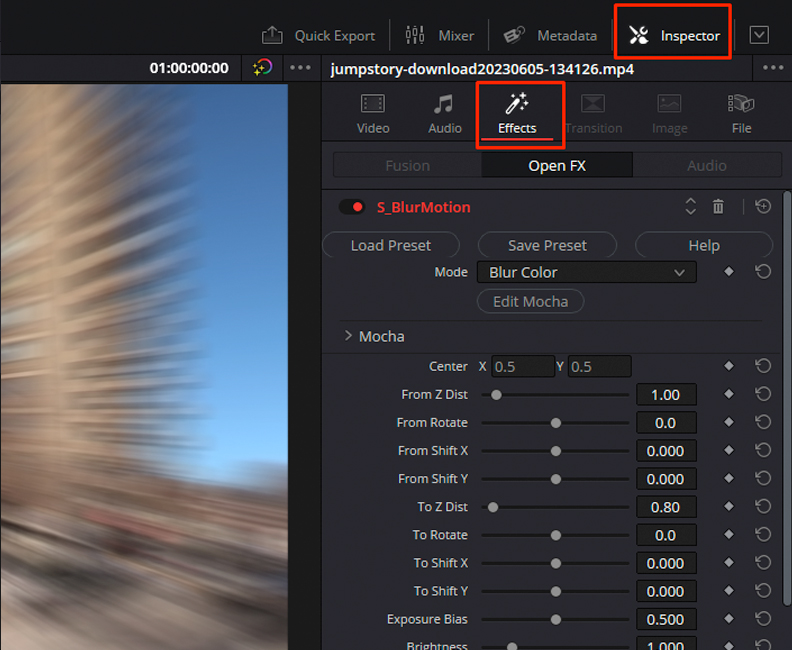
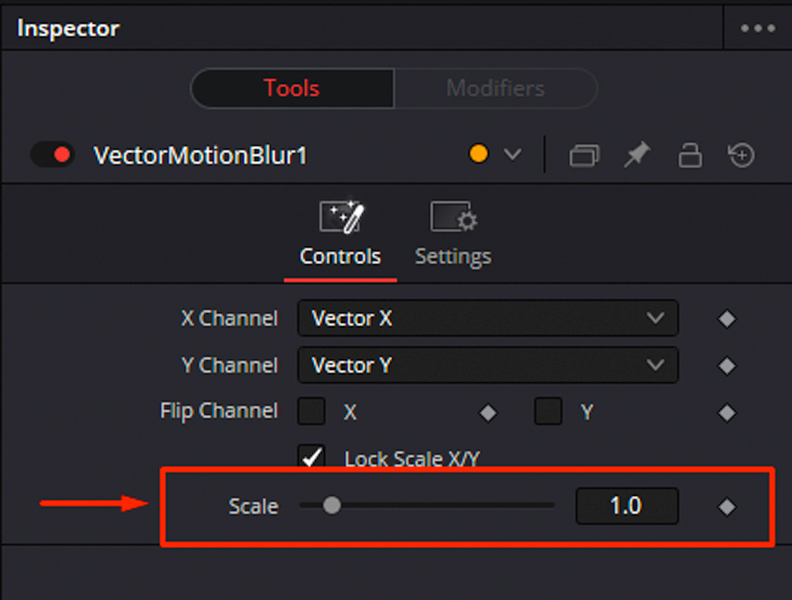
First, make sure you’re in the Edit page. This is where all the magic happens! Find the clip you want to add motion blur to. Now, in the Inspector panel (usually on the right side of your screen), scroll down until you see the Motion Effects section. Can’t find it? Make sure your clip is selected!
See that little checkbox labeled Motion Blur? Yep, you guessed it. Tick that box! You’ve officially unleashed the blur.
But wait, there's more! Simply ticking the box might not give you the exact look you're after. You'll want to tweak a couple of settings to really dial it in.
Fine-Tuning Your Blur: Shutter Angle and Samples
The two main settings you'll be playing with are Shutter Angle and Samples. Think of the Shutter Angle as how long the "shutter" is open, capturing the motion. A higher shutter angle means more blur, while a lower one means less. It's usually measured in degrees. A common starting point is around 180 degrees, but feel free to experiment!
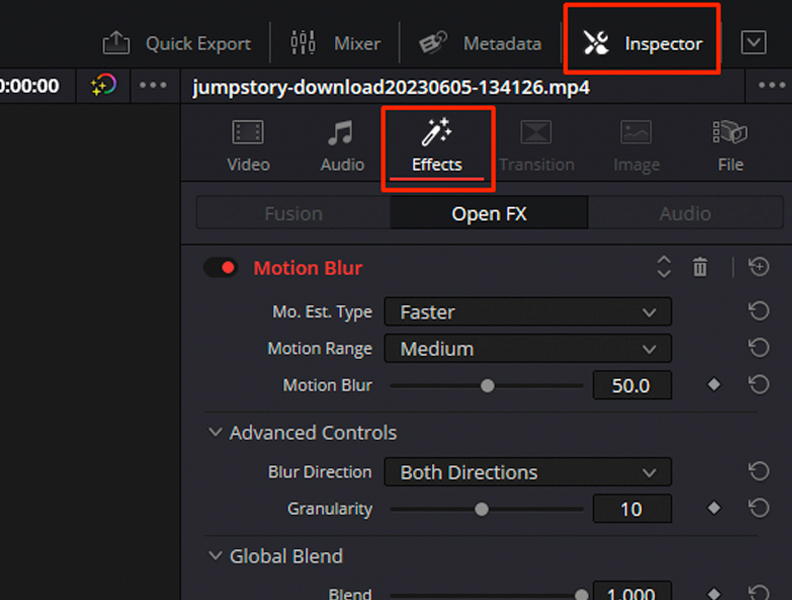
Samples, on the other hand, control the quality of the blur. Higher samples mean a smoother, more refined blur, but it also requires more processing power. Lower samples are faster to render, but might look a bit grainy or artificial. Finding the right balance is key. Start with a sample rate of around 8, and then adjust according to what looks best and how quickly you need the rendering to happen.
Pro Tip: Less is often more! Don't overdo the motion blur. Too much can look unnatural and distracting. It's a bit like adding seasoning to food – a little can enhance the flavor, but too much ruins the dish!
When Does Motion Blur REALLY Shine?
So, when should you actually use motion blur? Here are a few situations where it can be a real game-changer:
- Fast-Moving Objects: Cars, runners, spaceships – anything that's moving quickly will benefit from some added blur.
- Titles and Graphics: Adding a touch of motion blur to animated text or graphics can make them feel more dynamic and engaging.
- Simulating Realistic Camera Movement: If you're adding camera moves in post (like zooms or pans), motion blur can help sell the effect and make it look more natural.
- Transitions: A subtle motion blur on transitions can smooth things out and make them feel less abrupt.
Important Note: Adding motion blur after shooting isn't a perfect substitute for capturing it in-camera. It's more of a "sweetener" than a fundamental ingredient. But, when used judiciously, it can definitely elevate your videos.
Experiment and Have Fun!
The best way to learn is to experiment! Play around with the settings, try different values, and see what works best for your specific footage. There's no magic formula, so don't be afraid to get creative. Think of it as digital play-dough, and just enjoy the process. Adding motion blur in DaVinci Resolve is a powerful tool that can add a touch of polish and realism to your videos. Now go out there and make some awesome content!