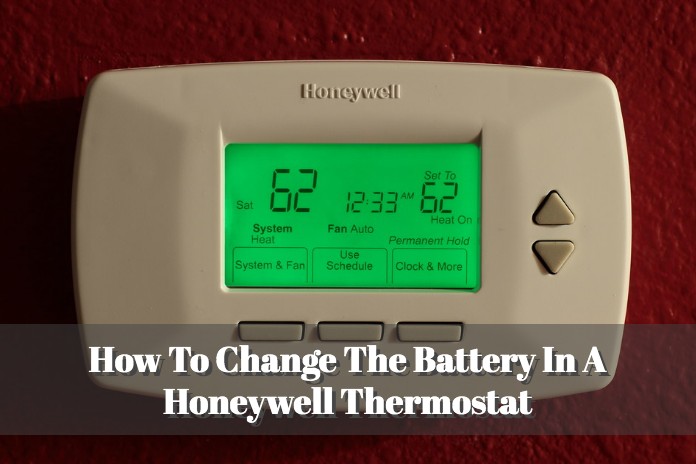
How Do You Change The Battery In A Honeywell Thermostat

Ever walked into your home, shivered a little, and stared blankly at your thermostat, wondering if it's staging a silent protest? Or maybe you’ve seen a cryptic "LOW BATT" message flashing like an emergency beacon? You know that feeling, right? That little pang of dread that something complicated, expensive, and probably involving a professional is about to happen. Well, let me tell you, when it comes to changing the battery in your Honeywell thermostat, that feeling is about to become a distant memory! Get ready to feel like a home maintenance superhero!
This isn't just about a practical chore; it's about reclaiming a tiny piece of your comfort, empowering yourself, and frankly, making your life a little more fun. Because who doesn't love the satisfaction of a job well done, especially when it saves you a service call and brings back the glorious warmth (or cool!) you crave?
Why Bother, You Ask?
Think about it. Your thermostat is the brain of your home’s climate control. When its battery starts to fade, things get wonky. Your heating or cooling might become unreliable, your settings could vanish into thin air, or worse, your unit might just… stop. A dead battery can lead to wildly fluctuating temperatures, wasted energy, and a grumpy you. But fear not, because bringing it back to life is often just a few simple steps away!
Must Read
And here’s the fun part: learning this small, seemingly insignificant skill actually builds confidence. It shows you that you can tackle little mysteries around your house. It’s like unlocking a secret level in the game of adulting!
Gearing Up for Greatness (It's Easier Than It Sounds!)
Before we embark on this grand adventure, let's gather our tools. Don't worry, we're not talking about a full workshop here. You'll likely need:
- A small flathead screwdriver (sometimes, not always!).
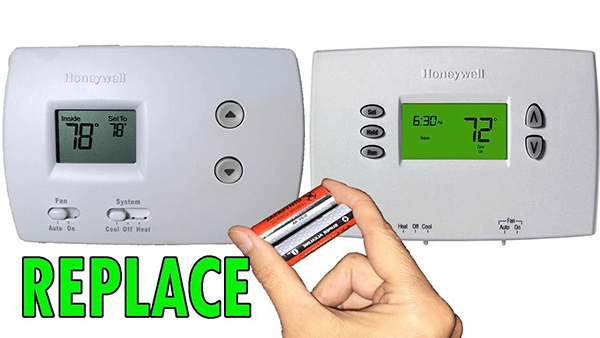
- New batteries! This is crucial. Most Honeywell thermostats take AA or AAA. Check your manual or the existing batteries to be sure. Pro tip: Always have a fresh set on hand.
- Maybe a flashlight, just for good measure, especially if your thermostat is in a dimly lit hallway.
That's it! No heavy lifting, no complex wiring diagrams. Just you, a few simple items, and the boundless potential of a fully charged thermostat!
The Great Unveiling: Finding the Batteries
This is where the magic happens, and it's surprisingly varied, depending on your Honeywell model. But don't let that intimidate you; it just means there are a few common places to check. Trust me, it's designed to be accessible, not a fortress!

Scenario 1: The Pull-Down Compartment
Many popular Honeywell models have a sleek, modern look. For these, often the battery compartment is a small tray or door that pulls straight out from the bottom or side of the main unit. Look for a subtle notch or a slight indentation. Gently pull it open. And there they are! Your little power source heroes, usually AA or AAA batteries, ready for their much-needed replacement.
Scenario 2: The Faceplate Pop-Off
Other Honeywell thermostats, especially older or simpler models, hide their batteries behind the main display unit, the "faceplate." To access them, you'll need to gently pull the faceplate away from the wall-mounted base. Don't yank it like you're starting a lawnmower! Look for small clips on the top or bottom, or just feel for a slight give. It usually detaches with a firm but gentle pull. Once the faceplate is off, the batteries are almost always on the back of it. Who knew, right?
Scenario 3: The Secret Screw
Occasionally, you might find a tiny screw holding the faceplate in place. This is where your small flathead screwdriver comes in handy. Unscrew it, and then proceed with the gentle pop-off method from Scenario 2. Remember: gentle is key!

The Grand Swap: Out With The Old, In With The New!
Once you’ve located the weary old batteries, it's time for the swap. Take note of their orientation (+/- ends). Pop them out, and then slide in the fresh, gleaming new ones, ensuring they face the correct direction. This is a moment of pure, unadulterated empowerment. You're literally bringing your thermostat back to life!
Now, carefully reattach the faceplate or close the battery compartment until it clicks securely into place. You might hear a little whir or see the screen flicker to life almost immediately. Voilá! Your thermostat is reborn, ready to serve your comfort needs once more.
The Sweet Taste of Victory (and Warmth!)
Take a moment to bask in your glory! That "LOW BATT" warning is gone, the display is bright, and your home is about to be perfectly tempered. You just saved yourself time, money, and gained a valuable skill. Isn't that just the best feeling?
This little act of DIY heroism is more than just changing batteries. It’s a reminder that many of life's "complicated" problems are actually quite simple when you approach them with a little curiosity and a willingness to learn. It shows you that you don't need to be an expert to make a difference in your home, and in your daily comfort.
So, the next time something seems daunting, remember your Honeywell thermostat. Remember how you conquered its battery dilemma with ease and a smile. If you can master this, what else can you learn? What other small, empowering skills are waiting for you to discover? The world of simple home maintenance is vast and rewarding, and you, my friend, are already on your way to becoming a true household champion. Go forth and conquer!