How Do I Replace Nest Thermostat Battery
Ah, the smart home. It promises a life of effortless comfort, where your thermostat practically reads your mind. It learns your schedule, anticipates your needs, and generally makes you feel like you’re living in the glorious future.
Then, one day, it happens. A tiny, almost imperceptible whisper of dread starts in the pit of your stomach. A flicker. A momentary blank screen. And then, the unmistakable, cold reality sets in.
Your beautiful, sleek Nest thermostat, the very beacon of modern convenience, flashes a message. Or perhaps, it just goes… dark. Silence. An unsettling quiet descends upon your formerly temperature-controlled abode.
Must Read
The Great Nest Battery Conundrum: A Modern Epic
For many of us, this moment feels like a personal challenge. Our mighty Nest, usually so self-sufficient, now demands something from us. And that something, we quickly realize, is a battery replacement.
Our minds, conditioned by the intricate dance of circuits and microprocessors, immediately jump to worst-case scenarios. We envision delicate surgical procedures, tiny screws, and perhaps even a degree in electrical engineering.
The sheer sophistication of the Nest itself implies an equally sophisticated, and therefore daunting, maintenance routine. It’s not just a dial, after all. It’s a learning thermostat. It's smart!
"Surely, a device this intelligent requires an equally smart, perhaps even genius-level, technician to simply change a battery?" you might ponder, feeling a bead of sweat form.
This is precisely where my "unpopular opinion" comes roaring in. We, the people, the everyday users of marvelous modern technology, are overthinking this. We are overcomplicating it to an almost comical degree.
The Nest battery saga is a prime example of our collective tendency to gaze upon advanced tech and immediately assume impenetrable complexity. We build up an invisible wall of apprehension around it.
Before You Call NASA, or Even Your Nerdy Nephew…
Let's be honest with ourselves. When something goes wrong with our fancy gadgets, our first instinct isn't always to tackle it head-on. It's often to Google frantically, consult a tech-savvy friend, or even consider hiring a professional.
And for a Nest thermostat, a device that feels like it possesses a small, benevolent AI, the stakes seem even higher. You might imagine needing specialized tools, or at least a tiny screwdriver set you bought for eyeglasses and promptly lost.

Perhaps you’ve already started scrolling through forum posts, seeing diagrams that look suspiciously like quantum physics equations. Stop right there. Take a breath. This isn't that kind of party.
The truth, my friends, is far, far simpler. It's so simple, in fact, it feels almost… anticlimactic. And that, I believe, is part of its understated charm and the source of our collective overthinking.
It's the kind of secret that, once revealed, makes you want to slap your forehead and chuckle. You might even wonder why you ever broke a sweat over something so utterly, gloriously straightforward.
The Myth of Complexity, Gloriously Debunked
Picture this: You approach your silent Nest, perhaps with a slight trepidation. You might even take a deep, fortifying breath. This is it. The moment of truth. The battle between human and machine.
Are you ready for the big secret? The groundbreaking revelation? The incredibly complex step that will solve all your problems and restore warmth (or cool) to your abode?
Are you sitting down? Good. Because here it is, the whispered truth: You just… pull it off. Yes, you read that correctly. Just. Pull. It. Off.
"Wait, what? Pull what off? The whole thing? The part that's stuck to the wall?" you might be asking, eyebrows knitted in confusion. No, dear reader, the whole display unit. The fancy, shiny, rotating part.
It’s designed that way! It’s meant to be separated from its wall-mounted base. It’s not glued, it’s not screwed in with hidden fastenings designed by ancient aliens. It just… pops.
The Grand Unveiling: No Tools Required (Mostly!)
Gently but firmly, grasp the outer ring of your Nest thermostat. Not the base attached to the wall, mind you, but the part that displays the temperature and twists to adjust it.
Give it a confident tug directly outwards. It might offer a tiny bit of resistance, like a friendly handshake, but don't be shy. It's designed to come right off, separating from its less glamorous base.
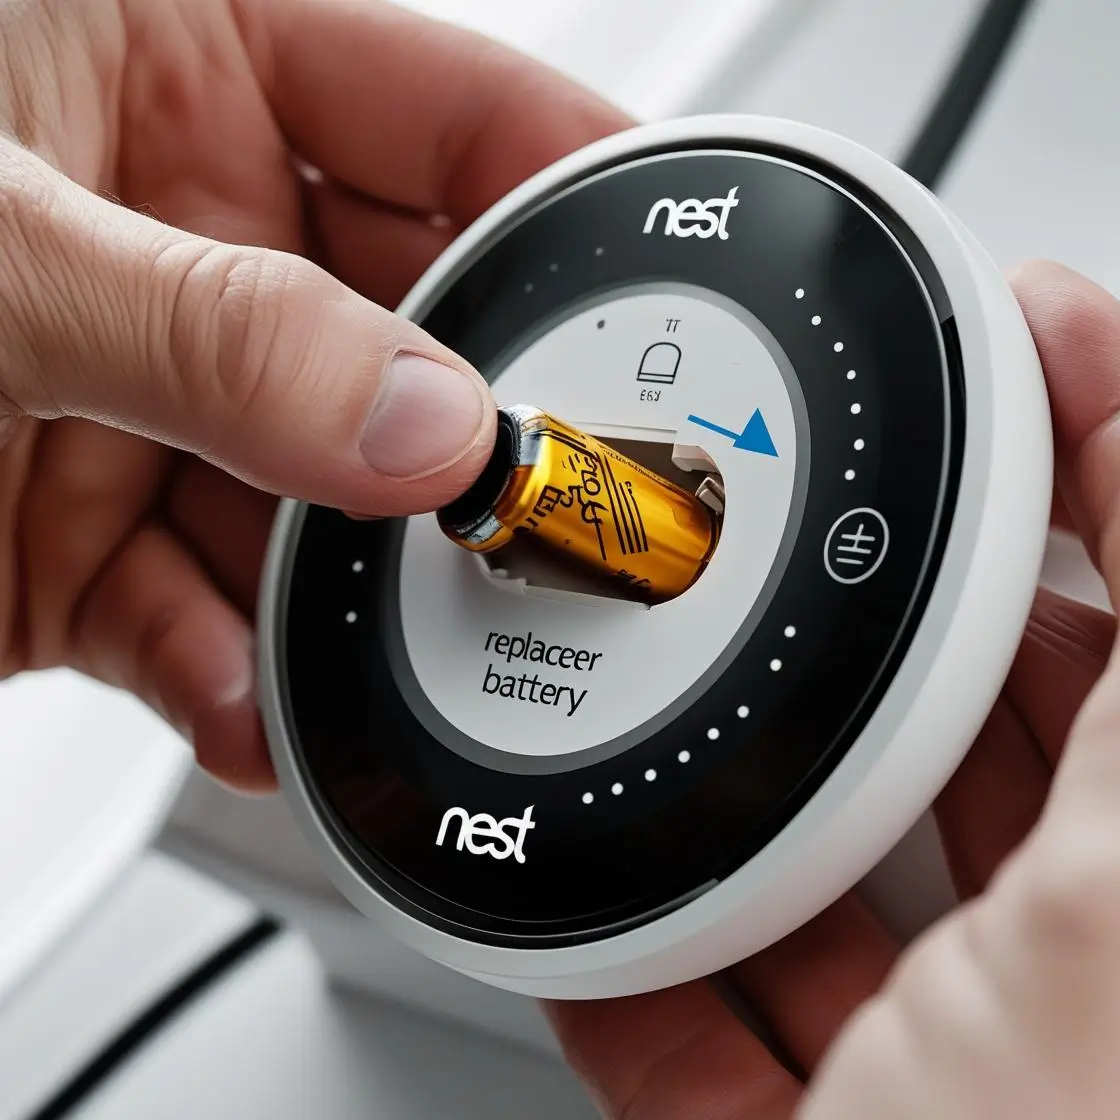
And there it is! In your hand, a disc of smart technology, perhaps a bit heavier than you imagined. Now, flip it over. On the back, you'll see a revelation that might make you chuckle, or perhaps even let out a small, victorious gasp.
Because there, nestled snugly, are one or two AAA batteries. Yes, those standard, run-of-the-mill batteries you probably have in a junk drawer somewhere, or in a remote control, or even in a child's toy.
No obscure coin cells. No proprietary power packs. Just good old, universally available AAA batteries. The simplicity of it is almost offensive, given the panic it initially inspires.
The Moment of Truth: Battery Swap, a Child's Play
Now, this is where the real "skill" comes in. You know, the kind of skill you learned as a toddler. You simply… pop out the old ones. They usually have a little ribbon to help, or you can just pry them gently with a fingernail.
Admire the spent batteries for a moment. They bravely served their purpose, powering your smart home convenience. Give them a silent, respectful nod of farewell.

Grab your fresh AAA batteries. Make sure they're oriented correctly, positive and negative ends matching the little diagrams. This is perhaps the most challenging part, if you can even call it that.
Slide them in. Hear that satisfying click? That, my friend, is the sound of victory. It's the sound of saving yourself a service call, or at least a few minutes of frantic internet searching and anxious pacing.
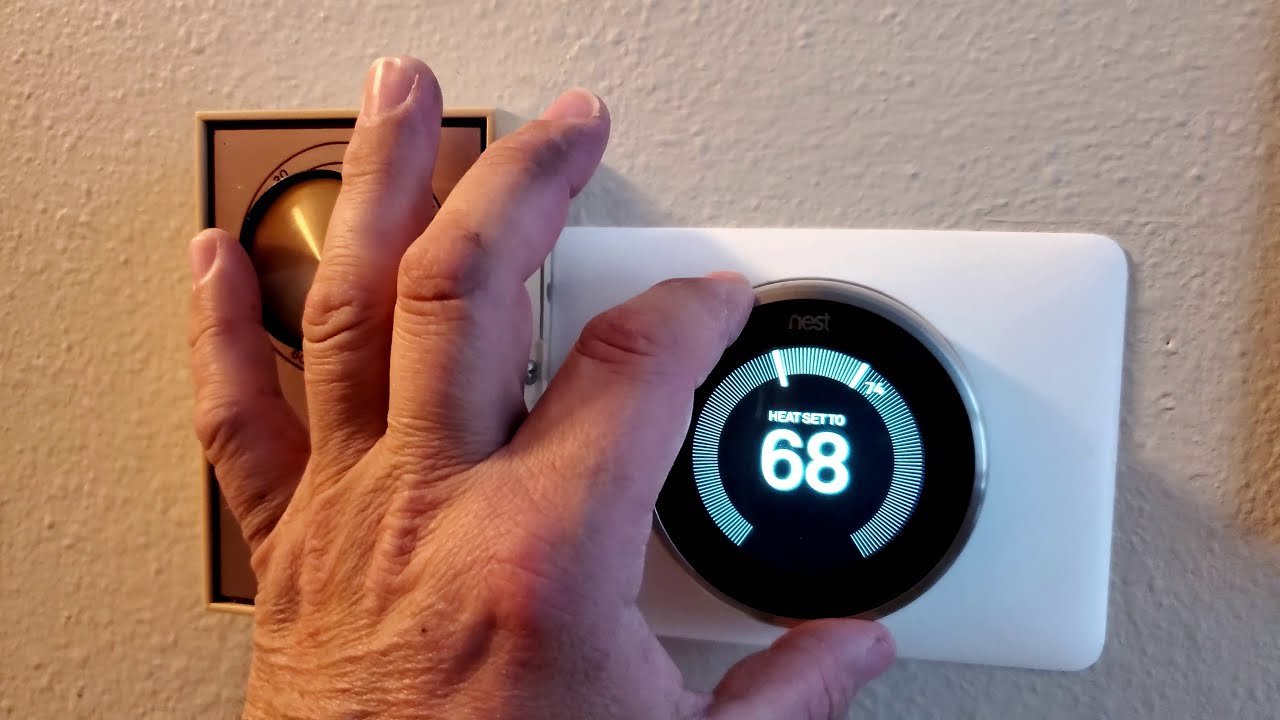
Now, for the triumphant finale: line up the display unit with the base on the wall. It’s usually magnetic, so it will snap right back into place with a comforting thud. A gentle press, and it’s secure.
Watch as your Nest springs back to life, bright and beautiful. It might even greet you with a friendly "Hello!" or a spin through its initial setup before settling back into its routine of effortless climate control.
The Post-Replacement Glow: A Smug Satisfaction
You did it. You faced the unknown, the blinking light, the existential dread of a smart device gone silent. And you conquered it, like a true tech hero. A hero with very simple tools, mind you.
Without a single specialized tool. Without a complex diagram. Without even breaking a sweat, unless you live somewhere very warm and your AC was off for a bit too long.
"See? I told you it wasn't rocket science! It’s barely even 'light tinkering'! It's barely even anything!" you can now triumphantly declare to anyone who will listen.
This whole experience is a wonderful little metaphor, isn't it? We often build up the complexity of modern technology in our heads, creating daunting mental hurdles where none exist.
We imagine impenetrable barriers, intricate systems designed only for the initiated, the certified, the technically gifted. But sometimes, just sometimes, the simplest solution is hiding in plain sight, waiting for us to just… pull it off.
The Nest thermostat battery replacement is one of those delightful little secrets. It's a reminder that not everything needs a grand, complicated fix. Sometimes, the most elegant solutions are the most mundane.
Embracing the Simple Wins, One Battery at a Time
So, the next time your fancy smart gadget throws you a curveball, take a moment. Take a breath. And remember the humble Nest battery, and your simple triumph over imagined complexity.
Remember that satisfying pop as the display comes off. Remember the familiar sight of those AAA batteries. Remember the simple joy of putting it all back together and seeing it light up anew.
It’s a small win, but it’s a win nonetheless. It’s a moment of empowerment in a world that often makes us feel helpless against our own devices. It’s a tiny fist pump of self-reliance.
And perhaps, just perhaps, it's a gentle nudge to look for the simple solutions first, before we dive headfirst into panic mode or reach for our wallets to call a pricey professional.
Because sometimes, the answer to "How do I fix this smart, complicated thing that costs a fortune?" is simply: "With a couple of AAAs, my friend. With a couple of AAAs from the remote control."
Go forth, brave smart-home adventurer, and change those batteries with confidence. You’ve got this. And now, you've got heat (or cool) again!