Wiring Stove Outlet 3 Prong

Alright, kitchen champions! Ever stared at that lonely 3-prong stove outlet, perhaps thinking it's some kind of mythical electrical beast? Well, let me tell you, that beast is about to become your best friend, and you, my friend, are about to become a wiring wizard! We're talking about connecting a standard 3-prong stove outlet, and it's less like rocket science and more like a really satisfying puzzle. Get ready to feel like a total superstar!
Imagine this: the aroma of freshly baked cookies, the sizzle of a gourmet stir-fry, the bubbling joy of your favorite pasta sauce – all powered by your very own handiwork. That’s right, getting your stove hooked up is one of those incredibly gratifying tasks that makes you feel like you can conquer anything. And the best part? It’s surprisingly simple when you approach it with a little swagger and a whole lot of confidence. Forget the scary myths; we're about to make this fun!
Your Mission: Assembling Your Superhero Toolkit!
Every superhero needs their gear, right? For this thrilling adventure, your arsenal is wonderfully compact and delightfully simple. You won’t need a whole workshop, just a couple of trusty sidekicks:
Must Read
- A good, sturdy screwdriver. Preferably one with interchangeable heads, so you're ready for any screw personality – flathead or Phillips, your choice! This is your magic wand, your trusty sword, your key to unlocking culinary dreams.
- And, of course, a healthy dose of enthusiasm! Consider it your invisible, super-powered cape.
Remember: This isn't just about screws; it's about channeling your inner DIY rock star!
Meet the Star: Your 3-Prong Stove Outlet!
Let's get up close and personal with the star of our show: the 3-prong stove outlet itself. Take a good look. You'll notice it has three distinct holes, ready to welcome your stove’s power cord with open arms. Think of them as three distinct personalities, each with a crucial role:
-
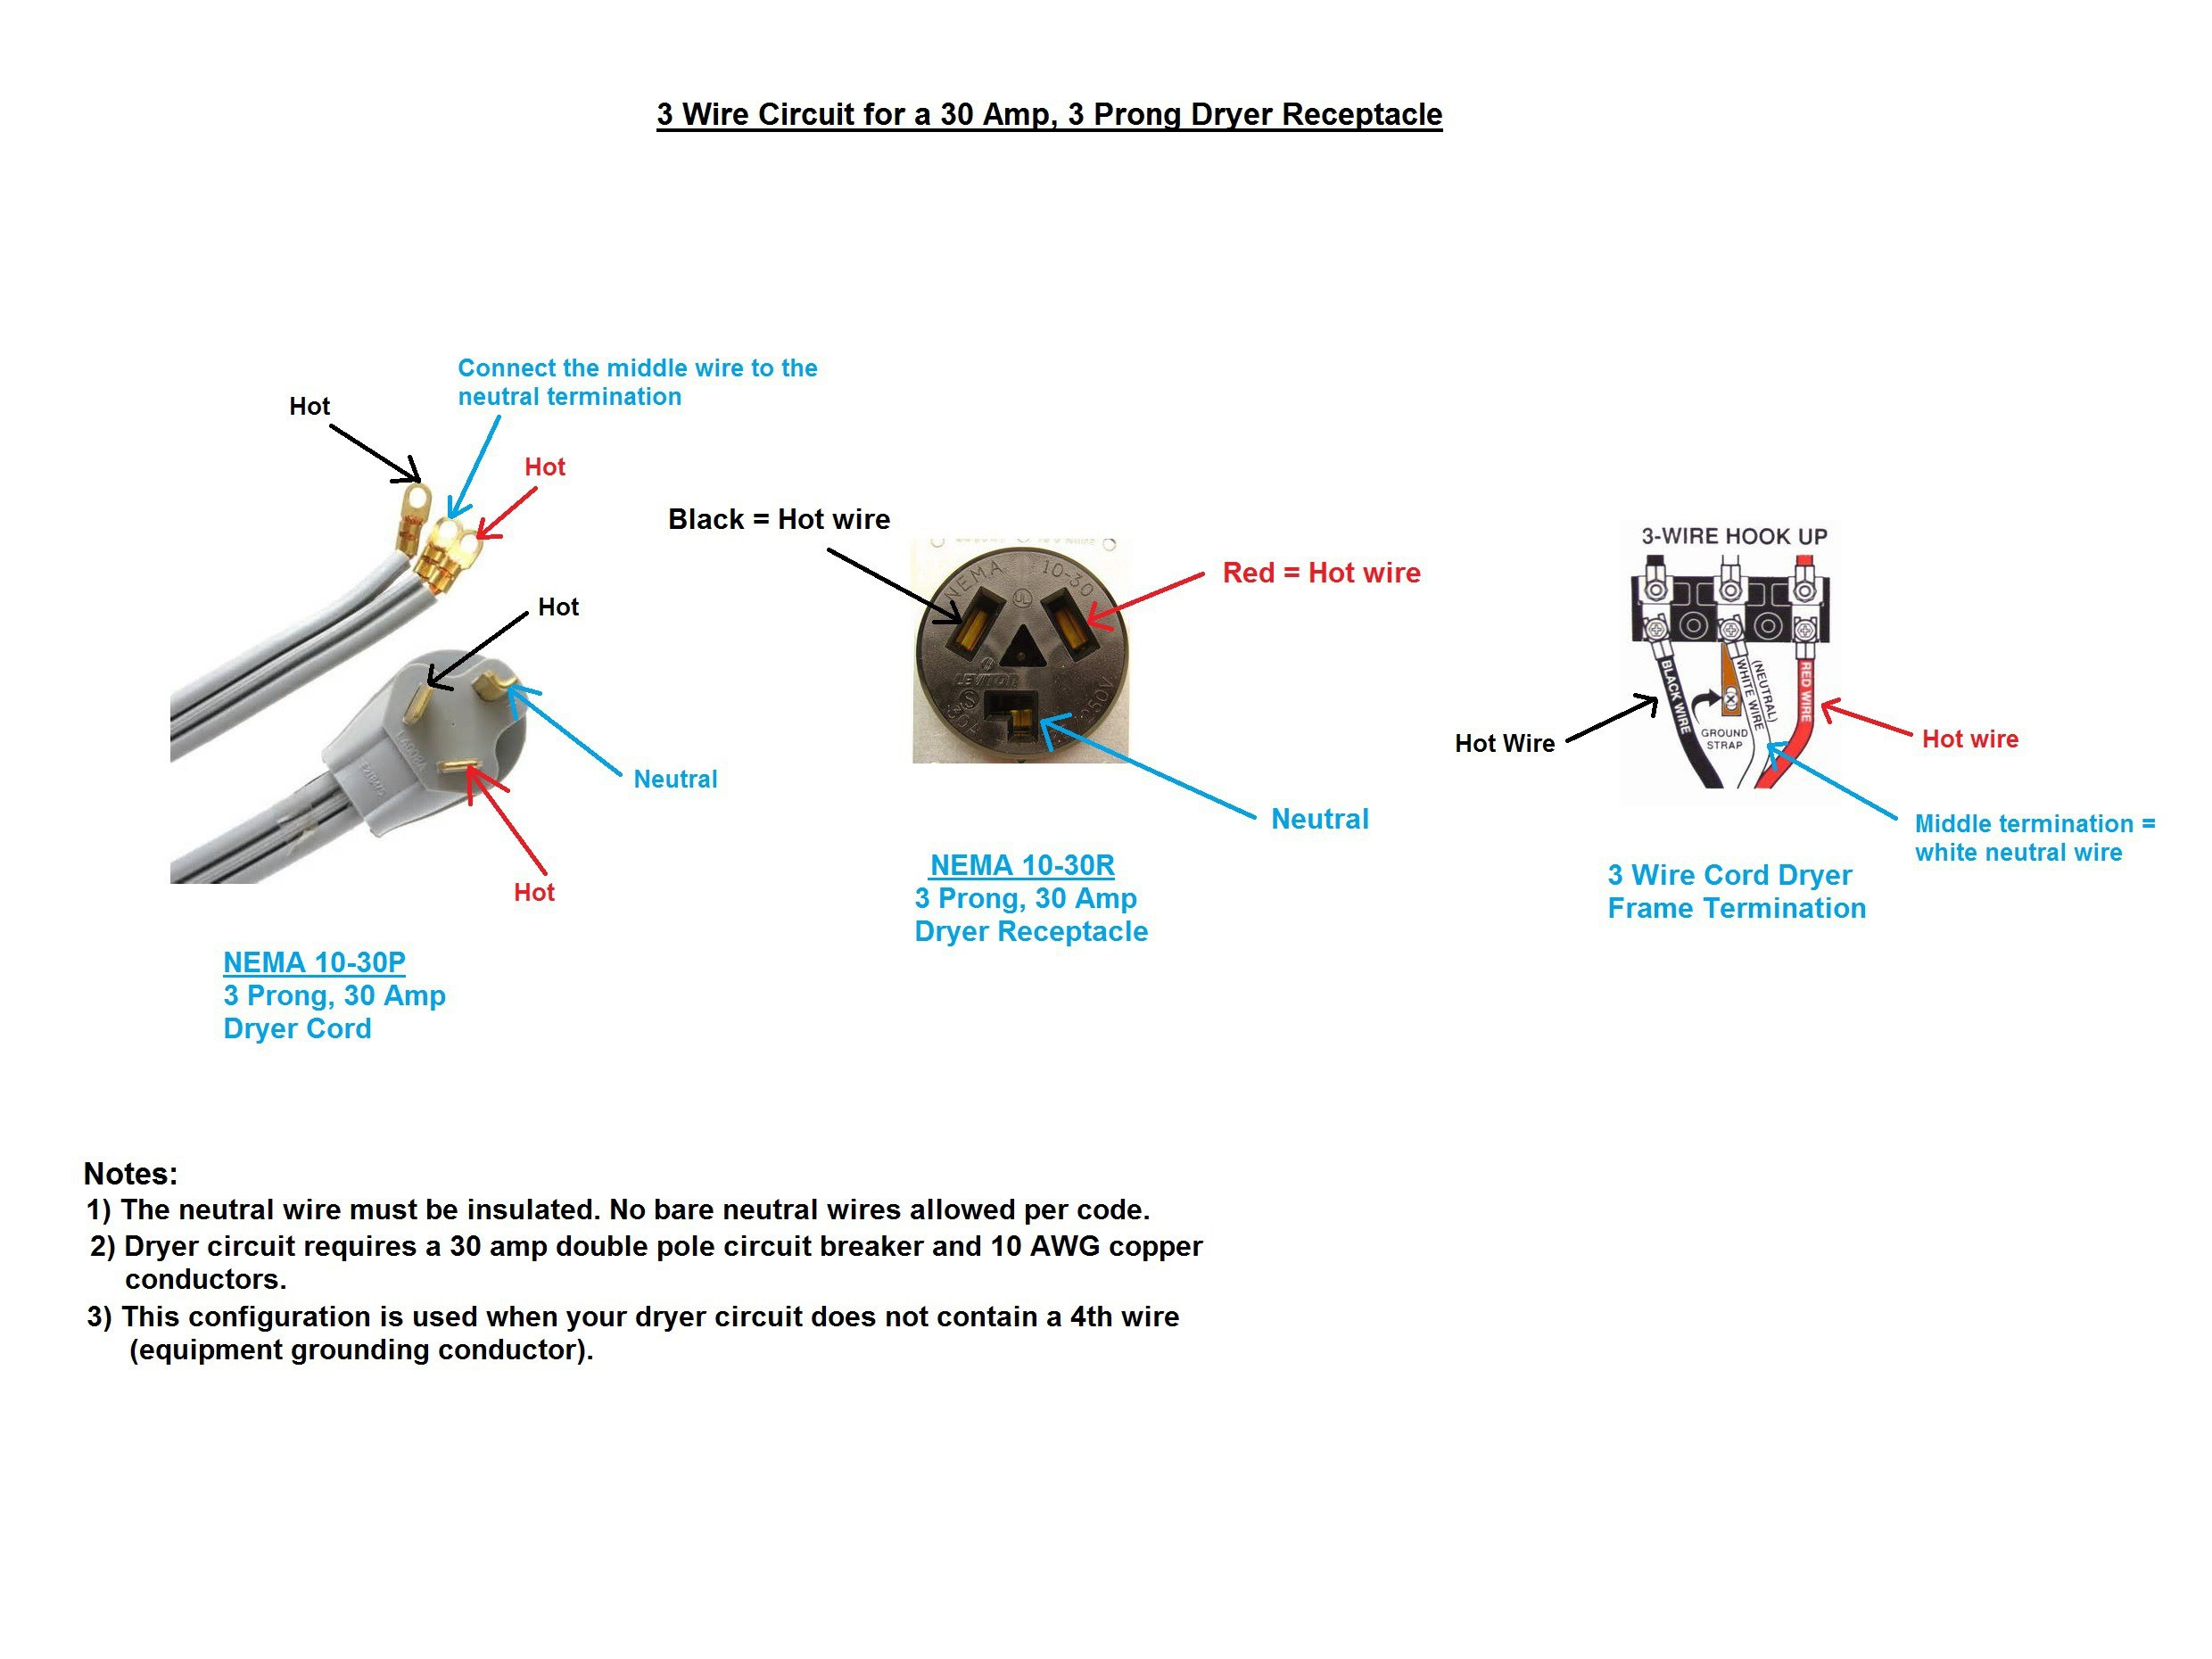
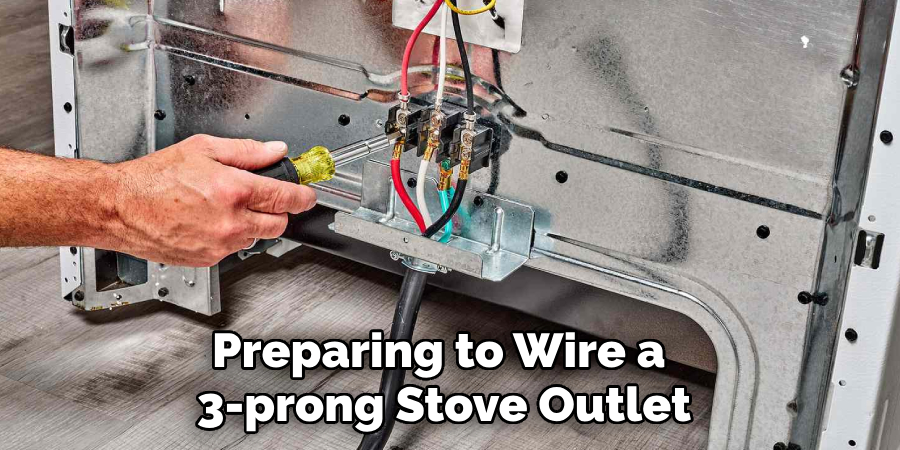
The Grounding Guru: See that distinctive U-shaped opening, or sometimes an L-shape? That's the cozy spot for your grounding prong. It’s the steady anchor, the reliable friend, the one that makes sure everything is standing firm. On the outlet, it connects to the prominent green screw. Green means go… for ground!

Wiring Diagram for Three Prong Range Outlet -
The Dynamic Duo (The Power Players): Then you have two straight slots. These are the twin engines, the power portals that bring all the cooking magic to life. They're ready for the "hot" wires that will make your burners glow and your oven toast. On the outlet, these connect to the two brass-colored screws. They’re usually shiny and ready for action!
The Grand Wire Tango: Connecting Everything Up!
Now for the most exciting part – connecting the wires! Imagine each wire from your stove cord as a dancer, finding its perfect partner on the outlet. This is where the magic truly happens, where raw power transforms into delicious dinners.
First, and this is non-negotiable for any electrical adventure: make absolutely, positively sure the power to your stove circuit is OFF at the breaker panel! Double-check it! Triple-check it! We want sparks of joy, not actual sparks. It's like pausing the game before you make your big move!
With the power confidently off, let's look at the wires from your stove cord. You'll typically see three colors, each ready for its spotlight moment:

-
The Ground Wire (Green or Bare Copper): This is your outlet's sturdy anchor, the reliable one that ensures everything is solid. You’ll find this wire is either green or simply bare, uninsulated copper. Its partner on the outlet? The green screw! Gently loosen that green screw, loop the ground wire around it (in a clockwise direction, so it tightens as you screw it down!), and snug it up tightly. Give it a gentle tug to ensure it’s not going anywhere.
-
The Hot Wires (Black and Red): Ah, the energetic duo! These are the wires that bring the power party to your stove. You’ll have a black wire and a red wire. These two don't care which brass screw they go to, as long as each gets one! Loosen up those two brass screws. Take your black wire, loop it clockwise around one of the brass screws, and tighten it down firmly. Then, do the exact same thing with your red wire on the other brass screw. Make sure they’re both super snug, like they’re ready for a long, happy life of cooking!
How to Wire a 3 Prong Stove Outlet | Easy Process (2025)
Pro Tip: Think of the clockwise loop as a friendly hug for the screw – it gets tighter and more secure as you cinch it down!
The Grand Finale: Tucking Everything In and Celebrating!
Once all three wires are securely fastened – the green or bare to the green screw, and the black and red to the two brass screws – it's time to gently tuck the wires back into the outlet box. Make sure no stray copper strands are peeking out to say hello. Then, carefully screw the outlet cover back into place, making it look neat and professional.
Now for the moment of truth! Head back to your breaker panel, take a deep breath, and flip that stove circuit breaker back to the "ON" position. Feel that surge of accomplishment? You've just channeled electrical energy into a masterpiece of domestic utility!
Go ahead, plug in your stove with a flourish! Imagine all the incredible meals, the warm gatherings, and the sheer convenience that your newly wired outlet will bring. You didn't just connect a few wires; you unlocked a world of culinary possibilities. Give yourself a high-five, a pat on the back, or even a triumphant fist pump. You've conquered the 3-prong stove outlet, and you did it with style!