Ring Doorbell Plus Battery Replacement

Okay, so picture this: you're chilling, maybe sipping your coffee (or something stronger, no judgment here), and then your phone pings. It's your Ring app. But instead of "Motion Detected!" or "Someone's at the door!", it's that dreaded, tiny, passive-aggressive notification: "Your Ring Doorbell Plus battery is low." Ugh. The absolute worst, right?
Suddenly, that coffee doesn't taste quite as good. Your mind races. "Is it going to die mid-delivery? What if someone important comes to the door? Do I have to call a technician? Is this going to be one of those 'pull out half your hair' DIY jobs?"
Fear Not, My Friend! It's a Breeze!
Spoiler alert: replacing the battery in your Ring Doorbell Plus is probably one of the easiest tech fixes you'll ever do. Seriously, it's easier than assembling most flat-pack furniture, and definitely less frustrating than trying to pair Bluetooth devices. No weird proprietary tools, no complex wiring diagrams, just a quick swap and you're back in business.
Must Read
I mean, thank goodness for the "Plus" part of the Ring Doorbell Plus, right? Because that means it's got a removable battery. Not like those older models where you had to unmount the whole darn thing just to charge it. Who has time for that kind of drama?
Let's Get This Done!
So, what do you need for this grand adventure? Brace yourself, it's a lot… Kidding! You basically need two things: a fresh, charged Ring battery (if you don't have a spare, you should definitely invest!), and that tiny, star-shaped screwdriver that came with your Ring doorbell. You know, the one you probably put in "a safe place" and now can't find. Go on, I'll wait.
Found it? Excellent! If not, don't panic. A small Torx T15 screwdriver usually does the trick. Or, if you're like me, you probably have a tiny multi-bit screwdriver set that has just the right size.
Step 1: The Underside Discovery
Okay, look underneath your Ring Doorbell Plus. See that little screw? It's usually at the very bottom. That's our target. This tiny screw is the gatekeeper to your doorbell's freedom, and its fully charged future.
Take your tiny screwdriver and gently turn it counter-clockwise. Remember: "lefty loosey!" You don't need to completely remove the screw; just loosen it enough so that the doorbell casing can slide up and off its mounting bracket.

Step 2: The Slide-and-Lift
Once that screw is sufficiently loosened, gently push the entire doorbell unit upwards. It should slide off its bracket with a satisfying little nudge. If it feels a bit stuck, don't get aggressive – just check that screw again. A little wiggle-jiggle usually helps!
Now you're holding the actual doorbell unit in your hand. Feel the power! The freedom!
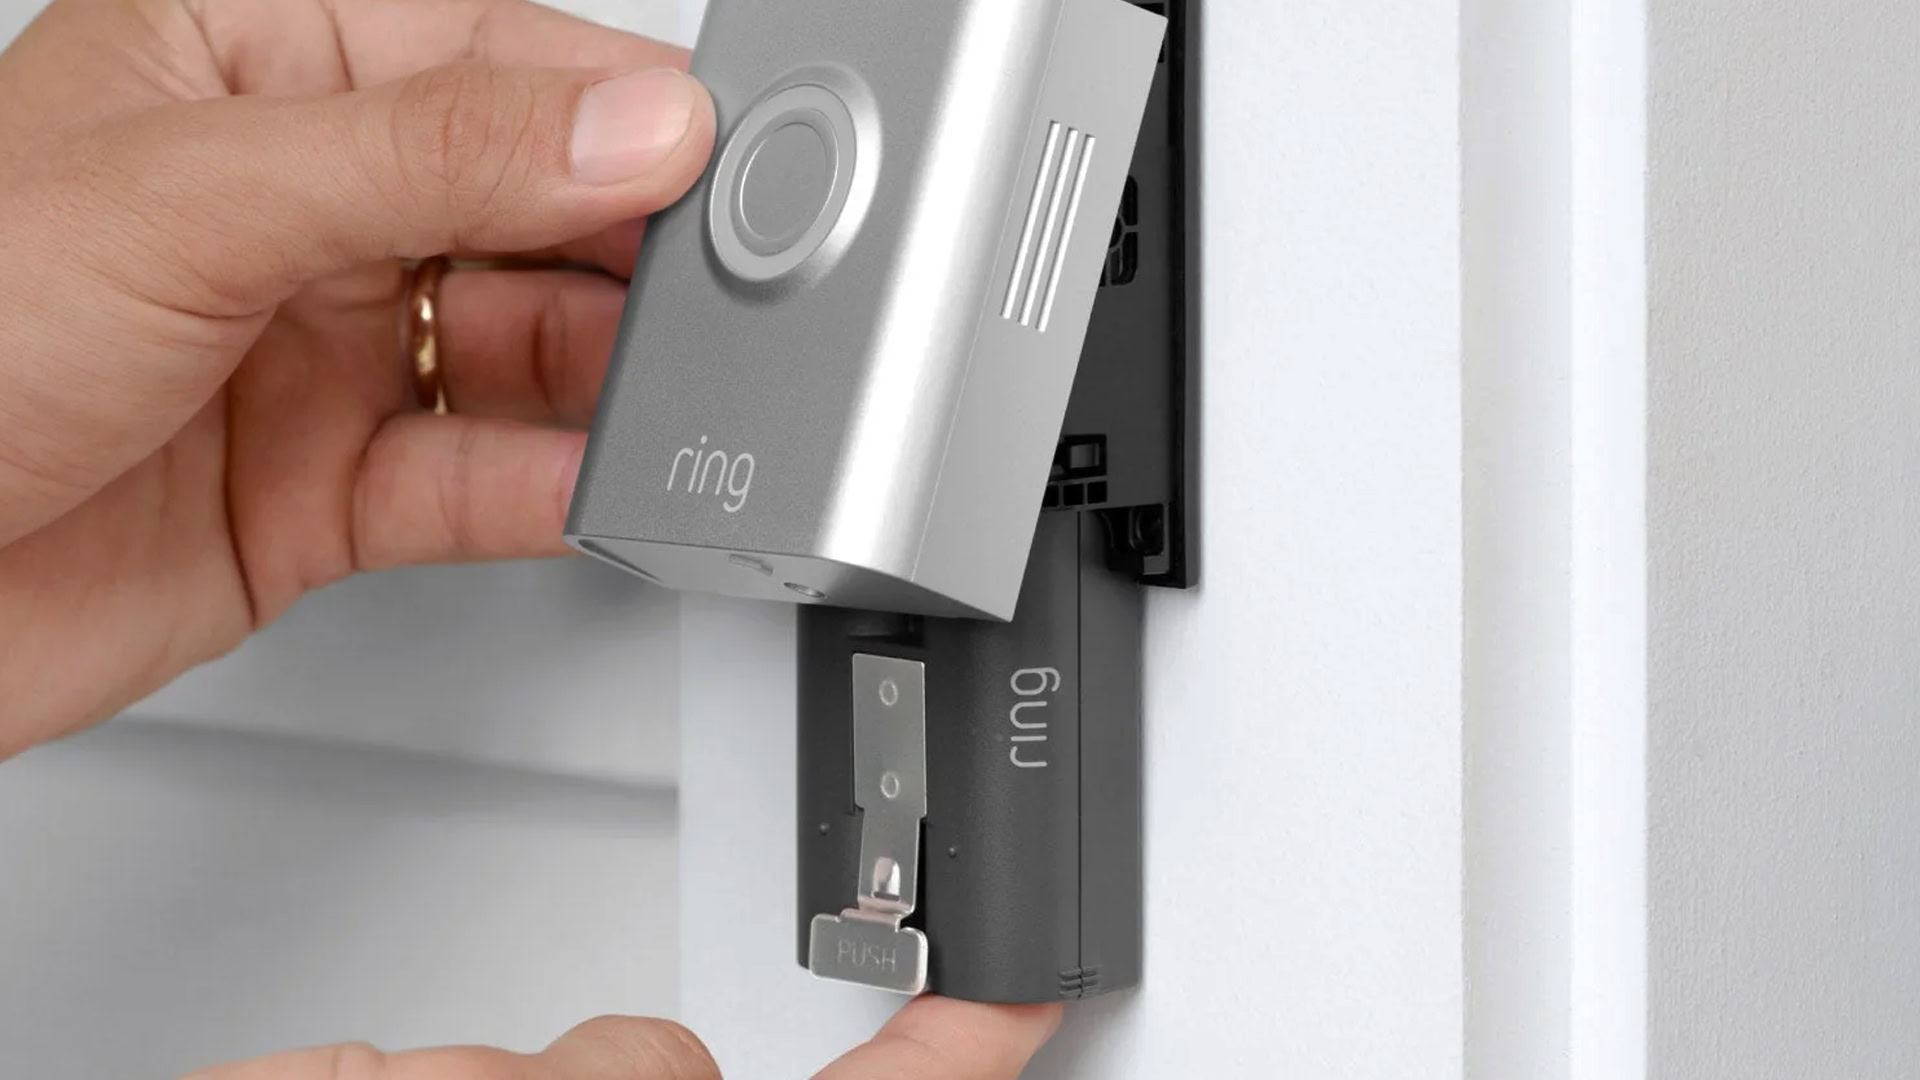
Step 3: Battery Out, Battery In!
Flip the doorbell over (carefully, of course). You'll see the battery compartment. It’s pretty obvious. The battery itself probably has a little tab or a simple clip holding it in. Give that tab a gentle tug or press that clip, and the old, tired battery will pop right out. It might even let out a tiny, defeated sigh as it exits.

Now, for the hero's entrance: grab your fully charged replacement battery. Slide it into the compartment. You'll feel a definite click as it locks into place. It’s a wonderfully satisfying sound, isn't it? Like everything in the universe suddenly aligned.
Step 4: The Reverse Mission
Time to put everything back together! Take your doorbell unit and align it with the mounting bracket on your wall. Remember how you slid it up to take it off? Now you're going to slide it downwards until it sits snugly in place. Make sure it feels secure and doesn't wobble.
Finally, grab that tiny screwdriver again and tighten the screw at the bottom. "Righty tighty!" Don't overtighten it – just snug enough so it feels secure. We don't want to strip the screw, nobody needs that kind of regret.
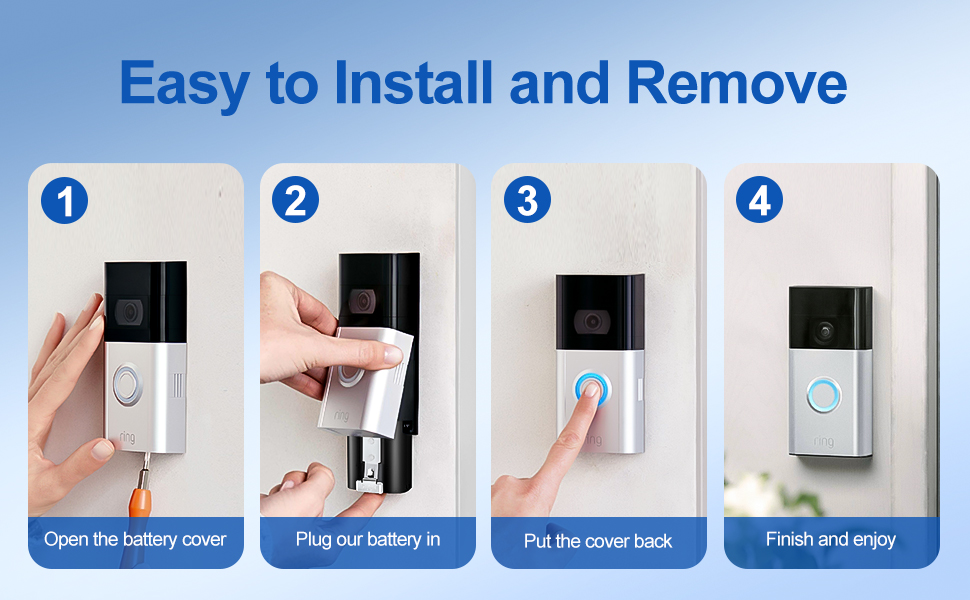
And Just Like That… You're a Hero!
Voila! Check your Ring app. You should see that glorious notification: "Battery at 100%!" It's truly a thing of beauty. You've conquered the dreaded low-battery notification, saved your smart home from a communication breakdown, and probably didn't even spill your coffee.
The best part about having a spare battery (which, seriously, get one if you don't!) is that you can always have one charging while the other is in use. No downtime! No frantic charging sessions when you realize it's completely dead. It’s a total game-changer for peace of mind.
So, next time your Ring Doorbell Plus throws that low-battery warning at you, don't sweat it. Just remember this little chat, grab your tiny screwdriver, and feel like the tech wizard you truly are. You got this!