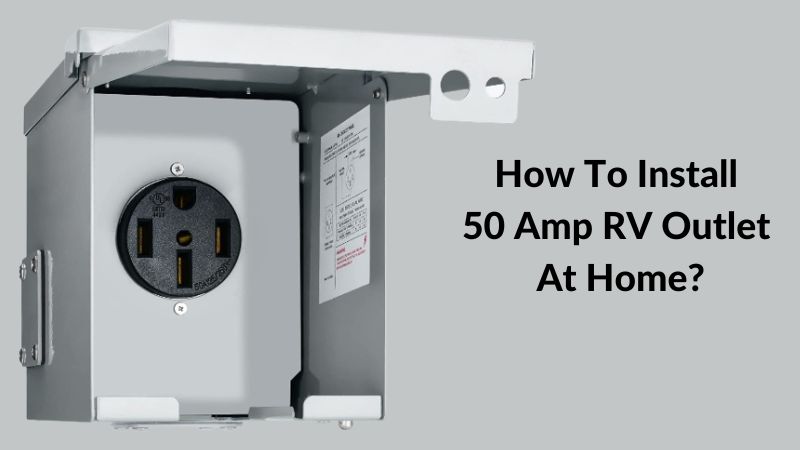
Install 50 Amp Rv Outlet At Home

Ever dreamed of having your RV parked comfortably at home, fully juiced up and ready for adventure at a moment's notice? You know, without those sad, overworked extension cords doing a questionable dance across your lawn? Yeah, me too! If you’ve got a big, beautiful beast of an RV that demands a 50 amp hookup, then you know the struggle is real when it comes to powering it up at home. But guess what? Installing a 50 amp RV outlet at your humble abode isn't as terrifying as it sounds. Let's get that RV its own dedicated power source, shall we?
Think of it as giving your RV its own personal spa day, complete with unlimited electricity for all its fancy gadgets. No more strategically turning off the AC to make coffee! We’re talking full power, full convenience, right in your driveway.
Why 50 Amps? Because Your RV Deserves the Best!
Before we dive into the fun stuff, let's quickly chat about why 50 amps is the bee's knees for many modern RVs. A 50 amp service basically gives your RV two separate 50 amp lines, letting you run everything simultaneously. Air conditioners blasting, microwave humming, water heater doing its thing, TV blaring – all at once! Compared to a 30 amp (which is just one 30 amp line) or a regular household outlet (a measly 15-20 amps), 50 amps is like upgrading from a tricycle to a turbo-charged motorcycle. So, if your RV has a NEMA 14-50P plug (that’s the four-prong one), this project is calling your name!
Must Read
First Things First: Safety and Sanity Checks
Alright, before we even think about touching wires, let’s lay down some ground rules. This isn't just about fun and games; we're dealing with electricity! So, please, if you're ever in doubt, or if the very idea of opening your electrical panel makes your palms sweat, call a qualified electrician! Seriously, they're the superheroes of the electrical world.
- Is Your Main Panel Up to Snuff? You'll need space for a double-pole 50 amp breaker. And your main service (the big number on your main breaker) needs to be able to handle an extra 50 amps. If you're rocking an ancient 100 amp service and already running a bunch of stuff, adding another 50 might be pushing it.
- Permits, My Friend: Depending on where you live, you might need an electrical permit. A quick call to your local building department can save you a headache (and potential fines!) down the line. It's boring, I know, but important.
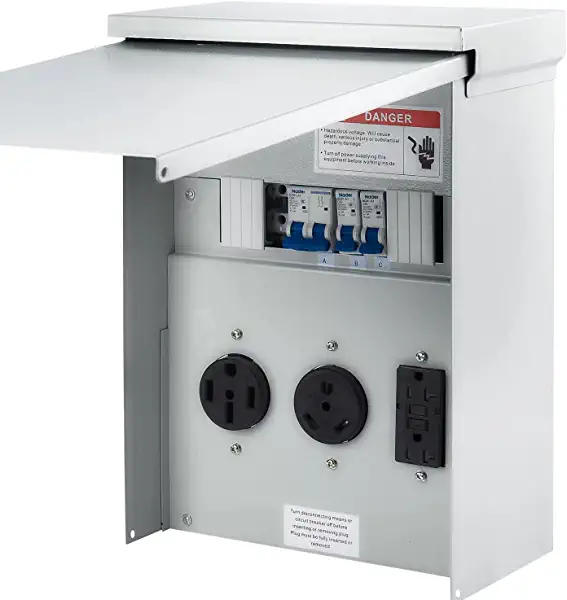
- Gather Your Arsenal: You'll need some specific goodies: a NEMA 14-50R outlet (that's the receptacle), a 50 amp double-pole circuit breaker, heavy-duty electrical wire (like 6/3 NM-B or individual 6 AWG THHN wires in conduit), an outdoor-rated enclosure for the outlet, conduit (if running exposed wire), and a bunch of tools like wire strippers, screwdrivers, a voltage tester, and probably a cold beverage for moral support.
Let's Get Wiring (the Simplified Version!)
Step 1: Location, Location, Location!
Where's this magic outlet going? Pick a spot that's convenient for parking your RV, preferably close to your main electrical panel to minimize wire run. Make sure it's at a height that's easy to access and protected from accidental bumps.
Step 2: Seriously, Turn Off the Power!
Go to your main electrical panel and TURN OFF THE MAIN BREAKER! I can't emphasize this enough. If you’re not sure if it’s off, use your voltage tester on existing outlets until they show no power. We're not trying to recreate a cartoon electrocution scene here!
Step 3: Mount That Outlet Box!
Install your outdoor-rated electrical box where you want the outlet. Make sure it's sturdy and level. This is where your fancy NEMA 14-50R receptacle will live. Think of it as building a little house for your RV plug.

Step 4: Run the Wire – The "Thick Stuff"!
Now, this is where the muscle comes in. You’ll be running a big, thick wire from your main panel to your new outlet box. If it's exposed outside, you must run it through appropriate conduit (like PVC or EMT) to protect it. If it's going through walls or attic, the NM-B cable is often okay. Just make sure you've got enough slack at both ends!
Step 5: Wiring the Outlet – Color Coded Fun!
Inside your NEMA 14-50R outlet, you'll see four terminals, usually labeled or color-coded. Your 6/3 wire will have four conductors: two hot (usually black and red), one neutral (white), and one ground (bare copper or green). Connect them correctly: hot to hot, neutral to neutral, and ground to ground. This is critical for safety and proper function. If it looks like a spaghetti monster, you might be doing it wrong!

Step 6: Wiring the Breaker Panel – A Delicate Dance!
This is arguably the most intimidating part for many. Once inside your main panel (with the power STILL OFF!), install your new 50 amp double-pole breaker. Connect the black and red hot wires to each screw terminal on the breaker. Connect the white neutral wire to the neutral bus bar (usually silver-colored, with a bunch of white wires). Finally, connect the bare copper ground wire to the ground bus bar (usually brass-colored, with bare copper or green wires). Double-check all connections to ensure they are tight and secure.
Step 7: The Moment of Truth – Test it!
Close up your electrical panel and outlet box. Now, with bated breath, flip that main breaker back on! Use your voltage tester at the new outlet to confirm you have power and that the voltages are correct (around 120V between each hot and neutral, and 240V between the two hots). You can even use an RV outlet tester for extra peace of mind. Then, very carefully, plug in your RV (or an adapter with a small appliance) and make sure everything hums along happily!
You Did It! High Five!
Look at you, a certified electrical wizard (at least for your RV)! You’ve tackled a significant home improvement project and come out victorious. Now, when you pull your RV into your driveway, you can instantly plug it in, crank up the AC, make a celebratory microwave popcorn, and start planning your next grand adventure without a single worry about power. Your RV is happy, your house is happy, and you, my friend, are ready for anything. Happy travels, and enjoy that sweet, sweet full power!