How To Weld Plastic Together

Imagine, if you will, a world where broken plastic isn't the end of the line, a sad, discarded relic.
Picture yourself as a magnificent mender, a fixer of the seemingly unfixable, a true plastic-whispering wizard!
Get ready to unleash your inner superhero because we're about to dive into the dazzling, dynamic world of joining plastic together with heat!
Must Read
The Magical Toolbox: Wands and Wonders
First things first, every phenomenal plastic magician needs their trusty tools, and yours are surprisingly accessible and oh-so-satisfying to wield.
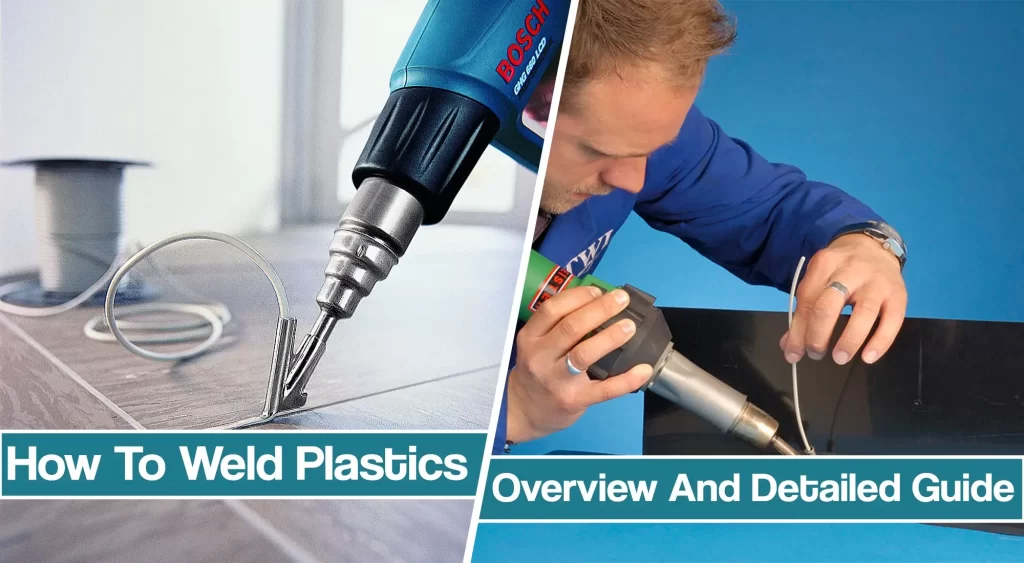
Our undisputed star player, the hot air plastic welder, is like a super-powered hair dryer with surgical precision and a fiery breath.
Think of it as your ultimate instrument for melting mischief and masterfully mending almost anything plastic that dares to cross your path.
The Hot Air Maestro: Your Primary Weapon
This remarkable little beauty, often affectionately called a plastic welding gun, blows a concentrated stream of intensely hot air.
It’s not just any old hair dryer; this ingenious device gets seriously, wonderfully hot, allowing plastic to flow and fuse like molten lava.
You’ll also definitely need some plastic filler rods, which are essentially slender strands of specific plastic ready to join your creative party and fill any gaps.
"These rods are the secret sauce, the very essence of your plastic welding potion, custom-made to match your plastic patient!"
They come in various plastic types, so choosing the right one for your project is like selecting the perfect spell ingredient.
Matching your rod to your base plastic, say ABS to ABS or PP to PP, ensures the strongest, happiest bond imaginable.
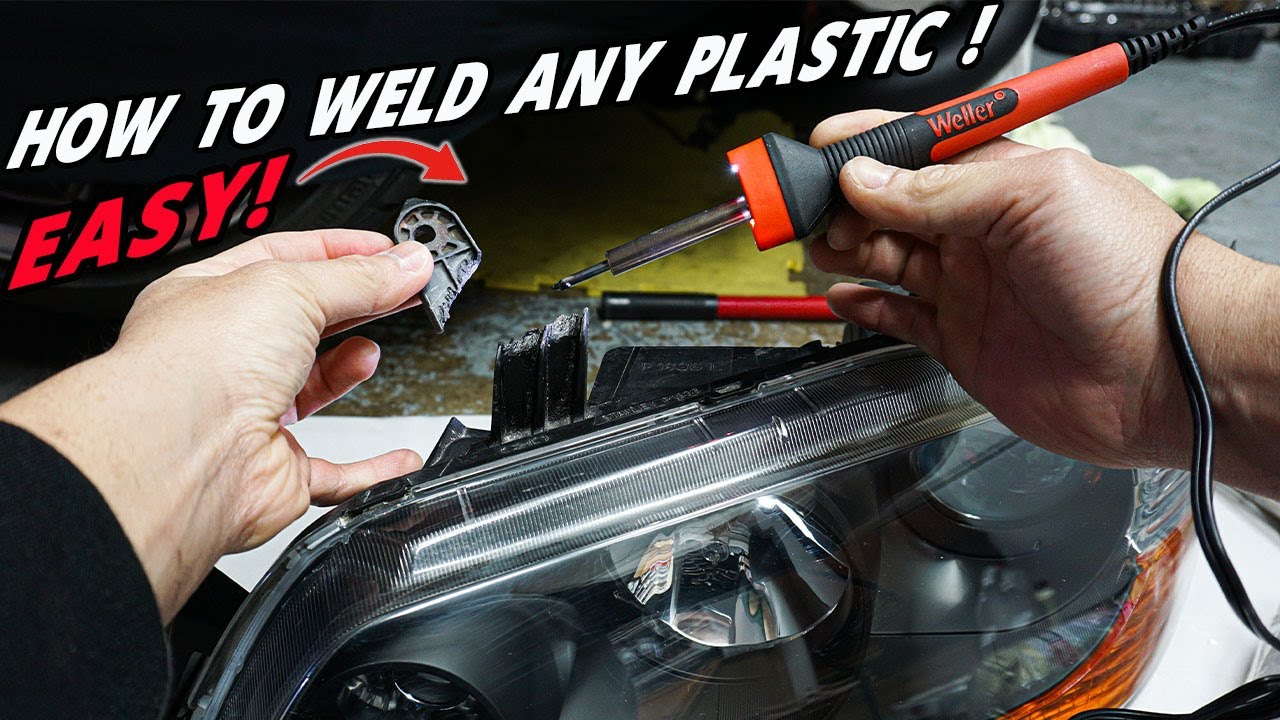
Alternative Alchemy: The Nimble Soldering Iron
For smaller, more delicate repairs, or if you're just dipping your toes into this molten marvelousness, your trusty soldering iron can step in as a nimble stand-in.
It’s less about blowing hot air and more about direct, gentle heat applied with precision, melting and fusing tiny imperfections.
Just be absolutely sure to dedicate one iron solely for plastic work; mixing metals and plastics can get messy, smelly, and even a little bit toxic!
This method is fantastic for little cracks where a big hot air gun might feel like overkill, offering a surgeon's touch to your plastic patient.

Prepping Your Plastic Patient: Setting the Stage for Success
Before any magical melding can begin, we absolutely need to set the stage perfectly for your plastic masterpiece.
Think of it as preparing your canvas for a glorious painting, or perhaps polishing your superhero shield before a grand adventure.
Cleanliness isn't just next to godliness in this world; it's absolutely, undeniably crucial for a strong, happy, and long-lasting weld.
Sparkling Cleanliness is Key!
Grab some rubbing alcohol, an industrial degreaser, or even just some good old soap and water, and give your plastic piece a thorough, loving scrub down.
Any speck of dirt, oily residue, or ancient gunk will be a giant, miserable party pooper for your molten plastic magic.
Imagine trying to glue two greasy pretzels together; it just won't work, right? The same principle applies here, but with much hotter tools!
A perfectly clean surface ensures that the new plastic can truly embrace and bond with the old, creating an invisible, powerful seam.
Edging Towards Perfection: The Mighty V-Groove
If you're repairing a dastardly crack or a broken edge, you might want to create a little "V" shaped groove along the line of distress.
This ingenious technique gives your incoming filler rod a comfy, welcoming trench to settle into, making the final weld stronger than ever before.
It’s like building a super sturdy foundation for a tiny, plastic bridge – absolutely essential for incredible longevity and Herculean strength!
You can achieve this with a rotary tool, a utility knife, or even the tip of your soldering iron for smaller, more precise channels.
The Grand Welding Dance: A Step-by-Step Ballet of Bonding
Now, for the main event, the moment you’ve been eagerly awaiting! This is where you truly become the maestro, the conductor of plastic harmony.
Get ready to feel the power, the precision, and the sheer, unadulterated joy of bringing broken things triumphantly back to vibrant life.
Remember, patience, a steady hand, and a dash of daring are your absolute best friends in this dazzling, molten dance.
Step 1: Warming Up the Stage
Turn on your hot air welder and allow it to reach its optimal operating temperature, usually a scorching 200-300°C.
Point the nozzle gently at the edges of your plastic, sweeping it back and forth with a smooth, hypnotic motion.
You want the plastic to get slightly glossy and pliable, like a shy dancer warming up their muscles for their big, show-stopping moment.
This pre-heating step ensures the base material is receptive and ready to merge with its new partner, the filler rod.
Step 2: Introducing the Filler Rod
Take your chosen filler rod and, holding it at a slight angle of about 45 degrees, start feeding it smoothly into the superheated area.
Simultaneously, keep that focused hot air stream directed onto both the rod and the softened base material.
It’s a delicate, mesmerizing three-way dance: the heat, the base plastic, and the filler rod all coming together in glorious, molten sync.
Maintain consistent pressure on the rod as you move, ensuring it melts evenly and fills the V-groove you so cleverly created earlier.
Step 3: The Fusion Tango
As the filler rod melts and flows, gently press it into the softened base plastic using the welder’s nozzle or a special roller attachment.
This crucial pressing action ensures an incredibly strong, deep bond, truly fusing the new plastic with the old, making them one glorious entity.
Think of it as giving your plastic pieces a firm, loving, and utterly permanent hug that lasts for a lifetime of adventures!
"The goal is not just to stick them together, but to make them truly one, like long-lost siblings joyously reuniting after ages apart!"
Move slowly and deliberately, allowing the heat to do its work without rushing; rushing often leads to weaker, less attractive welds.
Step 4: Smooth Operator Finishing Touches
Once you’ve successfully laid down your magnificent weld, you can use the hot air to gently smooth away any pesky bumps or ridges.
A quick, careful sweep of heat can make your weld look incredibly polished, professional, and truly a work of art that defies its origins.
Then, let your newly mended masterpiece cool naturally and completely; do not rush it, as impatient cooling can dramatically weaken your magnificent creation.
A cool, strong weld is a happy weld, ready to face the world again with newfound vigor and resilience, all thanks to your amazing skills!
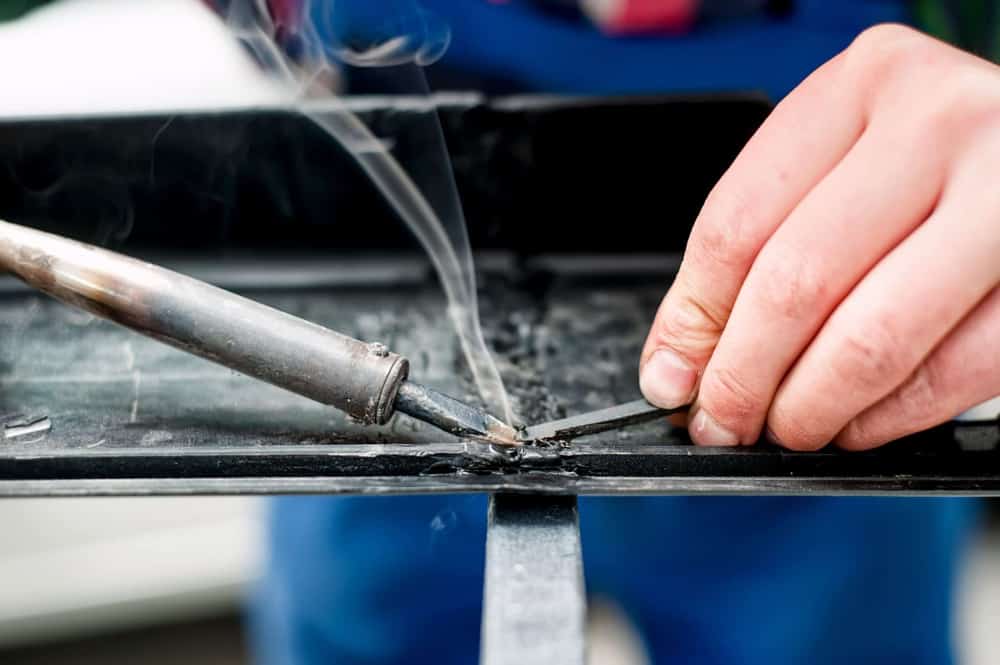
The Soldering Iron Side Quest (for the Nimble-Fingered)
If you're bravely tackling a tiny, mischievous crack or need to add a small, delicate patch, the versatile soldering iron is your unexpected hero.
Heat the tip to a moderate temperature and gently, oh-so-gently, melt the edges of the crack together, coaxing them into submission.
You can even melt small pieces of similar plastic (perhaps from a donor piece) directly into the gap for extra, hidden strength and structural integrity.
It’s like precision surgery for your plastic pals, requiring a truly delicate touch and steady hand for the most refined results!
Remember to practice on scrap pieces first, perfecting your technique before tackling your prized possession.
Safety First, Superheroes! (But Keep It Fun and Fabulous)
Even though we're having an absolute blast transforming plastic, a few sensible precautions will keep the fun flowing endlessly.
Always, always work in a super well-ventilated area because melted plastic can sometimes release some truly interesting, if not entirely pleasant, aromas.
And absolutely, positively, protect those precious peepers with some snazzy, stylish safety glasses – they’re your superhero mask!
These tools get hot enough to make dragons fiercely jealous, so be incredibly mindful of where you point them and never touch the hot tip!
A pair of heat-resistant gloves can also be a wonderful addition to your safety arsenal, protecting your precious digits from accidental encounters.
Practice Makes Perfect (and Hilariously Imperfect Attempts!)
Don't expect to magically become a plastic welding prodigy on your very first try; that, my friend, is half the glorious fun of it all!
Grab some scrap plastic, any old bits and bobs you can find, and just start enthusiastically experimenting with glee.
Your first welds might look a bit lumpy, perhaps like a kindergarten art project designed by a particularly enthusiastic badger, and that's perfectly, wonderfully okay!
"Remember, even Michelangelo probably started with a doodle. A lumpy, possibly embarrassing doodle, but a doodle nonetheless!"
Every clumsy attempt, every slightly wonky seam, is a valuable stepping stone on your magnificent journey to becoming a plastic-fusing legend.
Embrace the learning curve, laugh at your magnificent mistakes, and keep on melting and molding until you're a true master!
The Glorious, Triumphant Feeling!
When you successfully mend that beloved, broken garden gnome, revive a cracked car bumper, or fix that irreplaceable toy, the feeling is absolutely unparalleled.
You'll feel like a true inventor, a saver of countless plastic souls, a master of miraculous transformation, and a genuine everyday hero!
So go forth, brave plastic welder, and let your boundless creativity melt away the boundaries of what you thought was even remotely possible!
The entire world of perfectly mended plastic eagerly awaits your triumphant, heat-wielding touch!