How To Weld Chrome Moly Steel
Alright, gather 'round, folks, because we're about to dive into the sparkling, slightly intimidating, but utterly magnificent world of welding Chrome Moly Steel! Now, if you've ever dreamed of building something seriously strong, seriously light, and seriously cool – like a race car chassis that laughs in the face of G-forces, or a bicycle frame that feels like it’s made of pure thought – then Chrome Moly is your new best friend. But this isn't your grandpa's old fence post welding; this metal is a diva, and it needs a little TLC to really shine.
Think of Chrome Moly as the superhero of steels. It’s got incredible strength for its weight, thanks to a secret sauce of chromium and molybdenum (hence the snazzy name). But just like every superhero has a weakness, Chrome Moly can be a bit… delicate when it comes to heat. It doesn’t like sudden temperature changes, which can make it cranky and brittle. Our mission, should we choose to accept it, is to coax it into a beautiful, strong union without upsetting its delicate sensibilities.
The Warm-Up Act: Pre-Heat Like a Pro
Before you even think about striking an arc, we need to talk about heat, specifically pre-heat. Imagine asking a super athlete to sprint a marathon without a warm-up. Disaster, right? Same goes for our diva metal. You absolutely, positively, without a doubt, need to warm up your Chrome Moly workpiece before welding.
Must Read
We're talking about bringing the temperature up to somewhere around 300-400°F (that’s hot enough to make water sizzle and dance, but not red-hot). You can use a propane torch, an oven, or even a fancy induction heater if you're feeling particularly high-tech. The goal is to reduce the shock of the intense welding heat and allow the metal to expand and contract more gently. It’s like giving your metal a warm, comforting hug before asking it to perform acrobatics.
"Pre-heating Chrome Moly isn't just a step; it's a declaration of respect for a magnificent material."
Cleanliness is Next to Weldliness
This isn't just a suggestion; it's a commandment written in glowing arc light: your weld joint must be squeaky, sparkling clean. We’re talking surgical precision here. Any oil, grease, paint, rust, or even a lingering fingerprint can contaminate your weld, leading to a weak, ugly, and utterly disappointing result. Grab your grinder, your wire brush, and some acetone, and go to town. Make that surface shine like a new penny!
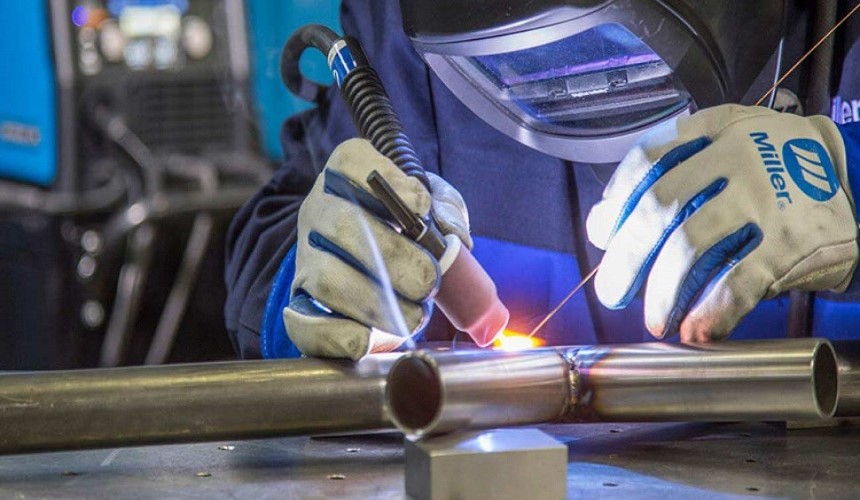
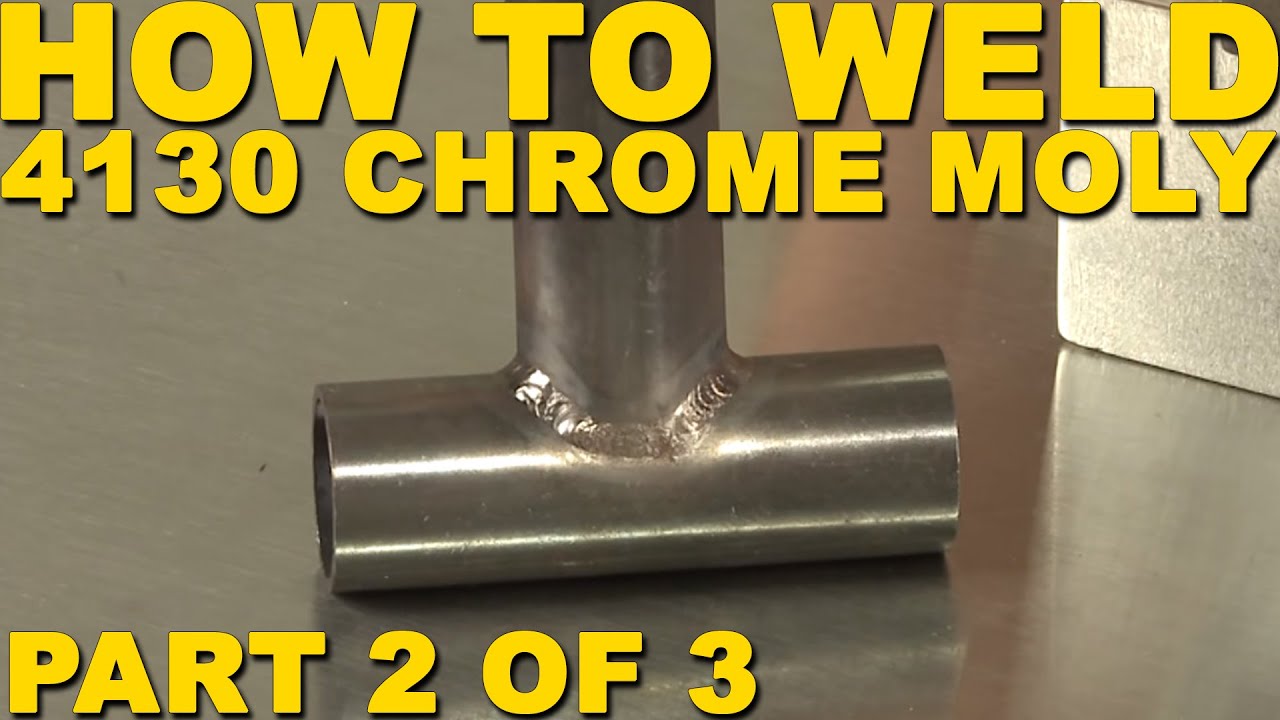
The Star of the Show: TIG Welding
While you can technically MIG weld Chrome Moly, if you want welds that are strong, beautiful, and worthy of a high-performance application, TIG welding (that's Gas Tungsten Arc Welding for the uninitiated, or just "TIG" for those in the know) is your go-to superstar. TIG gives you incredible control, precision, and produces the kind of beads that make other welders sigh with envy. It’s like painting with a laser beam – smooth, controlled, and utterly mesmerizing.
Choosing Your Weapon (Filler Rod)
When TIG welding, you'll need a filler rod to add material to your joint. For Chrome Moly, you’ll typically be looking at rods like ER70S-2 or, for even higher strength matches, ER80S-D2 or even 4130 filler specifically designed for Chrome Moly. Think of it as choosing the right flavor of icing for your masterpiece cake. The rod needs to play nice with your base metal to ensure a strong, homogenous bond.

The Dance: Technique and Amperage
With TIG, you're looking for a smooth, consistent motion. Hold your torch steady, maintain a tight arc, and feed that filler rod with rhythmic precision. It’s a dance, not a wrestling match. Amperage settings will depend on the thickness of your material, but generally, you want enough heat to get a good puddle without blasting through. Don't be afraid to take breaks and let the metal cool slightly between passes, especially on thicker sections. Remember, our diva metal hates sudden chills!
The Cool-Down Crew: Post-Weld Care
Just as important as pre-heating is the post-weld cooling process. Remember how we said Chrome Moly hates sudden temperature changes? Well, that applies after the weld, too. Letting a freshly welded joint air-cool quickly can lead to cracking, especially in thicker sections or more stressed areas. Think of it like baking a perfect soufflé – you don’t yank it out of the oven and throw it in the freezer. You let it cool down gradually.

For critical applications, you might even consider post-weld heat treatment (PWHT), which involves carefully heating the entire part in an oven and slowly cooling it. This relieves internal stresses and optimizes the metal’s properties. For most hobbyist or less critical applications, simply insulating the weld with a welding blanket or even burying it in dry sand can slow down the cooling process significantly, keeping our diva metal happy and crack-free.
Practice Makes Perfect (and Strong Welds)
Welding Chrome Moly isn’t something you master overnight. It takes practice, patience, and a willingness to learn from your less-than-perfect early attempts. Grab some scrap pieces, dial in your settings, and get comfortable with the feel of the arc and the flow of the puddle. Each weld is a lesson, and every perfectly laid bead is a victory.
So, there you have it! Welding Chrome Moly Steel is a skill that elevates your fabrication game to a whole new level. It's a bit more demanding than ordinary steel, sure, but the results are absolutely worth the effort. With a little pre-heat, pristine cleanliness, careful TIG technique, and a gentle cool-down, you'll be crafting aerospace-grade connections in no time. Go forth, future metal maestro, and weld something truly spectacular!
