How To Weather Seal A Window
:max_bytes(150000):strip_icc()/applying-self-stick-foam-weatherstripping-E3d5nlLU46bAcxyZ64bvr7-74caaad5b8244344ab7a286476db27cb.jpg)
Hey there, cozy seeker! Ever feel a mysterious chill slithering into your perfectly heated home, making your heating bill weep? Those sneaky drafts from your windows are often the culprits! But fear not, my friend, because weather sealing a window is one of those surprisingly easy DIY tasks that makes a huge difference. And guess what? We're going to tackle it together, no fancy tools or intimidating contractor speak required!
Why Bother, You Ask?
Well, besides banishing those villainous drafts, weather sealing is like giving your wallet a warm hug. It means your furnace (or AC!) doesn't have to work overtime, which translates to lower energy bills. Plus, your home will feel so much more comfortable – no more cold spots or sudden gusts of air that make you wonder if you accidentally left a window open... when you definitely didn't!
Gather Your Gear (The Fun Part!)
Think of this as assembling your superhero kit. You don't need much, just a few trusty sidekicks:
Must Read
- Caulk gun & Caulk: This is for those fixed gaps, like where the window frame meets the wall. Get exterior-grade, paintable caulk if it's visible.
- Weatherstripping: This is your hero for moving parts of the window, like where the sashes meet. There are various types: foam, V-strip, rubber. We'll keep it simple!
- Utility Knife or Scissors: For trimming.
- Cleaning Supplies: A rag, some all-purpose cleaner. Think of it as giving your window a spa day before its big makeover!
- Putty Knife or Scraper: To remove old caulk, if necessary.
- Optional but Recommended: Safety glasses (for scraping), work gloves (to keep your hands clean).
Prep Work is Dream Work!
Before we get sealing, we need a clean slate. Grab your cleaning supplies and wipe down the window frames and sills thoroughly. Get rid of any dirt, grime, or cobwebs (eek!). If you have old, cracking caulk, it's a good idea to carefully scrape it out with your putty knife. Fresh caulk sticks best to a clean, dry surface, so let everything dry completely.
Let's Get Sealing! Method 1: Caulking Those Fixed Gaps
This is for those areas that don't move. Think about the perimeter of your window frame where it meets the house siding or interior wall. It's often a prime spot for drafts!

How To Caulk Like a Pro (Almost!):
- Load the gun: Pop your caulk tube into the caulk gun. Snip the tip of the caulk tube at a 45-degree angle. Start small – you can always cut a bigger opening!
- Start squirting (gently!): Place the tip of the caulk tube at the start of your gap. Maintain a 45-degree angle and apply steady, even pressure to the caulk gun trigger as you pull the gun along the gap. Think of it like drawing a continuous line.
- Smooth it out: Immediately after applying a section, run your finger (or a wet sponge, or a caulk tool if you're feeling fancy!) along the bead to smooth it out. This makes it look neat and ensures a good seal.
- Repeat: Continue around all fixed gaps. Let it cure according to the manufacturer's instructions (usually a few hours to a day).
Pro Tip: Don't be afraid to practice on a piece of cardboard first. You'll get the hang of it quicker than you think!
Method 2: Weatherstripping for Moving Parts
This is for where your window sashes actually meet and move, like the bottom of the upper sash or the sides where they slide past each other. This is where a lot of air likes to sneak in!

Applying Weatherstripping (It's Easier Than It Sounds!):
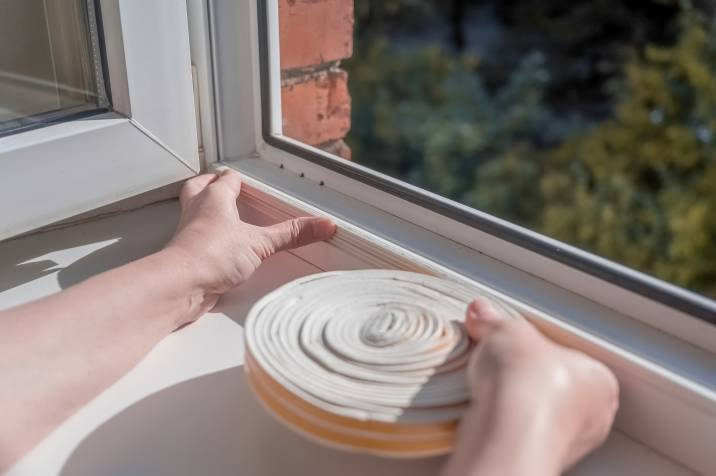
- Choose your strip: For DIY, self-adhesive foam or V-strips are super simple. They come on a roll and have a sticky back.
- Measure & Cut: Measure the length of the area you want to seal. Cut your weatherstripping to size with scissors or a utility knife.
- Peel & Stick: Carefully peel back a small section of the adhesive backing. Press the weatherstripping firmly into place, working your way down the length of the window frame or sash. Make sure it's snug but doesn't prevent the window from opening and closing smoothly.
- Test it: Open and close your window a few times to make sure it's not sticking too much. You want a good seal, not a window stuck shut!
Hot Tip: Focus on the meeting rail (where the upper and lower sashes meet) and the side channels where the sash slides. These are often the biggest culprits for drafts!
Voila! You Did It!
Congratulations, you magnificent draft-buster! You’ve just given your home an upgrade that’ll keep you warmer in winter, cooler in summer, and save you some hard-earned cash. Take a moment to pat yourself on the back – you've tackled a practical project, learned something new, and made your living space that much cozier. Now, go forth and enjoy your draft-free domain, perhaps with a warm beverage and a smug smile. You earned it!