How To Turn Off Water For Winter
Alright, gather 'round, my friends, and let's talk about the unsung hero of winter preparation: turning off your water. Yes, I know, it sounds about as exciting as watching paint dry, but trust me, it's a skill that will save you from a winter nightmare of epic proportions. Imagine waking up to a burst pipe, your living room transformed into a tropical swimming pool, and your bank account taking a nosedive faster than a polar bear on a waterslide. Not fun, right?
So, grab your imaginary coffee (or a real one, if you're feeling adventurous) because we're about to dive into the surprisingly entertaining world of winterizing your water system. Think of me as your slightly chaotic, overly enthusiastic guide through the labyrinth of pipes and valves.
Why Bother? The Great Freeze-Out Avoidance Plan
You might be thinking, "Can't I just leave a faucet dripping?" And to that, I say, bless your optimistic heart. While a tiny drip might delay the inevitable, it's like putting a band-aid on a gaping wound. Water, as you might remember from a long-forgotten science class, expands when it freezes. And pipes? They don't appreciate that kind of growth. They burst.
Must Read
A burst pipe isn't just a leak; it's an indoor geyser, a watery apocalypse. We're talking thousands of dollars in damage, endless headaches, and the distinct possibility of having to explain to your insurance company why your prized collection of garden gnomes is now floating in the dining room. So, consider this your ultimate defense against the frozen pipe monster. It’s about peace of mind and keeping your wallet from weeping tears of despair.
Step 1: The Quest for the Main Shut-Off Valve
Ah, the main shut-off valve. This mystical artifact is the master key to your water kingdom. Finding it can sometimes feel like an Indiana Jones adventure, minus the giant rolling boulder (usually). It's typically located where your main water line enters your house – think basement, crawl space, or utility closet. It often hangs out near your water meter, looking inconspicuous but holding immense power.
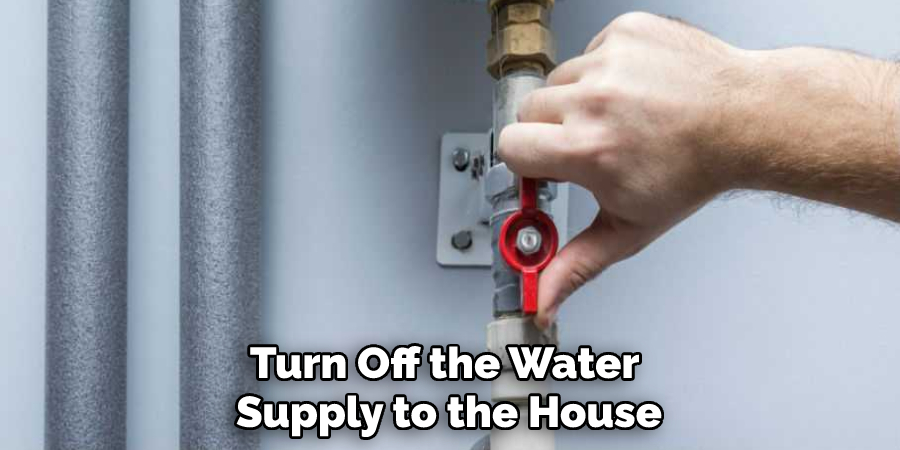
It could be a red handle, a lever, or a wheel. Whatever its form, your mission, should you choose to accept it, is to turn it off. Clockwise usually does the trick. You should hear the glorious sound of silence as the water flow grinds to a halt. If you can't find it, don't panic! Consult your home's blueprints, ask a seasoned neighbor, or call a plumber. This isn't a game of hide-and-seek you want to lose.
Step 2: Don't Forget Your Water Heater's Feelings
Once the main water supply is off, your next stop is the water heater. Why? Because we don't want it trying to heat an empty tank, which is a surefire way to damage it or, even worse, cause an electrical fire (if it's electric). If you have a gas water heater, turn the gas valve to the "pilot" or "off" position. For electric, flip the circuit breaker. Always prioritize safety here! No hot water next year is a small price to pay for not burning down the house today.

Step 3: The Grand Drain-Out: Unleash the Gurgles!
This is where the magic truly happens. You've cut off the supply, now you need to get all that lurking water out of your pipes. Start by opening the faucet at the lowest point in your house. This is often a utility sink in the basement or a spigot in a crawl space. Gravity is your best friend here, so let it do its thing. You'll hear gurgling, sputtering, and possibly what sounds like a small sea creature trying to escape. That's the sound of success!
Next, open every single faucet in your house, both hot and cold, upstairs and downstairs. Don't forget the outdoor spigots! Disconnect all hoses from outside faucets – leaving them attached is an open invitation for a burst pipe. Let everything drain until the gurgling subsides and only air whispers from the taps. You're effectively creating an empty highway for air, not ice.
Step 4: Toilets, Appliances, and the Art of Disconnection
Pipes aren't the only culprits. Toilets hold water, and so do appliances. For each toilet, flush it until the tank is empty. Then, take a sponge and soak up any remaining water in the bowl. You don't want a frozen porcelain ice sculpture!
For your washing machine, dishwasher, and refrigerator with an ice maker, you'll need to disconnect their water supply lines. This might involve a wrench and a towel (for any residual drips). It’s a bit fiddly, but imagine the satisfaction of knowing every nook and cranny is safe. Plus, you might find some forgotten treasures behind the fridge while you're at it – a single sock, a pet's toy, the remote control you thought you lost forever!
Step 5: The Antifreeze Finale: A Splash of Protection
Now, for the pièce de résistance: antifreeze. No, not the stuff you put in your car! We're talking about non-toxic RV or marine antifreeze. This is crucial for P-traps (the U-shaped pipes under sinks) and toilet bowls. Why? Because if these trap water and freeze, you're not just risking a burst pipe; you're also risking sewer gases wafting into your pristine winter haven. A charming smell, I assure you.

Pour about a cup into each toilet bowl, and down every drain (sinks, tubs, showers). This creates a barrier that won't freeze, preventing both damage and unpleasant odors. It's like giving your plumbing a cozy, non-freezing blanket for the winter. Plus, it's a satisfying final step that makes you feel like a true winter warrior.
Pro Tips and the Ultimate Victory Lap
For the truly dedicated, a small air compressor can be used to blow out any remaining water from the lines. It's a "pro mode" move that ensures maximum dryness. Also, make sure all your outdoor spigots are open after draining, to prevent any trapped water from causing damage. And always, always double-check everything. You'd be surprised what you might miss!
Once you're done, take a deep breath. You've done it! You've successfully navigated the treacherous waters of winterizing. You've conquered the potential for frozen pipes, saved yourself a fortune, and probably burned a few calories in the process. Now, go forth and enjoy your winter, knowing your pipes are safe, sound, and ready to welcome spring without a single watery drama. You've earned that extra cup of cocoa, my friend. Bravo!