How To Replace The Weather Stripping On A Door

Hey there, DIY adventurers! Ever notice a little whisper of wind snaking under your door? Or maybe a shockingly high energy bill that makes you gulp your coffee a little too loudly? It might be time for a weather stripping intervention. Don't worry, it's easier than you think! Think of it like giving your door a cozy new sweater.
So, what is weather stripping anyway? Simply put, it's that magical material that seals the gaps around your doors and windows, keeping the outside elements where they belong – outside! It's the unsung hero of home efficiency. Imagine it as your door's personal bouncer, politely but firmly denying entry to drafts, bugs, and even excess noise. Pretty cool, right?
Why bother with replacing it? Well, think of your home's energy efficiency as a leaky bucket. All that money you're spending on heating and cooling? If your weather stripping is old and worn, it's like pouring water into a bucket with holes. You're just throwing money away! Replacing it is a relatively inexpensive way to plug those leaks and keep your hard-earned cash where it belongs – in your wallet. Plus, a properly sealed door keeps out unwanted guests like creepy crawlies and, let's be honest, that annoying neighbor who always seems to drop by unannounced.
Must Read
What You'll Need: Your Weather Stripping Arsenal
Alright, let's gear up! Don't worry, you won't need a superhero suit. Here's the basic toolkit:
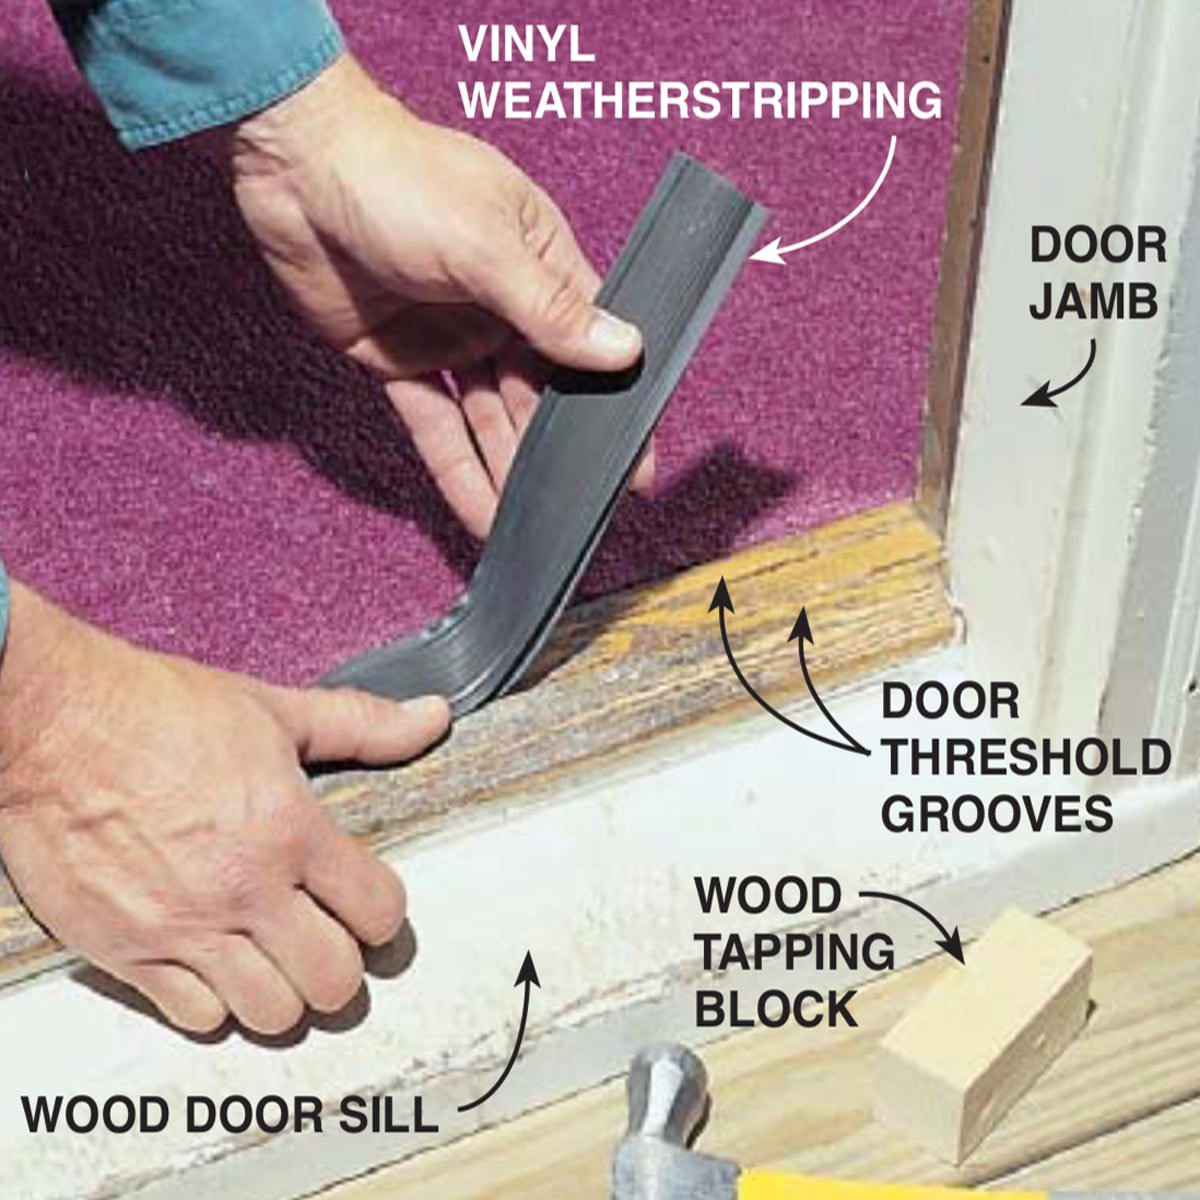
- New Weather Stripping: This is the star of the show! There are different types (foam, felt, vinyl, etc.), so choose one that suits your door and budget. Think of it like picking the right shoes for the occasion – you wouldn't wear flip-flops to climb a mountain, would you?
- Measuring Tape: Crucial for getting the right length of weather stripping. Accuracy is key!
- Utility Knife or Scissors: For cutting the weather stripping to size. Be careful and always cut away from yourself!
- Pry Bar or Flathead Screwdriver: To remove the old weather stripping. Gentle now, we don't want to damage the door frame.
- Hammer and Nails or Screws: Depending on the type of weather stripping you choose. Some even have adhesive backing!
- Cleaning Supplies: A clean surface ensures a good seal. Wipe down the door frame with soap and water.
Let's Get Stripping! (The Old Stuff, That Is)
Okay, time to get rid of that old, sad-looking weather stripping. This is often the most satisfying part, like peeling off a really stubborn sticker. Using your pry bar or screwdriver, gently lift and remove the old weather stripping. Be careful not to gouge the door frame. If it's really stuck, try using a heat gun (on a low setting!) to soften the adhesive. Once it’s off, give the area a good cleaning. A clean surface is crucial for the new weather stripping to adhere properly. Think of it like prepping a canvas before you paint – a smooth, clean surface is essential!
Measure Twice, Cut Once: The Golden Rule
Now comes the important part: measuring and cutting the new weather stripping. Measure the length and width of the door frame carefully. Remember the old carpenter's saying: "Measure twice, cut once!" This is especially true here. You want a snug fit, but not so tight that it's difficult to close the door. Once you've got your measurements, use your utility knife or scissors to cut the weather stripping to the correct size. Aim for a clean, straight cut.
Installation Time: The Grand Finale
Alright, the moment of truth! Now it's time to install the new weather stripping. This will depend on the type of weather stripping you've chosen.

- Adhesive-Backed: Simply peel off the backing and stick the weather stripping in place. Make sure it's aligned properly and press firmly to ensure a good seal.
- Nail-On or Screw-On: Position the weather stripping and use a hammer and nails or a screwdriver and screws to attach it to the door frame. Be careful not to damage the door frame.
Start at the top of the door frame and work your way down the sides. For the bottom of the door, you might need to install a door sweep, which is a special type of weather stripping that seals the gap between the door and the floor. Think of it as the door's stylish little skirt.
The Test: Feeling the Draft?
Once you've installed the new weather stripping, close the door and check for any gaps or drafts. Run your hand along the edges of the door to feel for any air leaks. If you find any, you might need to adjust the weather stripping or add a little extra sealant. It's like tuning a musical instrument – you might need to make a few adjustments to get it just right.
And there you have it! You've successfully replaced the weather stripping on your door. Give yourself a pat on the back! You've not only saved yourself some money on your energy bill, but you've also made your home more comfortable and secure. You're basically a DIY superhero! Now go enjoy the cozy, draft-free comfort of your home. You deserve it!

