How To Replace Battery In Nest Thermostat
Alright, superstar! Get ready to feel like a DIY champion because we're about to tackle a task so simple, so wonderfully straightforward, you'll wonder why you didn't do it sooner. We're talking about giving your beloved Nest Thermostat a little jolt of new life, a fresh burst of energy, a veritable springtime awakening!
Think of it as a quick pit stop for your home's climate control maestro. No heavy lifting, no complicated wiring, just pure, unadulterated empowerment. You're about to become your household's unsung hero, the wizard of warmth, the guru of coolness!
Gather Your Mighty Supplies!
Every great adventure begins with preparation, even if this particular adventure involves less dragon-slaying and more tiny screw-turning. First things first, let's gather your brave little companions for this miniature quest.
Must Read
You'll need a small Phillips head screwdriver. This isn't just any screwdriver; it's your key to unlocking comfort and bringing your Nest Thermostat back to its full, glorious potential! If you're feeling fancy, a jeweler's screwdriver set usually has the perfect size. Don't worry, it's not a puzzle; it's practically a friendly handshake with your thermostat.
Next up, the true stars of the show: a couple of fresh, energetic AAA batteries. Yes, those trusty little powerhouses! Make sure they're brand new, still in their packaging, brimming with zest and ready to leap into action. They're like little energy snacks for your Nest, ready to fuel its intelligent operations!
Pro-Tip: Always have some fresh AAA batteries on hand. They're the unsung heroes of countless gadgets, and your Nest will thank you with steady, reliable service!
The Gentle Detachment: Freeing Your Nest
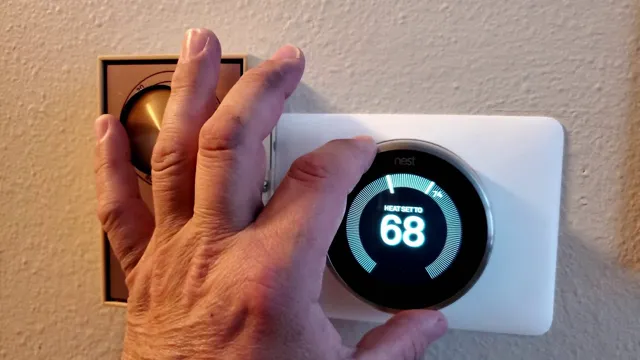
Okay, brave adventurer, your tools are assembled, your spirit is high! Now, let's approach your Nest Thermostat. It's usually mounted on the wall, looking sleek and sophisticated, perhaps a little sleepy if its batteries are low.

Here's where the magic begins: you're going to gently pull the display unit directly off its base. Don't twist it, don't yank it, just a steady, confident tug straight towards you. Imagine you're plucking a ripe apple, or perhaps removing a fancy lid from a very important jar.
You might hear a satisfying little click as it pops free. That's the sound of success, the sound of progress! You've just performed the first delicate dance step in this battery ballet. The base will remain on the wall, and you'll be holding just the round, shiny display unit in your hands.
Remember: This part is surprisingly easy! The Nest is designed for you to do this. You're not breaking it; you're just giving it a little freedom for a moment!
The Secret Compartment: Unearthing the Energy Source
Now that you're holding the display unit, flip it over. Look at the back. You'll probably see a small, usually black, cover held in place by a tiny screw. This, my friend, is the secret hideaway of the tired batteries, the cozy bed where the old power sources are slumbering.
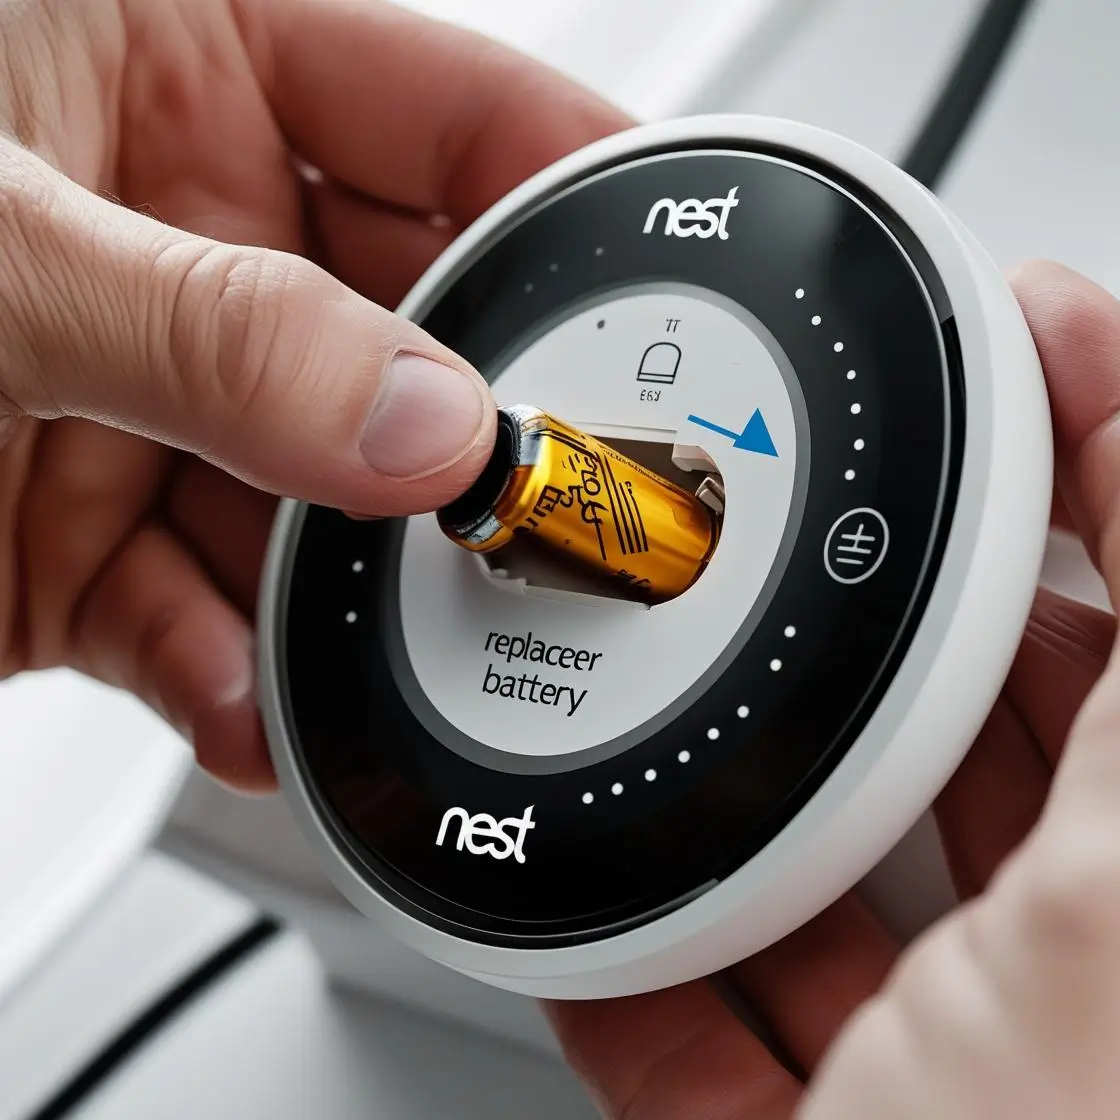
Grab your trusty Phillips head screwdriver. With surgical precision (okay, maybe just a normal, gentle turn!), unscrew that little screw. It won't come all the way out; it's usually captive, meaning it stays attached to the cover, so no worries about losing it under the sofa!
Once the screw is loose, you can gently pry off the cover. It might have a small lip or notch to help you get a fingernail or the edge of your screwdriver under it. And there they are! Peeking out at you, a pair of slightly worn-out AAA batteries, ready for retirement.
The Mighty Swap: Old Out, New In!
This is it, the grand finale of the old, the triumphant entrance of the new! Carefully pop out the old AAA batteries. Give them a silent thank you for their service; they've worked hard keeping your home comfortable.
Now, take your fresh, sprightly AAA batteries. Pay close attention to the little symbols inside the battery compartment: the plus (+) and minus (-) signs. It's like a tiny map, guiding you to place them correctly. Positive to positive, negative to negative!
Slide them in with confidence. Feel that satisfying click as they settle into their new home. You've just injected pure, unadulterated power back into your Nest Thermostat! It's like giving your best friend a super energy drink after a long day.
Critical Step: Double-check those polarity signs! Getting them right ensures your Nest wakes up without a hitch. You've got this!
The Triumphant Return: Reattaching with a Flourish
With the fresh batteries nestled securely, it's time to close up the secret compartment. Place the cover back over the batteries, ensuring it snaps or sits flush. Then, re-tighten that little captive screw with your Phillips head screwdriver. Not too tight, just snug and secure.
Now, hold your revitalized Nest Thermostat display unit. Look at the base still on the wall. You'll notice pins or connectors on the back of the display and corresponding holes on the base. It's like a perfect puzzle piece, waiting to be reunited!
Carefully align the display unit with the base on the wall. Push it gently but firmly until you feel and hear a definite click. That's the sound of connection, the sound of your Nest coming back online, fully powered and ready to resume its duties!

It might take a moment or two for it to boot up, like a tiny computer starting its day. You might see the Nest logo appear, or it might just spring to life, displaying the temperature and its familiar interface.
Bask in the Glory: Your Nest is Alive!
Congratulations, you magnificent DIY wizard! You've done it! You've successfully replaced the batteries in your Nest Thermostat. Take a moment to truly appreciate your handiwork.
Your Nest is now humming with new energy, ready to learn, adapt, and keep your home at the perfect temperature. You've averted a potential climate crisis (in your home, at least!) with nothing more than a tiny screwdriver and a couple of batteries.
You are officially a household hero, a tech-savvy powerhouse, a beacon of self-reliance! Go forth and enjoy the comfort you've so expertly restored. And remember, that satisfying feeling of accomplishment? That's what DIY is all about!
You tackled it, you conquered it, and now you can relax in perfectly regulated comfort, all thanks to your amazing skills. Way to go!