How To Replace Battery In Adt Motion Sensor
Ever heard that insistent, high-pitched chirp coming from somewhere in your house, but you just can't pinpoint it? It’s like a tiny, electronic bird trying to tell you something important, usually at 3 AM. If you have an ADT security system, chances are that mystery sound is a motion sensor kindly (or not so kindly) letting you know its battery is running on fumes. And guess what? You're about to become a superstar and fix it yourself!
Forget the dread, the calls to customer service, the waiting for a technician. This isn't just about a battery; it's about empowerment. It's about feeling like a modern-day MacGyver, tackling a small but mighty challenge, and proving that you're perfectly capable of keeping your home humming along smoothly. Plus, isn't it satisfying to save a little cash and gain a new skill? We think so!
Why Bother? The Fun Factor!
You might be thinking, "It's just a battery, how is that fun?" Ah, my friend, that's where you're wrong! Imagine the look on your family's faces when you confidently stride over to the chirping culprit, a small screwdriver in hand, and silence the digital siren. That’s pure, unadulterated satisfaction right there.
Must Read
It's about taking control, demystifying the tech in your home, and realizing that these devices aren't some impenetrable black boxes. They're just machines, and you, yes you, can understand and maintain them. Think of it as your first step into a world of DIY victories. Today, a battery; tomorrow, who knows what home improvement adventure awaits?
Your Mission, Should You Choose to Accept It...
Ready to embark on this epic quest? Good! Here's what you'll need, gathered like a true explorer preparing for an expedition:

- A small Phillips head screwdriver or a flathead (depending on your sensor model). Think of it as your trusty sword!
- A new battery. This is crucial! Most ADT motion sensors use a CR123A lithium battery, but always, always check the existing battery when you open the sensor to be 100% sure. Having the right replacement is half the battle.
- A stable chair or small ladder, if the sensor is mounted high. Safety first, aspiring tech guru!
- About 5-10 minutes of your precious time. That's it!
The Step-by-Step Journey to Silence
Let's get down to business. Follow these simple steps, and you'll be basking in the glorious silence of a fully powered sensor in no time.
Step 1: Locate Your Target
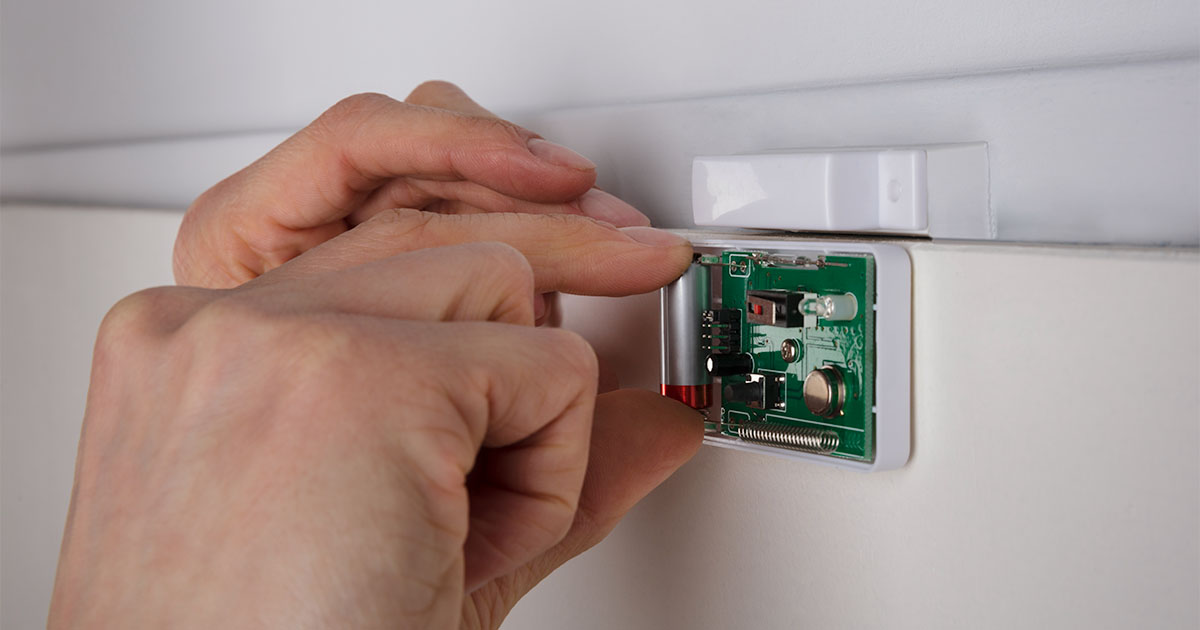
First things first, find the motion sensor that’s causing all the fuss. ADT sensors are usually small, white, and mounted on a wall or in a corner. They often have a small lens on the front. Once you’ve identified it, take a moment to look for any visible screws or tabs – these are your entry points.
Step 2: The Secret Handshake (Opening the Sensor)
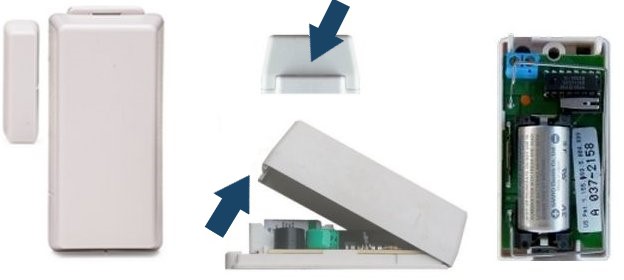
This is where your screwdriver comes in handy. Look at the bottom or sides of the sensor. Many ADT sensors have a small screw at the bottom that you'll need to loosen (you don't usually need to remove it completely). Others might have a small tab you can gently push in with the screwdriver or your finger, allowing the front cover to pop off. Be gentle! We want to fix it, not break it.

The cover often hinges open or slides upwards and then off. Once open, you’ll see the internal workings – don't be intimidated, your focus is on the battery!
Step 3: Identify and Remove the Old Power Source
Inside, you'll see the battery nestled in its compartment. It will likely be a CR123A, which looks like a stout AA battery. Note its orientation – specifically, which end is positive (+) and which is negative (-). This is super important for when you put the new one in!
Gently pry out the old battery. Sometimes they’re a snug fit, so a little nudge with your fingertip or the flat end of your screwdriver might be needed. Dispose of the old battery responsibly, please!

Step 4: Insert the New Heart
Now, grab your sparkling new CR123A battery. Remember the orientation you noted earlier? Place the new battery into the compartment, making sure the positive (+) and negative (-) terminals match the markings inside the sensor. It should click into place securely. A poorly seated battery is a sad battery, and your sensor won't work!
Step 5: The Satisfying Snap (Closing It Up)
With the new battery in place, it’s time to close the sensor. Realign the front cover, making sure any tabs fit back into their slots. Gently press or slide the cover until it snaps securely shut. If there was a screw, tighten it back up (but don't overtighten – it’s plastic!). Hear that click? That's the sound of victory!
Step 6: The Moment of Truth – Test It Out!
Once the sensor is back together, give your ADT system a minute or two to recognize the "new" sensor. Then, walk in front of the motion sensor. Does the little red light flash? Does your ADT panel stop showing a low battery warning? If yes, congratulations! You’ve done it! If not, don't despair – double-check the battery orientation and ensure the cover is fully closed. Sometimes, it just needs a good re-seat.
Beyond the Battery: A New Perspective
You’ve not just changed a battery; you’ve unlocked a new level of DIY confidence. This small act of maintenance is a powerful reminder that you don't need to be a certified technician to handle basic household tasks. It’s about being proactive, understanding the gadgets that protect your home, and gaining that wonderful feeling of self-reliance.
Think about what else you could learn! Replacing a filter in your furnace? Fixing a leaky faucet? These small triumphs build up, making you feel more connected to your home and more capable in your everyday life. This isn’t just about making your house a home; it's about making yourself feel more at home within your own skills.
So, the next time something chirps or blinks, instead of groaning, approach it with curiosity and the knowledge that you have the power to figure it out. The world of DIY is waiting, and you've just taken your first inspiring step. What will you learn next?