How To Remove Honeywell Home Thermostat From Wall
Ever found yourself staring at your thermostat, wondering how in the world it’s attached to the wall? Or maybe you’re thinking about a fresh coat of paint, an upgrade to a snazzier smart device, or just need to swap out some batteries. Well, you're in luck! Removing a Honeywell Home thermostat from your wall might sound like a daunting task, but it’s actually one of those surprisingly easy-peasy DIY projects that can give you a real sense of accomplishment. It’s useful, popular because so many homes have Honeywell, and honestly, understanding how a small but mighty part of your home works can be pretty satisfying!
So, why would you want to know how to do this? The benefits are pretty clear, no matter who you are. For beginners to home improvement, it's a fantastic entry point. You don't need fancy tools or specialized knowledge, and it saves you the cost of calling an HVAC technician for something as simple as changing batteries or painting. For busy families, knowing this trick means you can quickly diagnose and fix minor issues, like a dead thermostat battery that's suddenly left you without heat or AC. It keeps your home comfortable without any unnecessary fuss or waiting. And for the budding hobbyists or seasoned DIYers, it’s another feather in your cap, deepening your understanding of your home's systems and setting you up for future smart home upgrades with confidence.
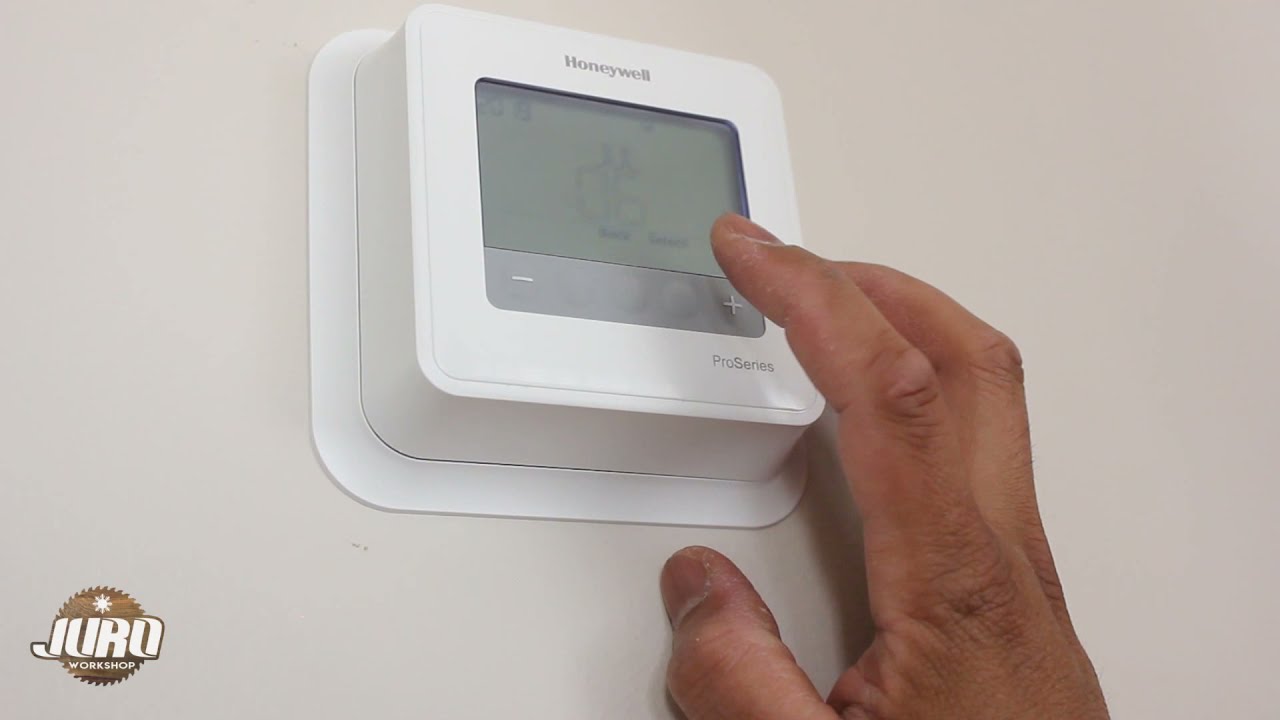
There are quite a few reasons you might need to detach your thermostat. The most common is often to replace dead batteries – many older Honeywell models need them. Beyond that, perhaps you're planning to repaint the wall behind it for a cleaner look. Maybe you’re ready to upgrade to a shiny new smart thermostat that offers more features and energy savings. Or, in some rare cases, you might be troubleshooting a minor wiring issue (though for anything complex, a pro is always best!). While many Honeywell models are quite similar in how they attach, some might have visible screws, while others use hidden clips or tabs. The good news is, the fundamental approach remains the same: gentle, methodical, and safety-first!
Must Read
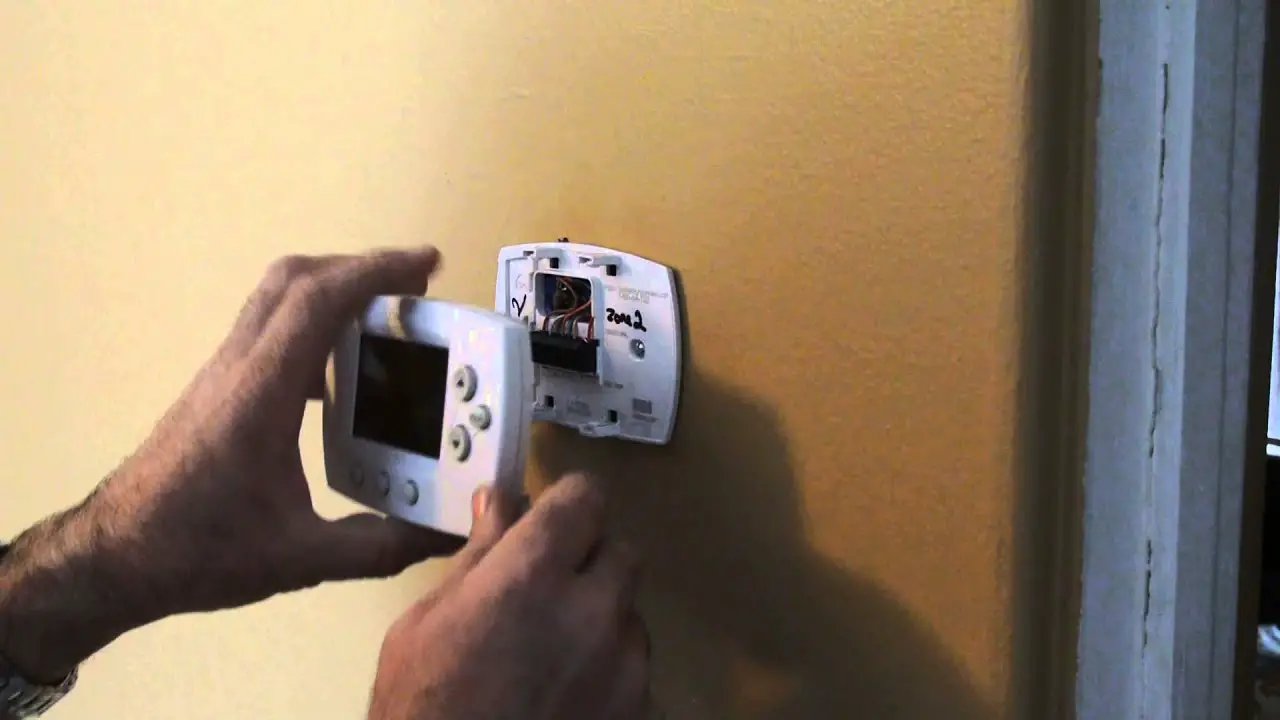
Ready to give it a try? Here are some simple, practical tips to get you started. First and foremost, safety is key! Before you touch anything, always go to your home’s main electrical panel and turn off the power to your HVAC system. Look for the breaker labeled "furnace," "AC," or "HVAC." This step is non-negotiable to prevent any shocks or damage. Next, grab a small Phillips head screwdriver – that’s usually all you’ll need. Take a good look at your thermostat. Often, there will be a small screw or two at the bottom or sides that you'll need to loosen or remove. For models without visible screws, look for tiny release tabs or a slot where you can gently pry the front cover off. Once you’ve unfastened it, the thermostat usually pulls straight forward off its base plate. Before you disconnect any wires (if you even need to), take a photo of the wiring with your phone! This provides a perfect reference for reconnecting them correctly later. If you do disconnect wires, consider labeling them with masking tape.
See? It’s not so scary after all! Removing your Honeywell Home thermostat from the wall is a straightforward task that empowers you to tackle simple home maintenance yourself. It’s a great way to save a bit of money, learn more about your home, and build confidence in your DIY abilities. Enjoy the satisfaction of understanding and managing your living space just a little bit better!