How To Make A Faraday Cage Box
Ever thought about building something that feels a little bit like a secret agent gadget? Something that looks totally ordinary but holds a truly surprising secret? Get ready to unleash your inner inventor with a project that's pure fun!
We're diving into the wonderfully weird world of making a special kind of box. It’s not just any box; it’s a craft project with a delightful twist. You’ll be amazed at what simple materials can do!
The Grand Idea Takes Shape
Gathering Your Super Supplies
First things first, let's gather our creative arsenal. You'll need a sturdy cardboard box, perhaps one that once held your favorite snacks or a cool new toy. The size doesn't matter too much, just pick one you like.
Must Read
Next up, the star of the show: aluminum foil! Yes, the shiny stuff from your kitchen. Grab a fresh roll; we're going to need a good amount of it for this spectacular creation.
You'll also want some regular old masking tape or packing tape. This will be our trusty sidekick, holding everything together like a champ. A pair of scissors or a craft knife will be handy for precise cuts.
Don't forget a ruler or measuring tape. It helps keep things neat and tidy, especially when you're aiming for that professional DIY look. And a marker? Perfect for jotting down notes or guiding your cuts.
Finally, you might want a paperclip or a piece of wire. We'll get to that later, but it's a small detail that adds a big touch of cool to our special box. Just keep it handy!
The Cardboard Canvas
Now, let's talk about that cardboard box. This is the foundation of our magnificent project. It's where all the magic will begin.
Make sure your box is clean and dry. Flatten any flaps that might be sticking out, or tape them down neatly. We want a smooth canvas for our upcoming sparkling transformation.
If your box has a detachable lid, that’s perfect! If not, don't worry. We can make one work. Just focus on having a nice, solid structure to start with.
Imagine it as a blank slate, ready for its incredible journey. This humble box is about to become something truly unique. It’s an adventure in craft, right in your own home.

Give it a gentle pat; it's doing great work already! This initial step is all about getting comfortable with your main component. It's the silent hero of our build.
Sparkle and Shine Time!
Foiling the Edges
Here comes the really fun part: the aluminum foil! Unroll a long section of that shiny goodness. Feel how crinkly and flexible it is.
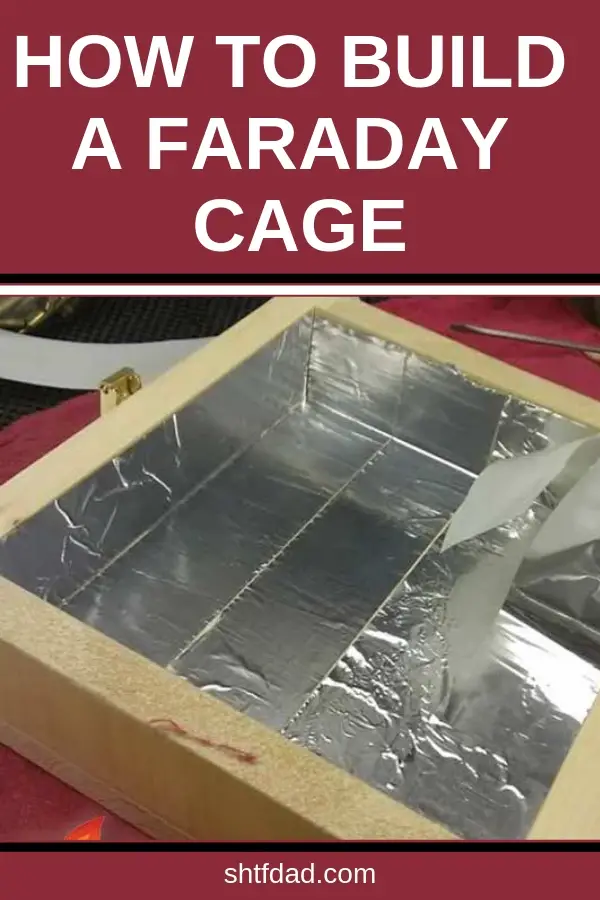
Start by covering the inside of your box with foil. Think of it like wallpapering, but with super cool, reflective material. Smooth it out as best you can, avoiding too many wrinkles.
Overlap the pieces slightly if you need to. The goal is to cover every inch of the interior surface. It’s like giving your box a dazzling silver lining.
Press the foil firmly against the cardboard walls. You want it to stick as close as possible. This step really starts to make the box feel special and mysterious.
Don't forget the bottom of the box! Make sure that's fully covered too. We're aiming for a complete, sparkling inner chamber. It's a satisfying process, watching it all come together.
Taping It All Together
Now, let's secure all that shiny foil with our trusty tape. Take strips of masking or packing tape and carefully apply them over the seams of your foil. This keeps everything neat.
You want to make sure the foil stays in place, without any edges lifting. Tape is our best friend here, providing that much-needed grip and stability. It's like stitching your project together.
Don't be shy with the tape! A little extra reinforcement never hurts, especially when you’re building something so intriguing. Every strip you lay down adds to its strength.

Look at how the tape makes the foil look even more purposeful! It's starting to look like a truly custom-made item. This is where your craftsmanship really shines through.
Take a step back and admire your progress. You're building something that feels surprisingly robust. It's a fantastic feeling to see your design take shape.
The Inner Sanctum
A Second Layer of Awesome
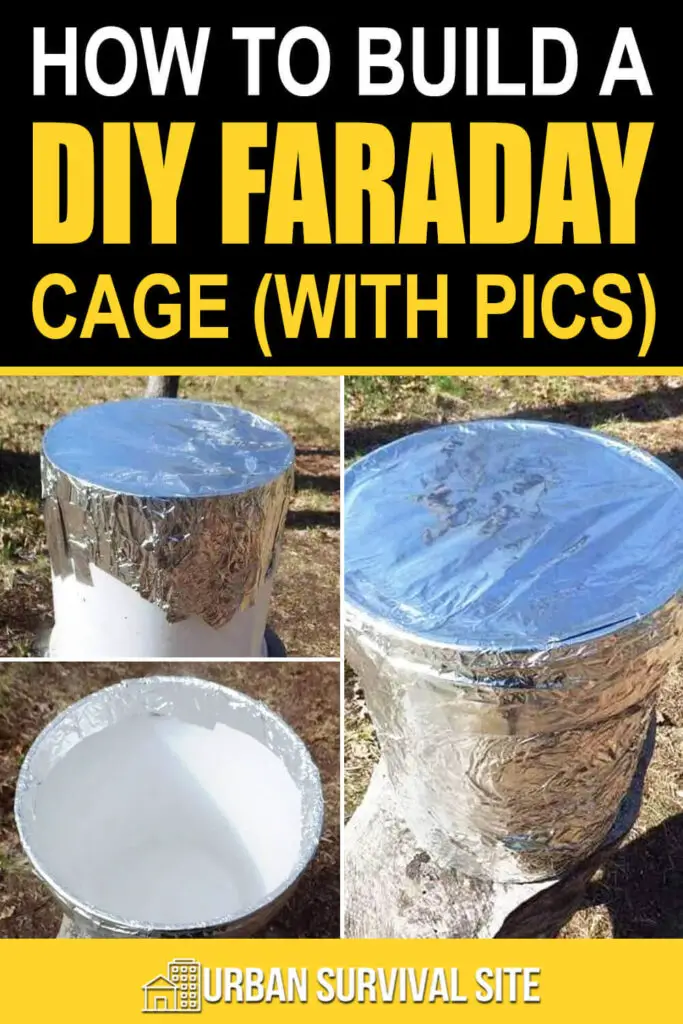
Alright, time for a little extra oomph! We're going to add another layer of aluminum foil to the outside of the box. Yes, both inside and out!
This step really makes our box feel substantial. It’s like giving it a shiny, protective shell. Again, smooth out the foil carefully as you go.
Cover all the exterior walls and the bottom. Think of it as wrapping a very important, very shiny present. The more complete the coverage, the better.
Use tape to secure these outer foil layers too. Overlap the pieces slightly and press them down firmly. This layered approach adds to the box's unique character.
This double layer makes the box feel incredibly purposeful, almost like it’s ready for a super-secret mission. You’ll be surprised by its new solid feel.
Crafting the Lid
Now, let's turn our attention to the lid. This is a crucial part of our extraordinary creation. It needs the same special treatment as the box itself.
Cover both the inside and outside of the lid with aluminum foil. Make sure to wrap it around the edges, just like you did with the main box.
Smooth out any wrinkles and secure the foil with tape. The lid should be a perfect, shiny match for the box. It’s all about consistency and attention to detail.
When you place the lid on the box, it should fit snugly. This tight fit is key to the box's special capabilities. It adds to the overall mystique of your project.
Imagine you're making a treasure chest, but one that guards a different kind of treasure. The lid is its strong, protective seal. It feels exciting, doesn't it?
The Finishing Touches
Making Connections
This next part adds a truly fascinating element. Remember that paperclip or wire? It's time to bring it into play.
Carefully make a small hole in the side of your box, somewhere discreet. Push one end of your paperclip or wire through this hole.
Make sure the wire touches the outer layer of foil. Then, bend it so it stays in place. This little wire is a curious addition that makes your box even more special.
On the inside, make sure the wire also touches the inner foil layer. It’s about creating a subtle connection, a tiny bridge in your design.
This small metallic touch adds a certain je ne sais quoi to your project. It’s a subtle nod to its mysterious abilities. It truly completes the look.
Admiring Your Creation
Take a moment to step back and gaze upon your finished masterpiece! You've transformed a simple cardboard box into something genuinely remarkable.

It looks unassuming on the outside, a bit shiny, perhaps. But you know the secret layers and connections hidden within its walls. That's a fun feeling!
Give the lid a gentle lift and then carefully replace it. Feel the snug fit, the secure closure. It's a testament to your careful crafting.
This isn't just a box; it's a testament to creativity and simple engineering. It’s something you built with your own hands, and that's something to be proud of.
Imagine the stories it could tell, or the intriguing items it could hold. Its simple yet clever design makes it quite an impressive piece of DIY magic.
A Special Kind of Wonder
You’ve just crafted something truly unique. A humble box, elevated to something surprisingly effective and utterly cool. It's a fantastic feeling of accomplishment.
The beauty of this project lies in its simplicity and the sheer wonder it inspires. It’s a testament to how clever designs can come from everyday materials.
Holding it in your hands, you can almost feel the intriguing power contained within its shiny walls. It's a conversation starter, a curious object.
This little creation is more than just cardboard and foil. It's a gateway to understanding a bit of everyday enchantment. It’s your very own handmade marvel.
So, go ahead and explore the possibilities! This little box is ready for its moment in the spotlight. Who knew building something so simple could be so much fun?