How To Install Vinyl Clad Replacement Weatherstrip

Hey there, friend! Feeling a little drafty? Is your energy bill making you weep silently into your coffee each month? Well, guess what? You're not alone, and more importantly, you CAN do something about it! We're about to dive into the surprisingly rewarding world of installing vinyl clad replacement weatherstrip. Trust me, it's easier than baking a soufflé (and way less likely to collapse in a fit of kitchen-related despair).
Why Bother With Weatherstrip? (Besides the Obvious!)
Okay, let's be honest. The main reason we're even talking about this is because you want to save money, right? Absolutely! New weatherstrip can dramatically reduce those sneaky drafts that bleed heat in the winter and AC in the summer. But wait, there's more!
Think about it: a properly sealed home is a quieter home. Less outside noise creeping in to ruin your Netflix binge. Plus, keeping out drafts means fewer allergens and pollutants floating around, which is a huge win for your health. Who knew weatherstrip could be so powerful? We're practically superheroes of home improvement here!
Must Read
What You'll Need: The Arsenal of Awesome
Don't worry, you don't need a degree in engineering to tackle this project. Here's a simple list of what you'll need to gather:
- Vinyl Clad Replacement Weatherstrip: Measure your windows and doors carefully! Accuracy is key! You can usually find this at any hardware store.
- Utility Knife or Scissors: For cutting the weatherstrip to the right length.
- Measuring Tape: Because eyeballing it is rarely the best approach (unless you're Picasso, maybe).
- Screwdriver or Drill (maybe): Some weatherstrip requires screws, others are self-adhesive. Check the packaging!
- Cleaning Supplies: A clean surface ensures the weatherstrip adheres properly. Think of it as prepping for a paint job.
- Safety Glasses: Because looking cool while protecting your eyes is always a good idea.
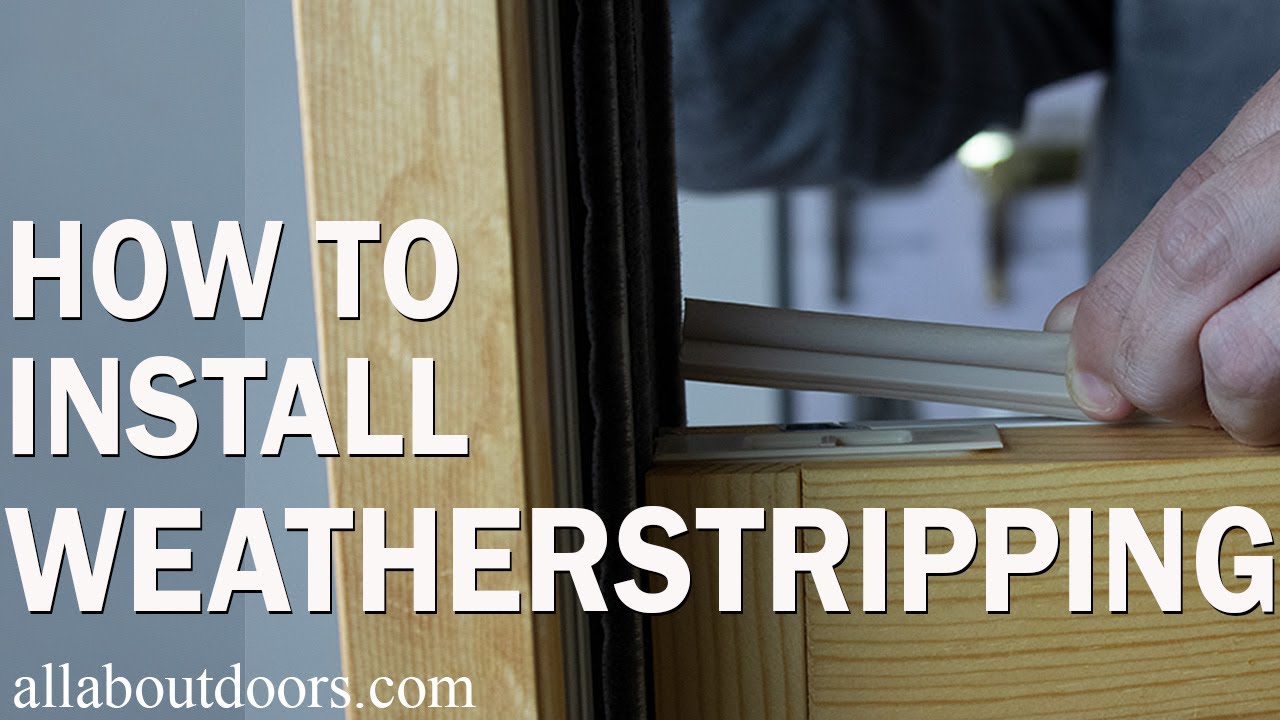
Let's Get This Show on the Road: The Installation Process
Alright, deep breath! This is where the magic happens. Follow these simple steps, and you'll be a weatherstripping pro in no time.
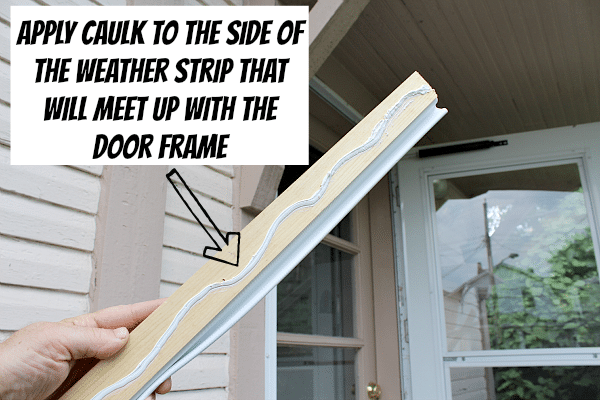
- Prep the Surface: Clean the area where you'll be applying the weatherstrip. Remove any old weatherstrip, dirt, or debris. A little elbow grease goes a long way!
- Measure and Cut: Carefully measure the length of the window or door frame. Then, cut the weatherstrip to the correct size using your utility knife or scissors. Remember the age-old advice: measure twice, cut once!
- Peel and Stick (or Screw): If your weatherstrip is self-adhesive, peel off the backing and carefully apply it to the frame. Press firmly to ensure a good seal. If it requires screws, align the weatherstrip and screw it into place. Don't overtighten! You don't want to strip the screws or damage the frame.
- Test the Seal: Close the window or door and feel for any drafts. If you find any gaps, you may need to adjust the weatherstrip or add an extra layer.
- Admire Your Handiwork: Step back and admire your handiwork! You've just made your home more comfortable, energy-efficient, and quiet. High five!
Troubleshooting Tips: When Things Get a Little Wonky
Sometimes, things don't go exactly as planned. Don't panic! Here are a few common issues and how to fix them:
- Weatherstrip Won't Stick: Make sure the surface is clean and dry. You can also try using a stronger adhesive.
- Gaps in the Seal: Double-check your measurements and make sure the weatherstrip is properly aligned. You may need to add an extra layer or use a thicker weatherstrip.
- Door or Window is Hard to Close: You may have used too much weatherstrip or installed it too tightly. Try removing a small amount of weatherstrip or adjusting the placement.
See? Nothing too scary! It's all about patience and a little bit of problem-solving. And if you really get stuck, there's always YouTube! (But we believe in you!).

The Final Flourish: Bask in the Glory of Energy Efficiency!
Congratulations! You've successfully installed vinyl clad replacement weatherstrip. Now, sit back, relax, and enjoy the cozy comfort of your draft-free home. And don't forget to check your energy bill next month – you might be surprised at how much you've saved!
But wait, the learning doesn't have to stop here! There's a whole world of home improvement waiting to be explored. Think of all the projects you could tackle, all the skills you could learn! From painting to plumbing to landscaping, the possibilities are endless. So go forth, my friend, and embrace the joy of DIY! You might just surprise yourself with what you can accomplish. And who knows? Maybe one day you'll be teaching me a thing or two. Now that would be something, wouldn't it? Happy weatherstripping!