How To Hook Up Second Battery For Car Audio

Alright gearheads and music lovers! Ever been cruising, windows down, blasting your favorite tunes, only to have your car battery cough and die? Yeah, not a vibe. That's where the idea of adding a second battery for your car audio comes in. Think of it like giving your sound system its own personal power-up – a dedicated fuel source for pure, unadulterated audio bliss.
Why bother with a second battery, you ask? Well, let's break it down. Your car's primary battery is already doing a lot: starting the engine, running your lights, powering your navigation system... It's like a hardworking single parent trying to juggle everything! Adding a beefy sound system with a powerful amp just puts even more strain on it. And when your battery is under constant stress, its lifespan gets shortened. Nobody wants to be replacing their battery every year, right?
A second battery, specifically for your audio system, acts like a dedicated assistant, taking the audio load off the main battery. It’s like having a separate fridge just for your favorite snacks – pure audio indulgence! This not only keeps your tunes pumpin' longer and louder, but it also protects your car's main battery. Win-win!
Must Read
So, How Do We Hook This Up? Don't Panic!
Now, before you run screaming, thinking this is some crazy electrical engineering project, let me assure you: it's totally doable, even if you're not a seasoned mechanic. It’s all about taking it step-by-step and being careful.
First things first: safety first! Disconnect the negative terminal of your car's main battery before you even think about touching anything else. We don’t want any unexpected sparks flying! It’s like properly stretching before a workout – essential to avoid injury.

Next, you'll need a few key ingredients. Obviously, you’ll need a second battery. An AGM (Absorbent Glass Mat) battery is generally recommended, as they're sealed, spill-proof, and can handle deep cycling (being discharged and recharged repeatedly) better than traditional flooded lead-acid batteries. They're a bit pricier, but worth the investment for your precious sound system.
You'll also need a battery isolator. This is a crucial piece of kit. Think of it as a gatekeeper between your two batteries. It allows the alternator to charge both batteries, but it prevents the second battery from draining the main battery if you're jamming out with the engine off. Without an isolator, you risk waking up to a completely dead car battery. Not fun!
Then, you'll need some heavy-gauge wiring, fuses, and terminals. This is where things get a bit more specific to your setup. The gauge of the wire depends on the amperage of your audio system and the distance between the batteries. Consult a wiring chart or ask a car audio specialist to make sure you're using the correct size. Using the wrong wire gauge can be a fire hazard – seriously!
The Nitty-Gritty: A Simplified Overview
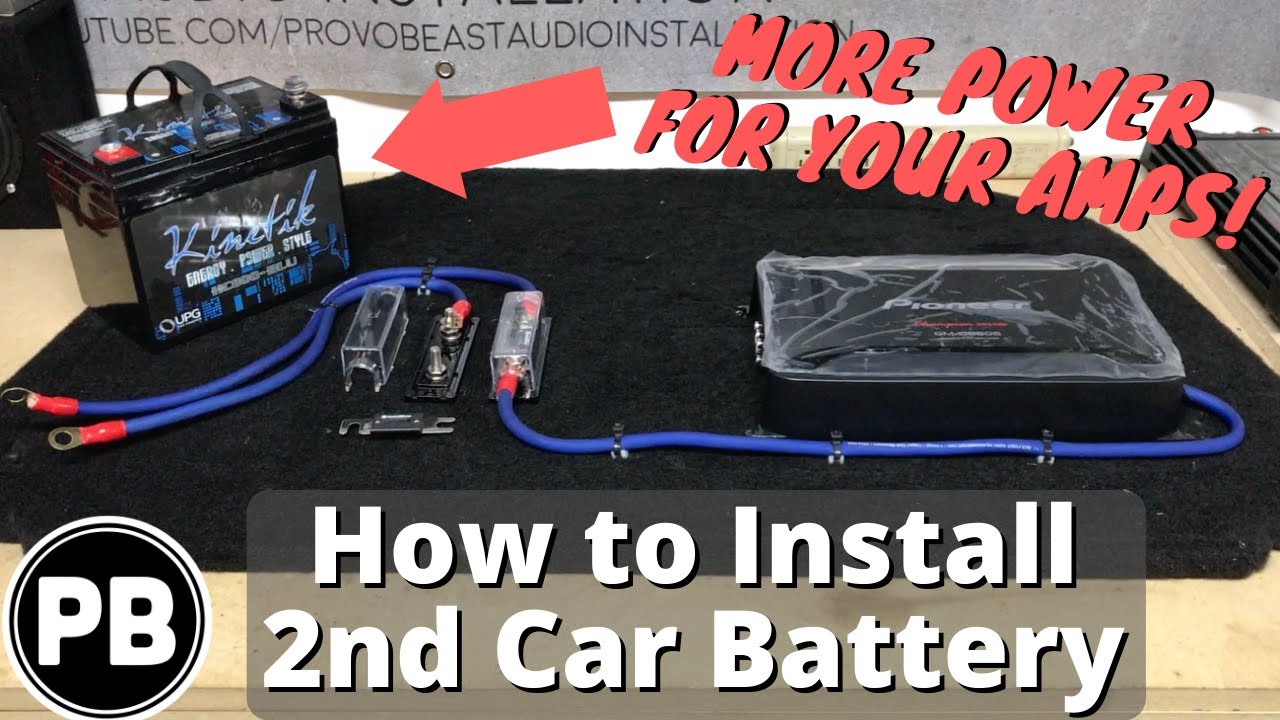
Here's a super-simplified breakdown of the hookup:

- Mount the second battery: Find a secure spot in your trunk or engine bay to mount the battery. Make sure it's properly secured – you don't want it bouncing around!
- Install the battery isolator: Mount the isolator close to the second battery.
- Wire the battery isolator: Connect the isolator to the positive terminals of both batteries. This is where the wiring diagram that comes with your isolator will be your best friend. Follow it carefully!
- Connect the ground wires: Run a heavy-gauge ground wire from the negative terminal of the second battery to a solid grounding point on the car's chassis. Make sure the connection is clean and secure.
- Connect your audio system: Run power and ground wires from the second battery to your amplifier. Make sure to use appropriate fuses to protect your system.
- Reconnect the main battery: Once everything is wired up correctly, reconnect the negative terminal of your car's main battery.
Important! This is a simplified overview. Always consult the specific instructions that come with your battery isolator and any other components you're using. If you're not comfortable working with electrical wiring, hire a professional! It's better to be safe than sorry.
The Sweet, Sweet Sound of Success
Once everything is hooked up, fire up your engine and let the magic happen! Your alternator will charge both batteries, and your audio system will be drawing power from its own dedicated source. You'll notice improved sound quality, more consistent bass, and less strain on your car's electrical system. Plus, you'll be able to crank up the volume without fear of draining your main battery.
Adding a second battery for your car audio is an investment in your listening experience and the longevity of your car's electrical system. It’s like upgrading from a basic kitchen to a chef's dream – a world of difference! So go ahead, give your sound system the power boost it deserves. You (and your ears) will thank you for it!
