How To Disconnect Fire Alarm Battery

Ah, the unmistakable chirp. That high-pitched, insistent little bleat that cuts through the quiet of your home, announcing to the world (or at least your immediate neighbors) that a tiny, crucial piece of plastic in your ceiling is in distress. We’ve all been there, standing on a wobbly chair at 3 AM, squinting at a smoke detector that has decided to wage its own private war against your precious sleep. Or perhaps it's a culinary adventure gone slightly too adventurous, filling the kitchen with more smoke than spice. Whatever the domestic drama, knowing how to temporarily silence that sentinel of safety can be a real sanity-saver. Let’s tackle this modern-day annoyance with grace, confidence, and a touch of humor.
First Things First: Safety & Sanity
Before we dive into the nitty-gritty, a quick but important note: fire alarms are our guardians. They save lives. This guide is for those moments when you need to temporarily disconnect a battery for replacement, to silence a false alarm, or during a renovation. It's not about permanent removal. Always remember to reconnect or replace those batteries promptly! Your peace of mind and safety depend on it.
The "Why": More Than Just Burnt Toast
Why do these little heroes choose the most inconvenient times to chirp? Usually, it's a simple case of a low battery. It's their way of politely (or perhaps not so politely) asking for a new power source. Sometimes, it's that overzealous pasta sauce, the forgotten popcorn, or even just dust accumulated inside the sensor. Whatever the trigger, that insistent "beep... pause... beep..." can turn a calm evening into a frantic scavenger hunt for a ladder and a prayer.
Must Read
Your Toolkit for Tranquility
You don't need much, but a few things will make this operation smooth:
- A sturdy chair or step stool: Safety first! No acrobatic feats, please.
- A flathead screwdriver (optional): Some battery compartments can be a bit stubborn.
- New batteries (if you're replacing): Usually a 9-volt, but some might use AA or AAA. Check your device!
The Great Disconnect: A Step-by-Step Guide
Step 1: Identify Your Chirping Culprit
If you have multiple alarms, try to pinpoint which one is making the noise. Walk around; cup your hand to your ear. It’s like a domestic game of "hot or cold." Once you've found the offender, you're ready for action.

Step 2: Get Up Close and Personal
Carefully position your chair or step stool directly beneath the alarm. Make sure it's stable. Remember that scene in every sitcom where someone falls off a chair trying to fix something? We're aiming for grace, not physical comedy.
Step 3: The Twist (or Push) and Release
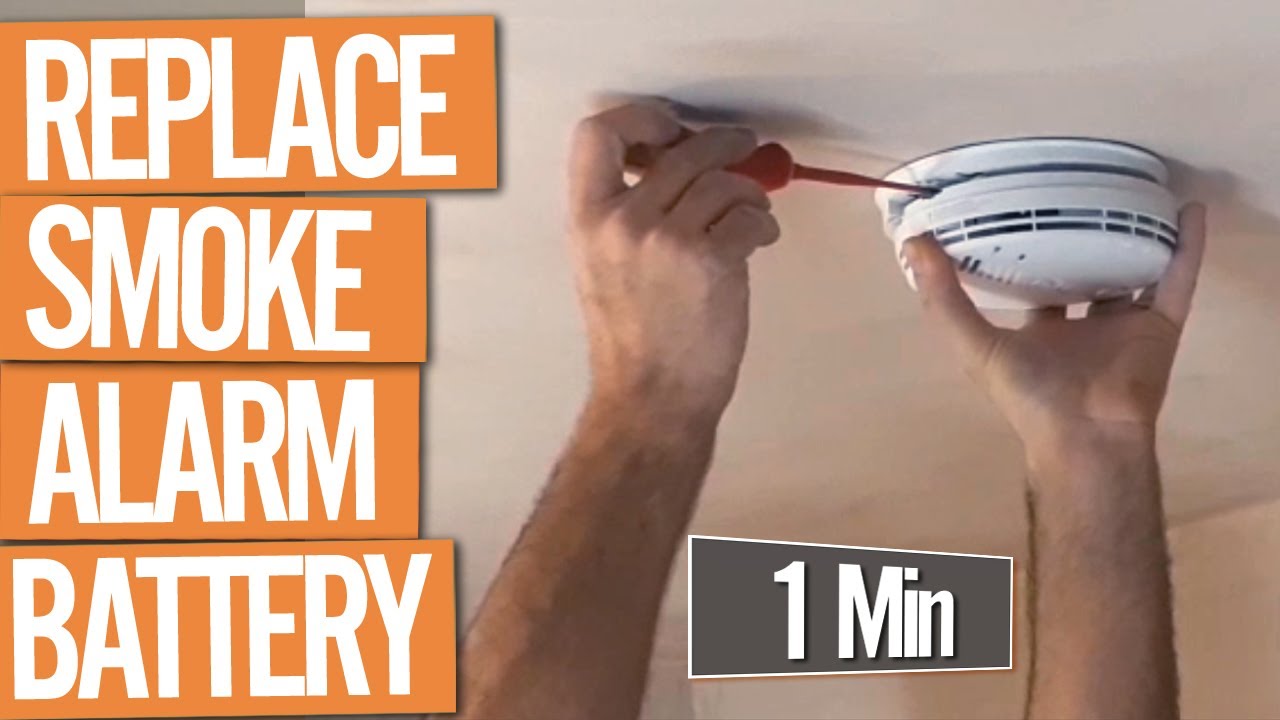
Most modern smoke detectors are designed to be easily removed from their mounting bracket. Gently grab the alarm unit and try to twist it counter-clockwise. It usually requires about a quarter turn. If twisting doesn't work, look for small tabs or a latch that you might need to press or slide. It should then come free from the ceiling base.

Step 4: The Battery Reveal
Once the unit is in your hand, flip it over. You'll usually find a clearly marked battery compartment. Sometimes it's a slide-out tray, other times a small door with a clip or a tiny screw.
Step 5: Disconnect with Confidence
This is the moment of truth! Locate the battery. If it's a 9-volt, it will have two small terminals connected by a snap connector. Gently pull the battery away from the connector. For AA/AAA batteries, simply pop them out. If you're replacing, pop the old one out and the new one in, making sure to match the positive (+) and negative (-) terminals correctly.

Step 6: The Grand Reinstallation (Don't Forget!)
Once the battery is disconnected (or replaced), the chirping will stop. Ah, glorious silence! If you were only silencing a false alarm, remember to reconnect the battery. If you replaced it, now's the time to snap the battery back into its connector, slide the compartment closed, and then carefully twist the alarm unit back onto its ceiling mount until it clicks securely into place. Many alarms will give a quick, reassuring single beep when powered up correctly.
A Little Known Fact & A Cultural Nod
Did you know that the "low battery chirp" frequency is often designed to be particularly annoying because it falls into a range that the human ear is highly sensitive to, especially at night? It’s effective, if not exactly pleasant! And who hasn't seen a movie character casually waving a towel at a shrieking alarm after a culinary disaster, only to resort to pulling the battery in exasperation?
A Reflection on Silence
In our constantly connected world, moments of sudden, forced silence can be surprisingly profound. Dealing with a chirping fire alarm, while annoying, is a small reminder to pause, address a minor issue, and then restore order and peace to our environment. It’s a metaphor for many daily nuisances: sometimes, you just need to disconnect, reset, and plug back into life with fresh energy. So, next time that chirp starts, remember you’ve got this – and soon, blissful quiet will reign once more.