How To Clean My Dryer Lint Trap
Hey there! Grab a cuppa, pull up a chair. We need to talk about something a little… fuzzy. And kinda important. Like, really important. We’re talking about that lint trap in your dryer, you know, the one you think you clean every time?
Yeah, that one. Turns out, just pulling out the big fluffy sheet of lint (the one that always feels so satisfying to peel off, am I right?) isn’t quite enough. Nope. There’s a whole secret world of gunk, dust, and tiny fabric particles hiding in there. And trust me, it's not just about your clothes taking forever to dry, which is annoying enough. We're talking about a genuine fire hazard. Gulp.
So, let's get down to business. Think of this as a super chill, zero-judgment session on how to give that lint trap a proper, spa-level clean. Because your dryer (and your house!) deserves it. And you, my friend, deserve efficiently dried clothes!
Must Read
First Things First: Gather Your Supplies!
Don't worry, we're not building a rocket here. You probably have most of this stuff lurking around already. We’re talking about tools, not complicated gadgets. Promise!
- A small brush (an old toothbrush works wonders, but not one you’ll use for actual teeth again, please!)
- Your trusty vacuum cleaner with a hose attachment and a narrow crevice tool.
- A little dish soap.
- Warm water.
- Maybe a flashlight if your laundry room is a bit cave-like.
- And possibly some rubber gloves if you're feeling fancy or just don't like touching damp lint. No judgment here!
Got everything? Excellent. Let's dive in!
Step 1: The Obvious Bits (But Let’s Do It Right)
Okay, this is the part you probably do already. But let’s just make sure we’re all on the same page. Open your dryer door and locate that magical lint trap. It's usually a flat screen that slides out from a slot, often right inside the door opening, or sometimes on the top panel.

Pull it out completely. You’ll see that satisfying sheet of fuzzy lint. Peel it off. Ooh, ahh. Feel free to bask in the glory of your lint-removal prowess for a moment. Go on, you earned it.
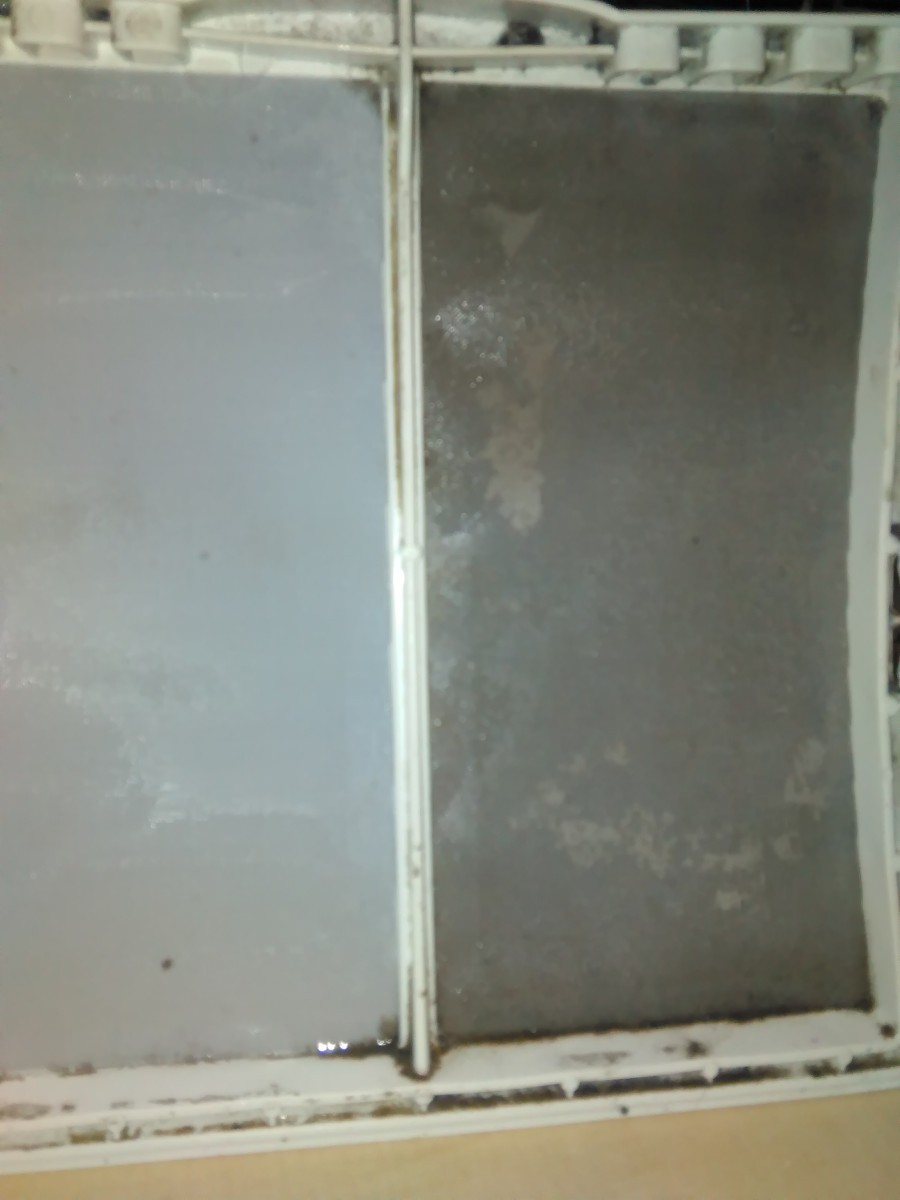
Now, hold that screen up to a light. Can you see through it easily? If not, or if it looks kinda gray and hazy even after you've pulled off the big stuff, then we have work to do. And believe me, we usually do!
Step 2: Vacuum Out the Lint Trap’s Lair
This is where the real magic happens, folks. Or, you know, the real cleaning happens. The spot where that lint trap usually lives? That's its "lair." And guess what? It's probably full of fuzz that your dryer’s suction couldn't quite reach.

Grab your vacuum cleaner with the hose and that narrow crevice tool. Now, gently insert the crevice tool into the slot where the lint trap sits. Go as far as you can! Move it around, up and down, side to side. You'll be amazed (and possibly a little disgusted) by the amount of dust bunnies and lint monsters you'll suck out of there. Seriously, it's like a lint convention in a tiny cave!
If you have a dryer vent brush (a long, flexible brush designed for this specific task), now’s a great time to use it too! Just gently push it in and twist to loosen up anything stubborn, then follow up with the vacuum. Getting all that hidden lint is crucial for fire safety and efficient drying. No joke!
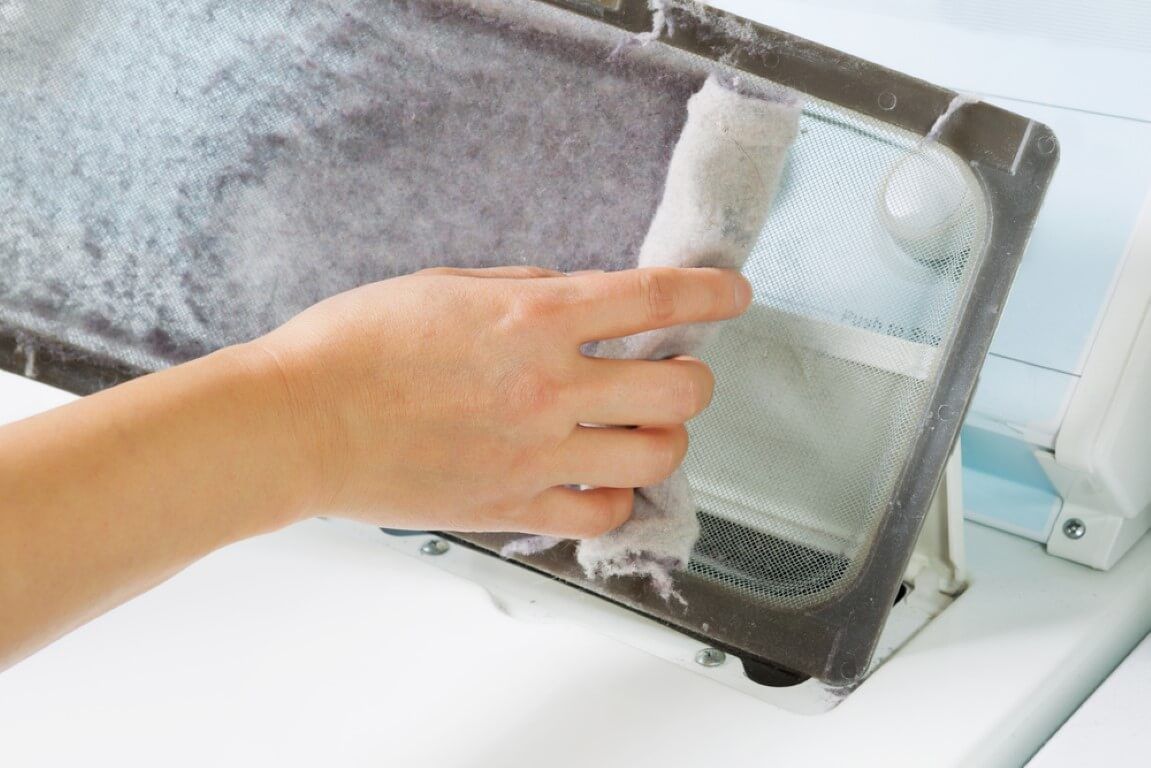
Step 3: The Deep Clean Shower for Your Screen
Remember how we held the screen up to the light? If it still looks cloudy, even after you’ve peeled off the obvious stuff, it means there's a build-up of fabric softener residue and tiny lint particles. This gunk clogs the tiny holes in your screen, making it harder for air to flow through. And less airflow equals longer drying times and a very unhappy dryer.

So, here’s what you do: take that lint screen to your sink. Run some warm water over it. Now, add a few drops of dish soap to a soft brush (your old toothbrush is perfect here!). Gently scrub the screen on both sides. You might see some gray, greasy-looking residue come off. That's the stuff we want gone!
Rinse it thoroughly under warm water until no suds remain and the water flows freely through the screen. Hold it up to the light again. See? It should be crystal clear now. Like a brand new window, but for lint!
Shake off excess water and let it air dry completely before putting it back in the dryer. This is super important! You don't want damp lint trap bits causing more problems.
Step 4: Reassembly & A Pat on the Back!
Once your lint screen is bone dry and sparkling clean, slide it gently back into its slot in the dryer. Make sure it goes in all the way and feels snug. Give yourself a high-five, seriously!
You’ve just significantly reduced a fire risk, improved your dryer's efficiency, and probably saved yourself some money on your energy bill. Not to mention, your clothes will thank you with quicker drying times!
How often should you do this? Well, aim for a full vacuum and deep clean of the screen at least once a month. The daily lint removal is still a must, of course! But these deeper cleans are what keep everything running smoothly and safely.
So there you have it! Who knew cleaning a lint trap could be so... empowering? Now, go enjoy your freshly dried clothes, you magnificent, lint-fighting machine, you!