How To Build A Rubber Band Car

Ever felt the thrill of watching something you made come to life? There’s a special magic in creating a simple machine that moves under its own power. And when that power source is nothing more than a humble rubber band, the wonder only grows! Building a rubber band car is a classic project that transcends generations, bringing together playful creativity and fascinating physics. It's not just a toy; it's a gateway to understanding fundamental engineering principles, wrapped up in an afternoon of pure, unadulterated fun. Whether you’re a curious kid, a nostalgic adult, or a parent looking for an engaging activity, the rubber band car offers an accessible and incredibly rewarding experience.
So, why bother building one? Beyond the sheer enjoyment of watching your creation zip across the floor, rubber band cars are powerful educational tools. They introduce concepts like potential and kinetic energy in the most intuitive way possible. You literally wind up the rubber band, storing energy, and then release it to propel your car forward. It’s a brilliant, tangible demonstration of how stored energy can be converted into motion. This project also hones problem-solving skills. What makes a car go faster? How do you ensure it rolls straight? You'll experiment with wheel size, axle friction, and chassis design, learning through trial and error – the very essence of scientific inquiry and engineering. It fosters creativity, encouraging you to look at everyday materials in new ways, transforming cardboard, bottle caps, and skewers into a functional vehicle.
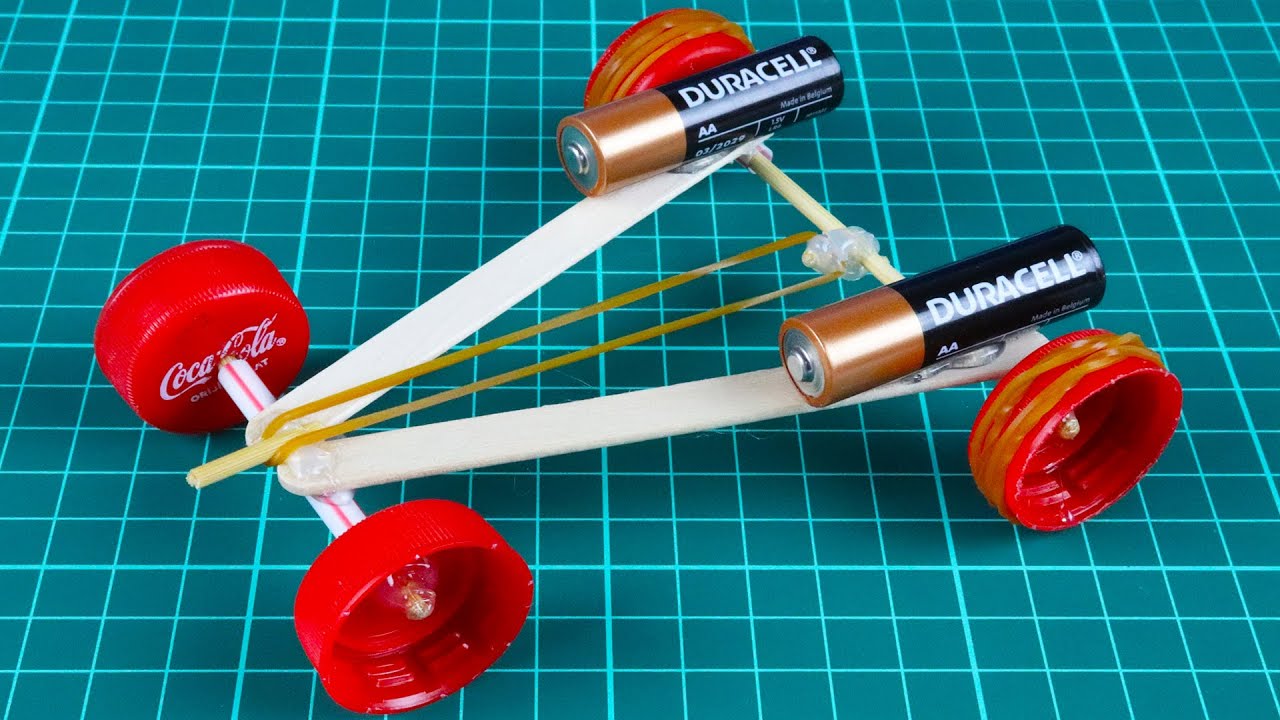
Getting started is surprisingly simple, often requiring nothing more than items you might already have around the house. At its core, a rubber band car needs a chassis (the body), wheels, axles, and, of course, the mighty rubber band. Your chassis can be a sturdy piece of cardboard, a plastic bottle, or even a wooden block. For wheels, think bottle caps, old CDs, or custom-cut cardboard circles. Skewers or pencils make excellent axles, allowing your wheels to spin freely. The magic happens with the rubber band. Typically, one end of the rubber band is securely attached to the chassis, while the other end is looped around one of the axles. As you manually wind the wheels backward, the rubber band twists tighter and tighter, building up that all-important potential energy. Release the car, and whoosh! – the rubber band unwinds, spinning the axle and propelling your creation forward.
Must Read
The beauty of this project lies in its endless possibilities for customization and improvement. Want more speed? Try using a stronger rubber band or optimizing your gear ratio (even if it's just by changing wheel sizes!). Want it to travel further? Focus on reducing friction with smoother axles or lighter materials. This iterative process of building, testing, and refining is where the real learning happens. It’s an accessible entry point into the world of mechanical engineering, demonstrating that with a little ingenuity and a few simple materials, you can create something truly impressive. So, gather your supplies, unleash your inner inventor, and get ready to experience the satisfying joy of building your very own rubber band powered marvel!