How Do You Winterize A Camper For Beginners
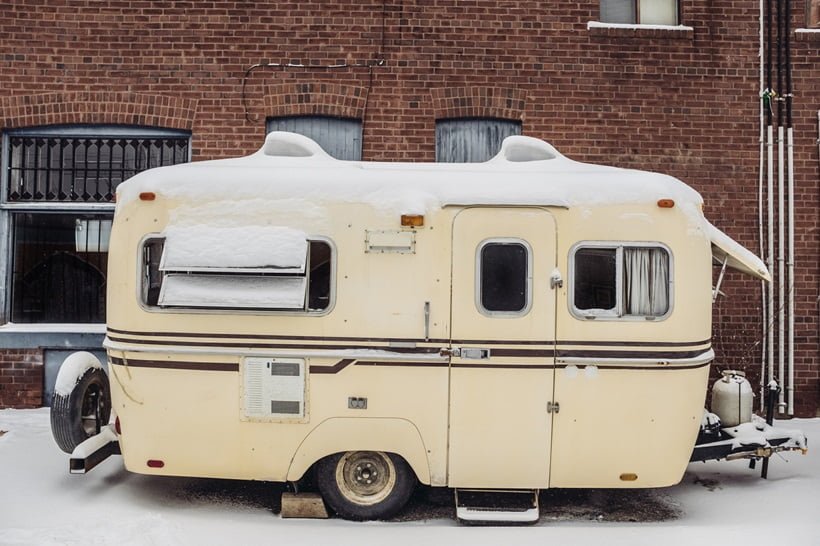
So, you've had an amazing summer (and maybe even fall!) exploring the great outdoors in your camper. But as the leaves change and the temperatures drop, it's time to think about putting your trusty home-on-wheels into hibernation. Winterizing your camper might sound like a chore, but think of it as giving your adventure buddy a well-deserved spa day! Plus, properly winterizing can save you a ton of money and headaches down the road. Imagine the joy of knowing your camper is safe and sound, ready to roll again in the spring without any burst pipes or nasty surprises. Trust us, it's worth it!
But what exactly is winterizing? Simply put, it's preparing your camper for freezing temperatures to prevent damage from ice expansion. Water expands when it freezes, and that expansion can crack pipes, damage your water pump, and even wreck your entire plumbing system. Winterizing removes the water and protects vulnerable components, ensuring your camper survives the winter unscathed. Think of it as giving your camper a warm, fuzzy blanket for the winter, even though it's actually about removing water!
Okay, let's get down to the basics. Here's a simple step-by-step guide for winterizing your camper, perfect for beginners:
Must Read
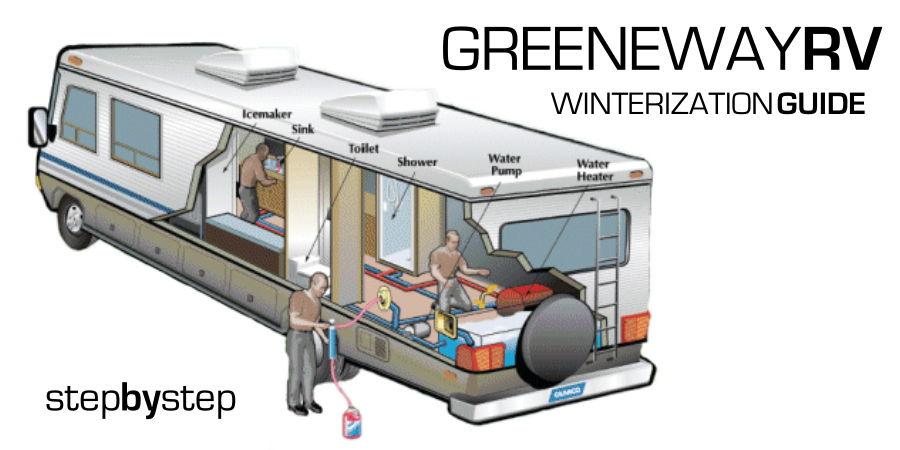
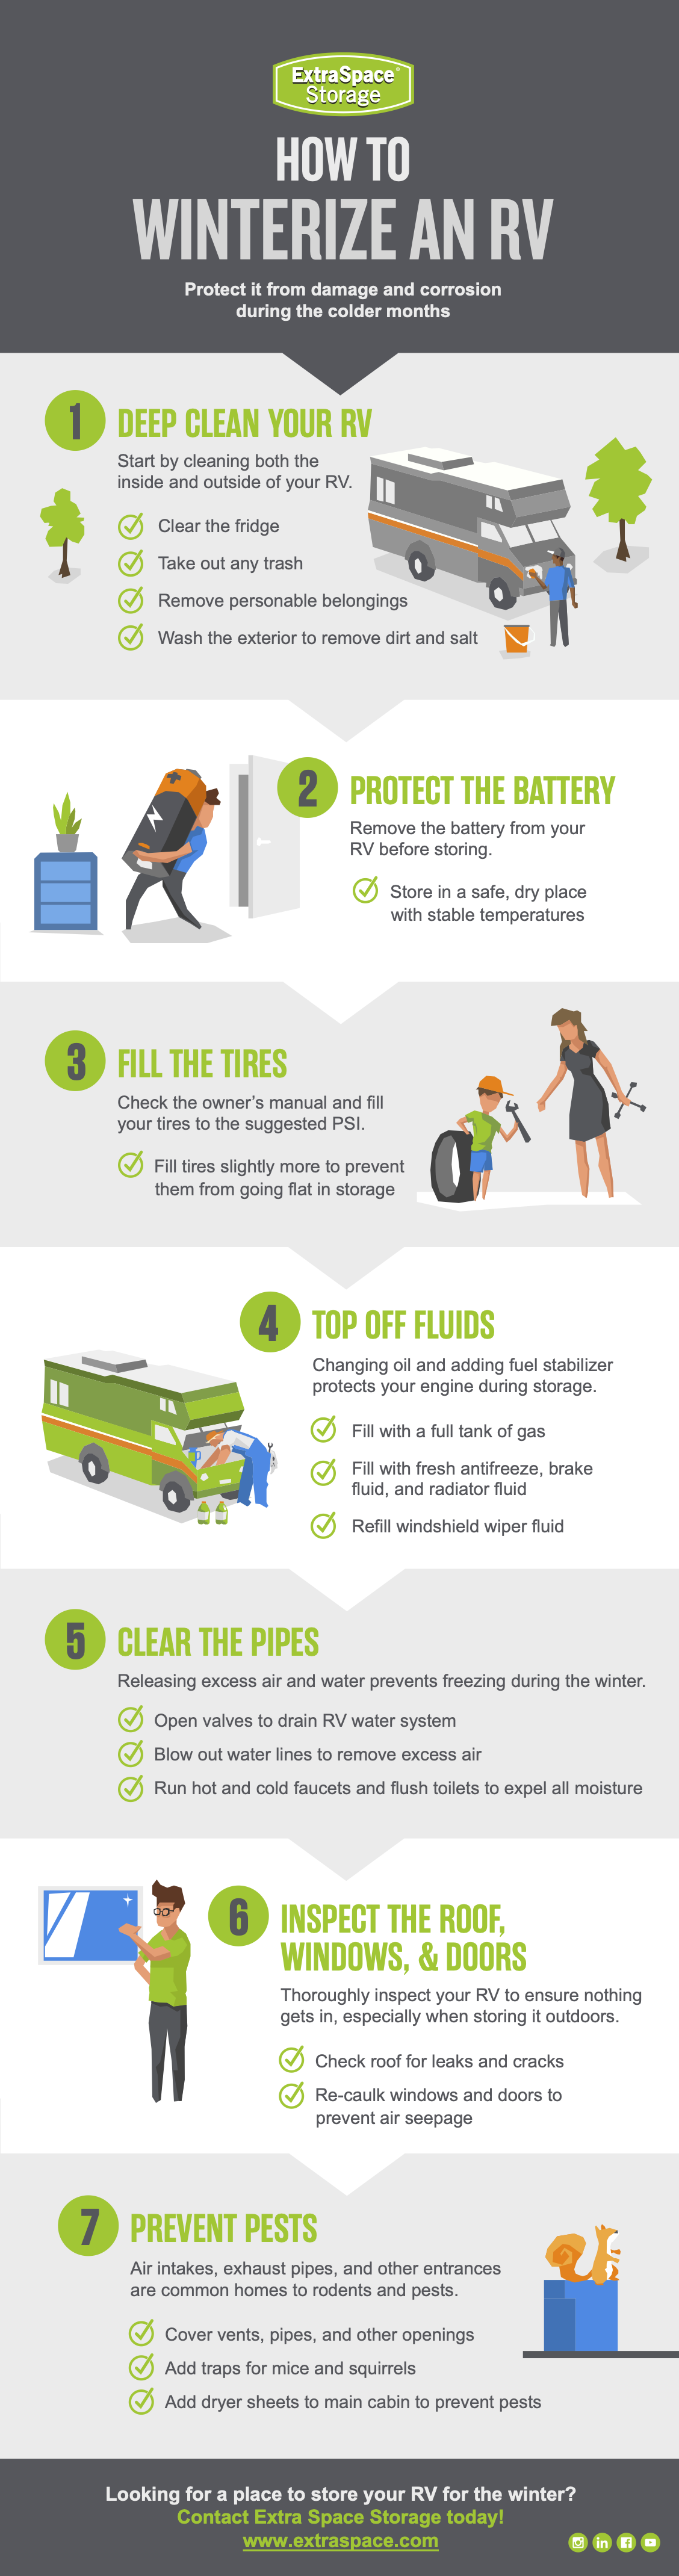
- Drain everything! Start by draining all the water from your fresh water tank, water heater, and holding tanks (gray and black water). This is the most crucial step! Use the drain valves located on each tank.
- Bypass your water heater. Most water heaters have a bypass valve. Use it! This prevents antifreeze from entering the water heater, saving you a lot of antifreeze (and money!). If you don't have a bypass valve, you can purchase and install one.
- Drain and flush your water heater. Even with the bypass, drain the water heater completely. You can also flush it to remove any sediment.
- Add RV antifreeze. This is where the "winterizing" magic happens. Use a water pump converter kit (easy to install) to pump RV antifreeze through all your water lines. Open each faucet (both hot and cold) until you see pink antifreeze flowing. Don't forget the toilet and any outside showers! Make sure you use RV antifreeze, not automotive antifreeze, which is toxic.
- Pour antifreeze into drains. Pour a cup or two of RV antifreeze down each drain (sinks, shower, and toilet) to protect the P-traps from freezing.
- Remove or protect batteries. Batteries can be damaged by freezing temperatures. Ideally, remove them and store them in a cool, dry place. If you can't remove them, disconnect the cables and check the water levels (if applicable).
- Clean out the fridge and pantry. Remove all food items to prevent spoilage and potential rodent infestations. Prop the refrigerator door open to prevent mildew.
- Cover vents and openings. Use vent covers or tape to seal off any openings that could allow rodents or insects to enter.
- Consider a cover. A camper cover can protect your camper from the elements, like snow, ice, and UV damage.
Winterizing your camper doesn't have to be intimidating. By following these simple steps, you can ensure your camper is protected from the harsh winter weather, and you'll be ready to hit the road again as soon as spring arrives. Happy camping (and winterizing)!