How Do You Make A Plaster Mold
Ever looked at a cool leaf, a funky seashell, or even just your oddly charming thumbprint and thought, "Man, I wish I could clone that"? Well, friend, you're not alone. And guess what? You can! With a little bit of plaster and a sprinkle of bravery, you can make a mold that’s like taking a fingerprint of the universe – or at least, your kitchen counter.
Making a plaster mold is one of those surprisingly satisfying, slightly messy, and wonderfully accessible crafts that feels a bit like magic. It's not rocket science; it's more like baking, but for solid objects. You’re essentially creating a negative space, a perfect impression, that you can then fill with another material to create a replica. Think of it as giving your favorite trinket its very own stunt double.
Gather Your Plaster Posse
Before you dive in like a giddy toddler into a mud puddle, you’ll need a few bits and bobs. The star of the show is, naturally, Plaster of Paris. You can find this stuff at any craft store, hardware store, or sometimes lurking in the back of your grandma's garage. It's surprisingly inexpensive, which is great because you'll probably make a glorious mess.
Must Read
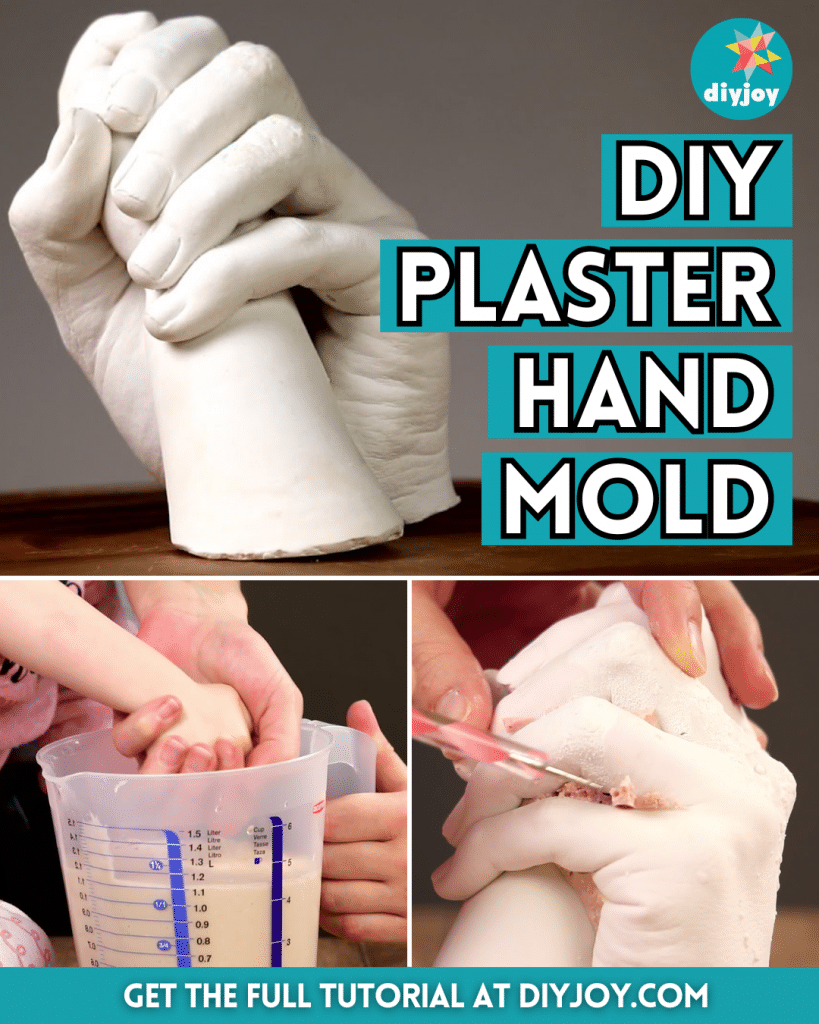
Next up: water. Tap water is perfectly fine. You’ll also need a mixing bowl you don't mind getting... plastered (pun absolutely intended). An old yogurt container or a disposable plastic cup works wonders. A stirring stick – maybe a craft stick, an old spoon, or even a twig if you're feeling particularly rustic – is also essential. And of course, your original object, the magnificent item you wish to immortalize!
One often-overlooked hero is a mold release agent. This can be as simple as petroleum jelly (Vaseline), cooking oil, or a specialized spray. Trust me, skipping this step is like trying to bake a cake without greasing the pan. You will end up with a heartbreaking, stubbornly stuck mess. We've all been there, staring wistfully at our object, fused forever to its plaster prison, muttering, "If only I'd applied the grease!"

The Great Plaster Mix-Up
Alright, you've got your gear. Now, for the main event! First, prepare your original object. Make sure it's clean and dry. If it's something flat-ish, like a coin or a leaf, place it on a flat, protected surface. If it’s more three-dimensional, you might need to build a little retaining wall around it – think of it as a tiny, temporary dam to hold your plaster in place. Lego bricks or strips of cardboard taped together work brilliantly.
Now, for the plaster. This is where a little finesse goes a long way. Pour some water into your mixing container. Then, slowly, gingerly, sprinkle the plaster powder onto the water. Don't just dump it in like you're feeding a hungry monster! Let it absorb the water naturally. You'll see little islands of plaster forming, then sinking. Keep adding until you have little plaster peaks just poking out of the water, like tiny snow-capped mountains. This is called the "volcano" method, and it helps prevent lumps.

Once you have your plaster peaks, give it a gentle stir. You're aiming for a consistency that's like thick pancake batter or creamy yogurt. Not watery soup, and definitely not thick, clumpy mashed potatoes. This is the Goldilocks zone – just right. Too thick, and it won't capture fine details; too thin, and it'll take forever to set (and might just run everywhere).
The Pour, The Wait, The Reveal!
With your perfectly mixed plaster, it’s time to pour. Gently and slowly, drizzle the plaster over your prepared, mold-released object. Start from one corner and let it flow across. This helps minimize air bubbles, which can be the bane of a beautiful mold. Cover your object completely, ensuring there's a good thickness of plaster all around it – at least half an inch, preferably more, for strength.

Now comes the hardest part for anyone with the attention span of a squirrel: the waiting game. Plaster usually sets within 20-30 minutes, but it needs to cure for longer to be truly strong. You’ll notice it starting to warm up as it sets – that's a good sign! It's an exothermic reaction, science fans! Resist the urge to poke it every five seconds, even though your brain will be screaming, "Is it done yet?!"
Once it’s cooled and feels rock solid, it’s demolding time! This is the moment of truth. Carefully remove any retaining walls. Then, gently pry your original object from the plaster. Sometimes it pops right out with a satisfying "thwock." Other times, it requires a little more persuasion. If you used your mold release diligently, it should separate without too much drama. And there you have it! A perfect, negative impression, ready to be filled with whatever your creative heart desires. You've just become a master of capturing moments, one plaster blob at a time. Go forth and replicate!
