How Do I Make Coffee In A Keurig

Okay, let's be honest. We've all been there. Staring blankly at that sleek, futuristic-looking Keurig machine, wondering if we accidentally wandered onto the set of a sci-fi movie instead of just trying to make a simple cup of joe. It's like, you just want caffeine, not to solve a Rubik's Cube of brewing technology. But fear not, fellow caffeine-dependent humans! Making coffee in a Keurig is actually way easier than explaining to your boss why you're late because you were wrestling with said coffee machine.
Step 1: The Water Works (But Not the Emotional Kind)
First things first: water. That's the magic ingredient, besides the actual coffee, obviously. Find the reservoir – it's usually a clear plastic thingy hanging out in the back or on the side. Think of it as the Keurig's water bottle. Make sure it's filled! Don't be like me that one time and try to brew with an empty tank. The result is a lot of pathetic sputtering and a profound sense of coffee-related shame.
Use filtered water if you're fancy, or tap water if you're feeling rebellious. Just make sure it's… well, wet. And reasonably clean. We're not aiming for swamp water coffee, okay?
Must Read
Step 2: Pod Placement – No Green Thumbs Required
This is where the K-Cup comes in. Grab your weapon of choice – dark roast, light roast, that weird caramel-vanilla-hazelnut concoction you found on clearance – and prepare for insertion. Lift the handle on top of the Keurig. It's like raising the drawbridge to your coffee castle. You'll see a little holster waiting for the K-Cup. Drop it in! Make sure it's sitting snug.
A word of caution: Do NOT try to reuse K-Cups. I know, I know, it seems wasteful. But trust me, the resulting coffee is weak, sad, and tastes vaguely of regret. It's like trying to squeeze water from a stone. Just… don't.
Step 3: Size Matters (The Coffee Kind, That Is)
Now, for the big question: how much coffee do you want? The Keurig usually has buttons for different cup sizes: 6 oz, 8 oz, 10 oz… maybe even a ludicrously large 12 oz if you're feeling particularly ambitious (or sleep-deprived). Choose wisely, grasshopper.
Think of it like Goldilocks and the Three Bears. Too little coffee, and you'll be left wanting. Too much, and you'll be bouncing off the walls for the next twelve hours. Find the size that's just right for your current caffeine craving.

Step 4: Brew-tiful! (The Actual Brewing Part)
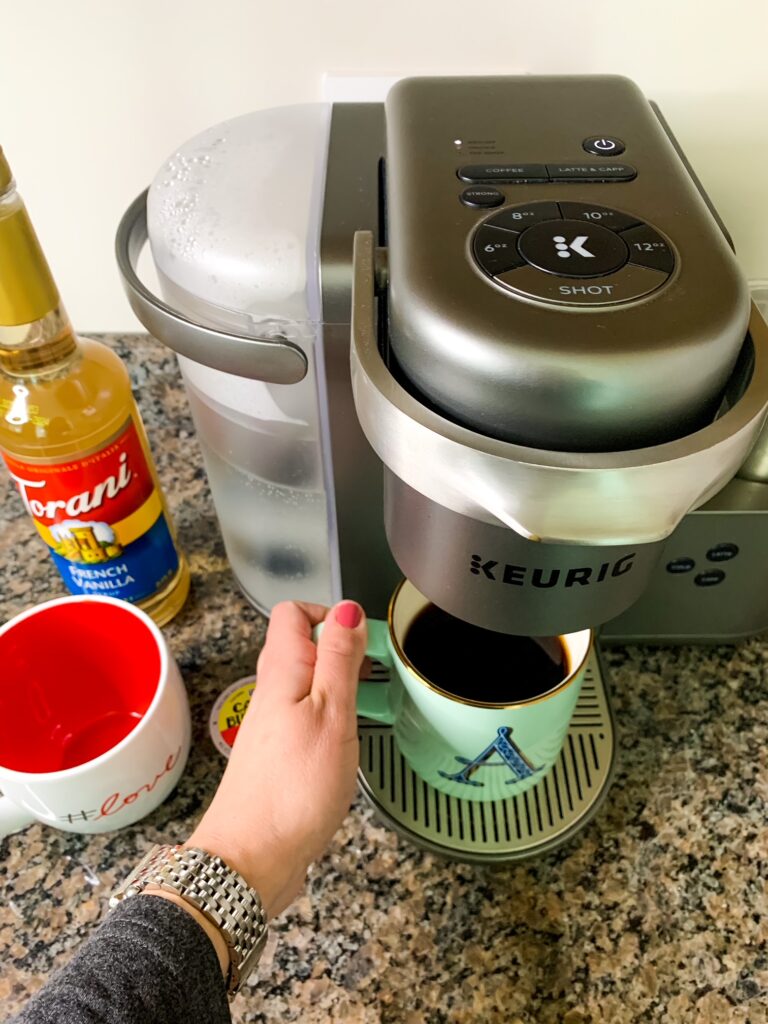
Almost there! Place your mug (or travel mug, if you're running late and trying to be sneaky) on the little tray underneath the spout. Make sure it's centered! Unless you enjoy the art of cleaning up coffee spills.
Then, hit the big, shiny "brew" button. Or whatever button your Keurig uses to initiate the magic. And wait. The Keurig will whir, gurgle, and generally make noises like a tiny robot giving birth to delicious coffee. It's a beautiful sound, isn't it? This is the moment where all your hard work pays off!

Step 5: Enjoy Your Liquid Gold (But Be Careful, It's Hot!)
Once the brewing stops, carefully remove your mug. The coffee will be hot. Like, lava-hot. Don't be a hero. Let it cool down for a second, or add some milk or creamer to tame the beast.
Dispose of the used K-Cup (responsibly, of course). And then… ENJOY! You've successfully navigated the treacherous waters of Keurig coffee making. Bask in the glory of your caffeinated accomplishment!
See? It's not so scary after all. Now go forth and conquer your day, fueled by the magic of single-serve coffee.
