Changing The Battery In A Nest Thermostat
Okay, picture this: It's zero dark thirty on a Tuesday morning. The kind of cold where your nose hairs freeze just thinking about leaving the duvet. I'm wrapped up like a human burrito, dreaming of coffee and a perfectly toasty house, when I notice something unsettlingly quiet. Too quiet, actually. The hum of the furnace? Nope. The gentle click of the Nest thermostat kicking on? Nada. My internal alarm bells started ringing.
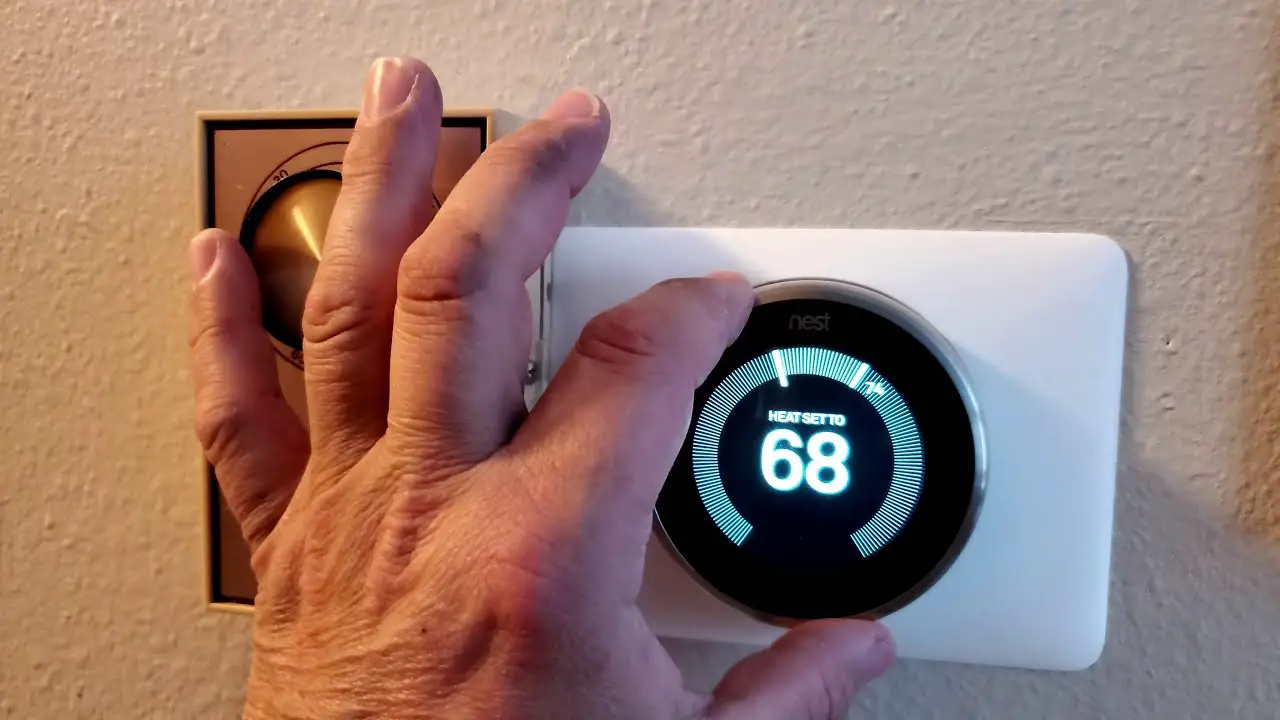
I stumbled out of bed, shivering already, and squinted at the wall where my sleek, usually glowing Nest Thermostat (the 2020 model, the one that looks less like a fancy puck and more like a minimalist square) usually resided. It was blank. Utterly, disturbingly blank. My heart did a little flop. Had the power gone out? Was it a wiring nightmare? Was I doomed to wear five sweaters until spring?
My mind immediately went to the complex. Surely, this smart, internet-connected gadget, the one that learns my schedule and talks to my phone, had some intricate internal battery system that needed a tech wizard to fix. I was already mentally Googling "Nest troubleshooting advanced power failure" when a tiny, nagging thought poked through the panic: "What if... what if it's just batteries?"
Must Read
And boom. Turns out, even the slickest, most intelligent new gadgets sometimes rely on the humble, dependable, and very much replaceable AAA battery. Who knew, right? It felt almost… ironically analog. So, if you've got the Nest Thermostat (the newer, non-Learning one) and it's playing dead, trust me, you're probably just a couple of batteries away from warmth.
Why Your Smart Thermostat Might Need a Battery Swap
You might be thinking, "Wait, my Nest has an internal rechargeable battery, doesn't it?" Well, yes, some do! The Nest Learning Thermostat (the round, iconic one) and the Nest Thermostat E typically have an internal, non-user-replaceable rechargeable battery that gets its juice from your HVAC system's C-wire. If those say "low battery," it often means they aren't getting enough consistent power from your wiring, which is a different can of worms.
But the newer Nest Thermostat (released in 2020, often distinguished by its mirrored finish and touch-sensitive side) is a different beast entirely. It’s designed to be more accessible, and part of that means it’s powered by two standard AAA alkaline batteries. These aren't just for backup; they're the main power source!
So, if your screen is blank, unresponsive, or flashing a low battery warning on this specific model, don't overthink it. It's likely just time for a battery refresh. It’s almost too simple, isn’t it?

The Nitty-Gritty: How to Change Those Batteries
This is where you become the hero of your own warm home story. And guess what? You don't need a degree in electrical engineering.
Step 1: Gather Your Tools (The Basics)
All you'll really need are two fresh AAA alkaline batteries. Seriously, that's it. Maybe a butter knife or a flathead screwdriver if your fingers aren't strong enough for step two, but usually, your hands are fine.
Step 2: Gently Remove the Display
This is probably the trickiest part, but it's designed to be easy. With the Nest Thermostat, the actual "screen" part snaps onto the base that's wired to your wall. Place your fingers on the top and bottom (or sides, depending on how it feels best) of the display and gently pull it straight off the base. It should come right off with a firm but controlled tug. Don't twist it! Pull it straight out.
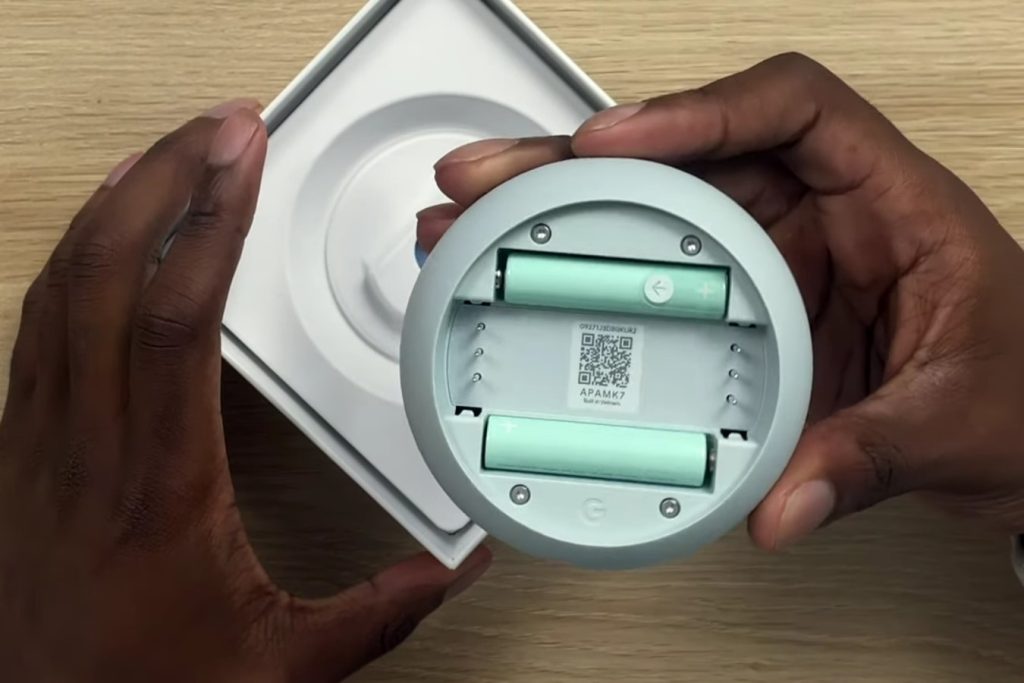
Step 3: Locate the Battery Compartment
Once the display is off, flip it over. You'll see the back. The battery compartment should be pretty obvious, often with a little tab or cover. It's usually labeled, too. Some models might have a small cover you need to slide or lift to reveal the batteries.
Step 4: Swap 'Em Out
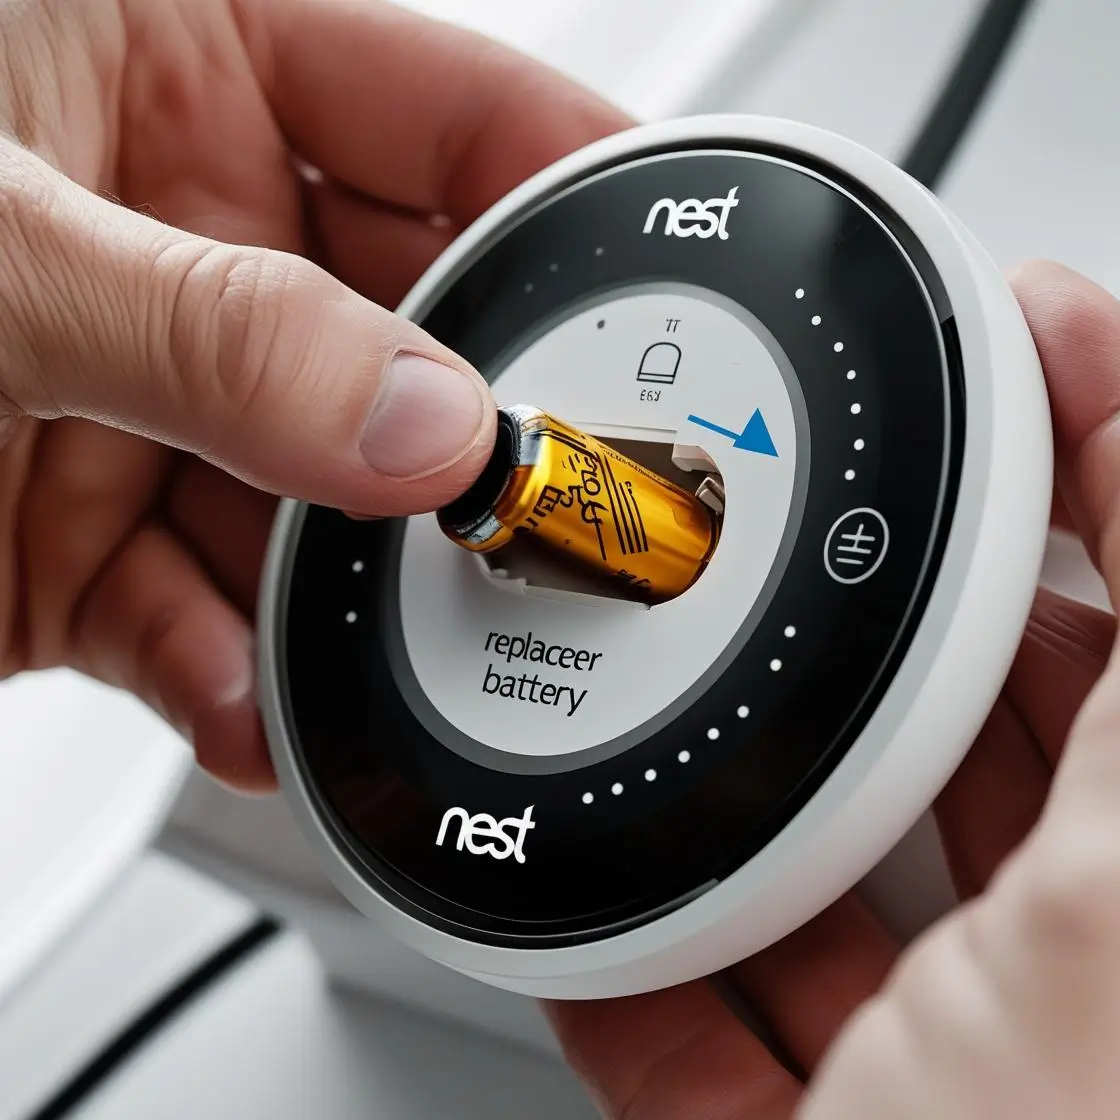
Carefully remove the old batteries. Take note of the polarity (+ and - symbols) before you put the new ones in. Insert the two new AAA alkaline batteries, making sure they're facing the correct way. Improper insertion is a common culprit if it still doesn't power on.
Step 5: Reattach the Display
Align the display with the pins on the base still attached to your wall. Gently but firmly push the display back onto the base until you hear or feel a satisfying click. It should sit flush against the wall.
Step 6: Power On and Check

Your Nest should instantly wake up and start displaying its usual information. Give it a moment to connect to Wi-Fi and your system. If it doesn't, double-check your battery orientation, ensure they're fresh, and that the display is properly seated on the base.
A Quick Word on Other Nest Models
Just a friendly reminder: If you have a Nest Learning Thermostat or a Nest Thermostat E, and you're seeing a "low battery" warning, changing AAAs won't fix it because they don't use user-replaceable AAAs for their main power. For those, a low battery usually means there's an issue with the power coming from your HVAC system, often related to the C-wire (common wire). That's a different troubleshooting adventure, typically requiring a quick call to an HVAC professional or a deep dive into your wiring.
Final Thoughts & Tips
Replacing the batteries in your Nest Thermostat (2020 model) is one of those wonderfully simple fixes that can save you a lot of headache and a potential service call. It's a great reminder that even in our world of smart homes and AI, sometimes the most elegant solution is just a pair of fresh alkaline batteries.
Consider setting a reminder on your phone to check or replace them annually, especially before the heating or cooling season ramps up. It’s a tiny maintenance task that makes a huge difference. Go forth, be warm, and marvel at the humble AAA, keeping your smart home surprisingly simple!