Alright, friend! So you're thinking about tackling aluminum with your trusty MIG welder, huh? I know what you're thinking: "Isn't aluminum, like, super tricky?" And yeah, it can be a bit of a diva, but I'm here to tell you that with a few pointers and the right setup, you can totally become an aluminum-welding wizard. Think of me as your friendly, slightly-caffeinated guide on this journey!
Why Aluminum? (Besides looking cool)
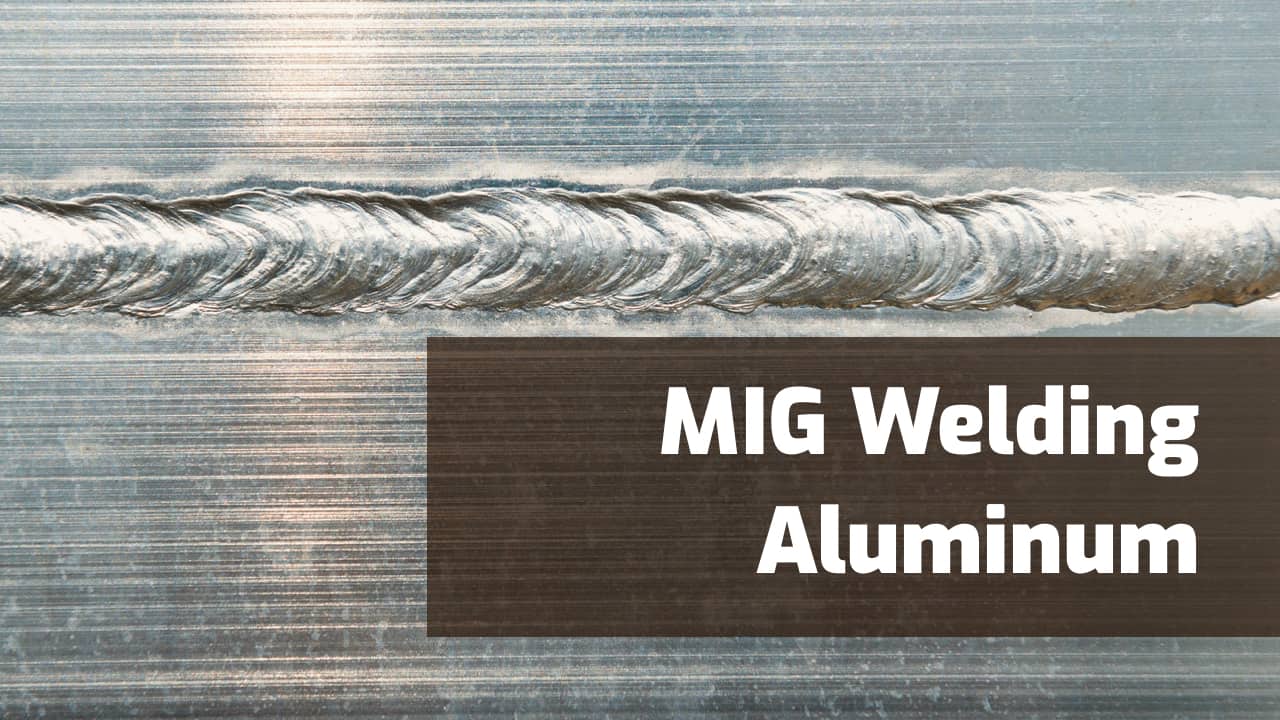
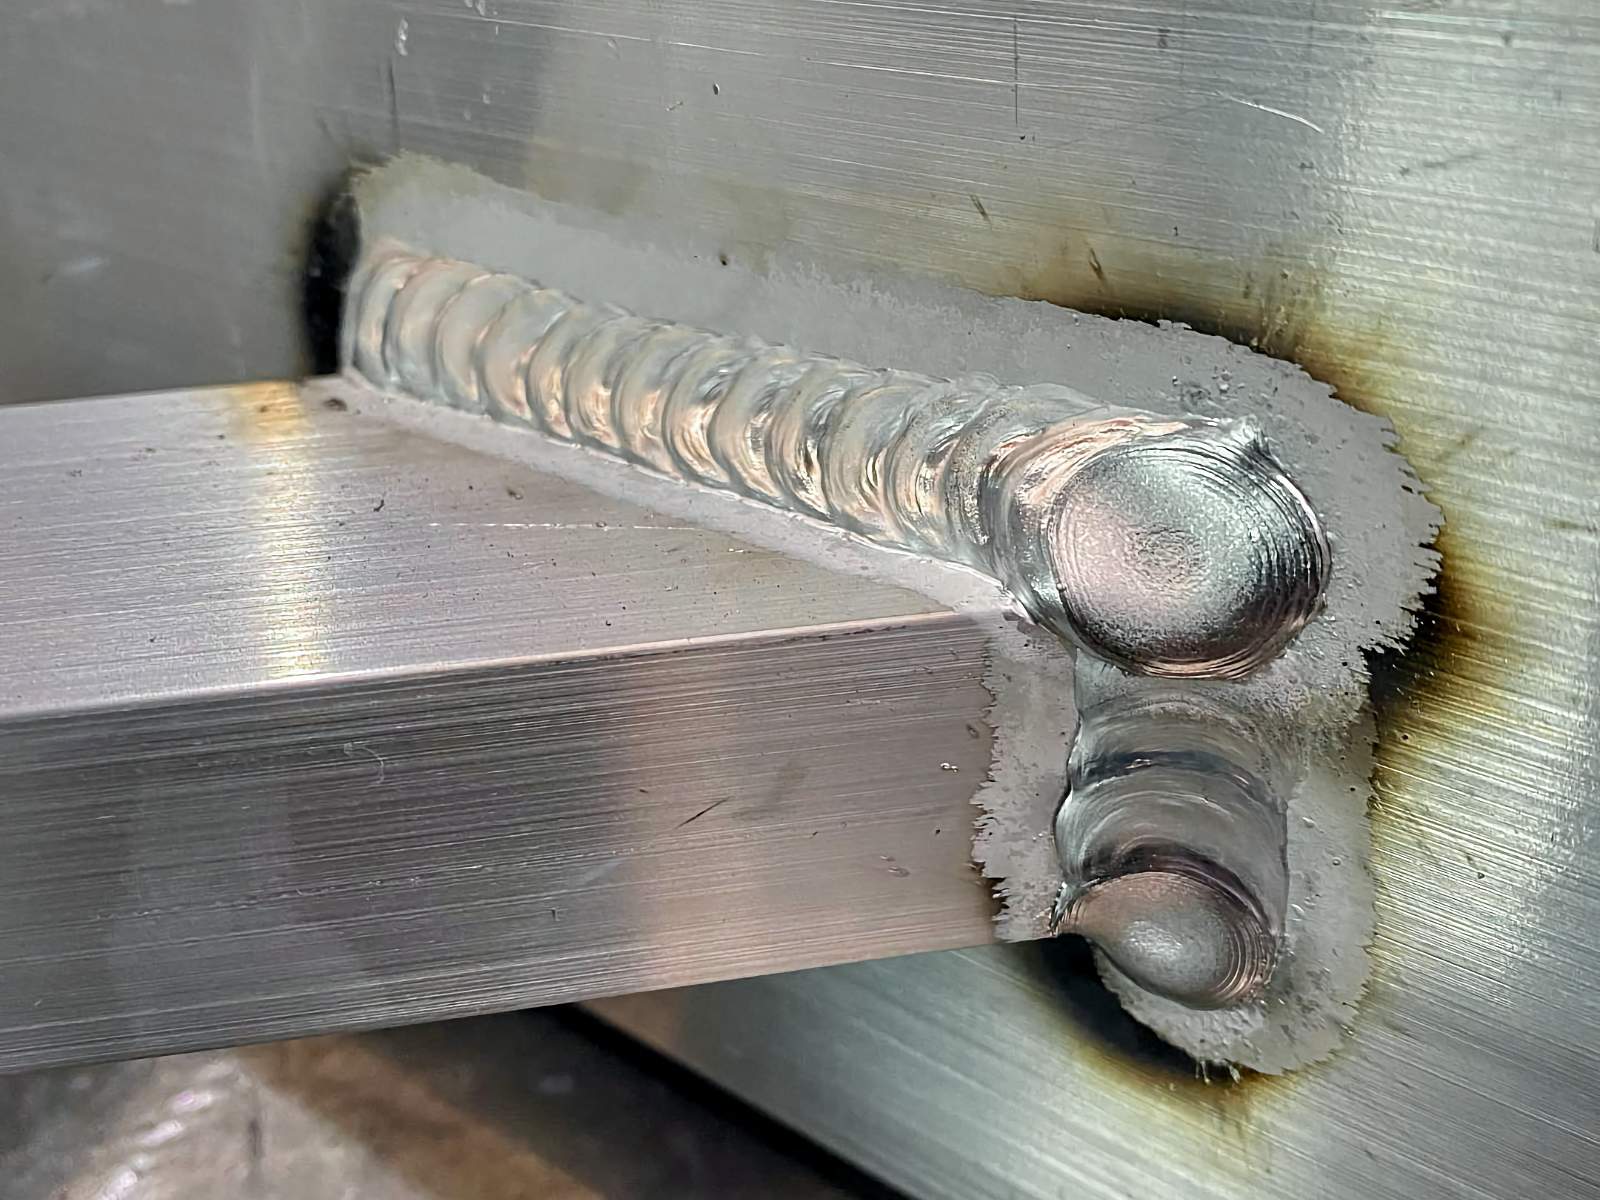
Aluminum is awesome because it's lightweight, strong, and corrosion-resistant. It's in everything from boat trailers to race car parts, and if you can weld it, a whole new world of projects opens up. But unlike steel, which is pretty forgiving, aluminum has a few quirks that make MIG welding it feel like trying to herd cats sometimes. But don't fret!
The Diva's Demands: Understanding Aluminum's Quirks
Here’s the lowdown on why aluminum can be a bit… well, demanding:
1. The Annoying Oxide Layer: Aluminum naturally forms a super thin, super tough oxide layer on its surface. The problem? This layer has a much higher melting point than the aluminum underneath. So, you're trying to melt something that melts at 1220°F (660°C) through a crust that melts at 3700°F (2037°C)! It's like trying to melt an ice cube by heating a tiny pebble on top of it. Solution? Clean, clean, clean! We'll get to that.
2. Heat Sinking Superpower: Aluminum is a fantastic conductor of heat. While great for cooking, it's a pain for welding. Heat gets sucked away from your weld puddle almost instantly. This means you need to weld hot and fast. Think of it like trying to warm up a walk-in freezer with a match – you need a lot of heat, quickly, before it dissipates.
3. The Soft Wire Shuffle: Aluminum welding wire is super soft compared to steel. This makes it prone to tangling, kinking, and generally causing a "bird's nest" in your machine if you're not careful. It’s like trying to push cooked spaghetti through a straw. Very frustrating!
Your Aluminum Arsenal: The Right Gear
To tame the aluminum beast, you need a few specialized tools:
1. The Right MIG Welder: Your machine needs to have enough juice. You'll often be welding at higher amperages than with steel. More importantly, it needs to be set up for aluminum.
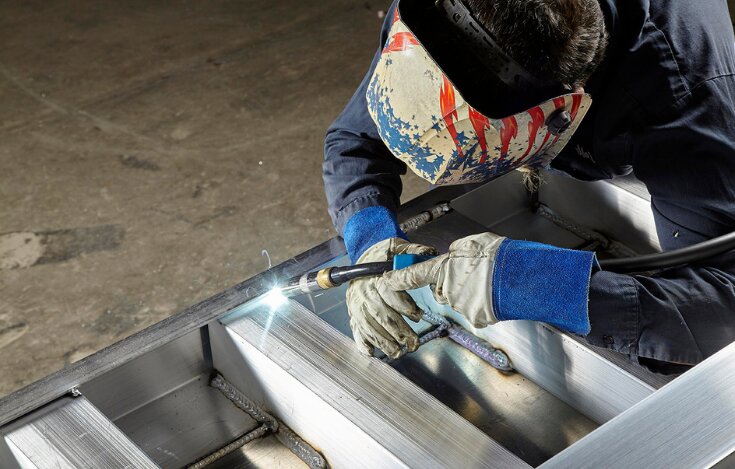
2. The Game Changer: A Spool Gun (or Push-Pull System): This is arguably the most critical piece of equipment for MIG welding aluminum. A spool gun attaches directly to your welder and holds a small spool of aluminum wire. Because the wire only has to travel a few inches (rather than through a long liner), those annoying feeding issues practically disappear! If you don't have one, trying to feed aluminum wire through a standard MIG gun's long liner is an exercise in pure frustration.
3. The Right Wire: You'll typically use either 4043 or 5356 aluminum welding wire. * 4043: Contains silicon, flows really well, good for general purpose, less cracking. * 5356: Contains magnesium, stronger welds, good for marine applications or if you need to polish/anodize later. Check your base metal to see what alloy it is and match accordingly, or pick a good all-rounder like 4043 for starters.
4. The Shielding Gas: Forget your C25 (Argon/CO2 mix) for steel. For aluminum, you absolutely need 100% Argon. It cleans the puddle and provides excellent penetration.
5. Specialized Contact Tips and Liner: You'll need aluminum-specific contact tips (usually marked "AL" or with a slightly larger diameter) and a Teflon, Nylon, or plastic liner in your MIG gun (if you're not using a spool gun). These reduce friction for that soft aluminum wire. And for your drive rollers, make sure they are U-groove, not V-groove, to avoid deforming the wire.
The Dance Steps: Your Welding Technique
Okay, gear sorted. Now for the fun part:
1. Cleanliness is Next to Weld-liness: This can't be stressed enough! Grab a stainless steel wire brush (dedicated only for aluminum!), acetone, or a degreaser. Brush off that oxide layer right before you weld. Wipe it down with acetone to remove any oils. If it's dirty, your weld will look like chewed gum. Seriously.
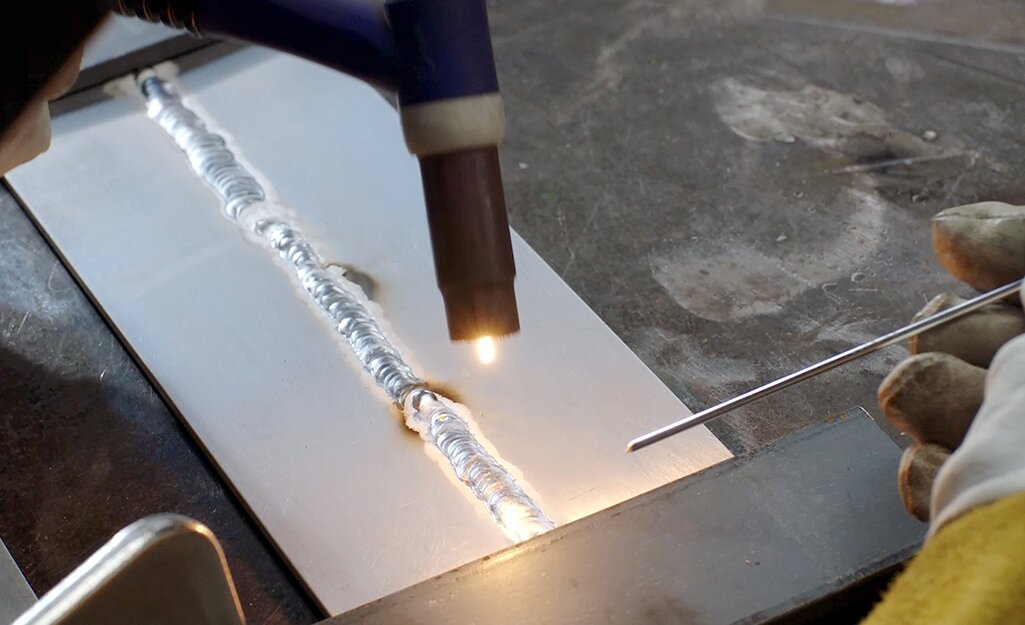
2. Settings: Hot and Fast! Remember that heat-sinking issue? Crank up your voltage and wire speed higher than you would for steel. Don't be shy! You want a nice, sizzly sound, not a sputtering mess. It's often referred to as "walking the dog" – a fast, consistent motion.
3. Push, Don't Pull: With aluminum, you generally want to push your puddle, leading the arc. This helps to better clean the metal with the gas shield and gives you a wider, flatter bead. Keep a consistent stick-out (the amount of wire protruding from your tip).
4. Practice, Practice, Practice: Your first aluminum welds won't be perfect, and that's totally okay! Grab some scrap pieces and get a feel for the speed and heat. It’s a bit different than steel, so give yourself some grace.
Safety First, Always!
Don't forget your usual PPE: welding helmet, gloves, long sleeves. Aluminum welding tends to produce a brighter arc, so make sure your helmet is rated for it.
You Got This!
Welding aluminum with a MIG might seem intimidating at first, like trying to juggle flaming chainsaws while riding a unicycle. But with the right equipment (especially that spool gun!), proper cleaning, and a good dose of practice, you’ll be laying down beautiful aluminum beads in no time. Think of the awesome projects you can create – lightweight, strong, and all thanks to your new skills! You're not just welding metal; you're crafting possibilities. So go on, grab that torch, and make some sparks fly. You've totally got this, aluminum whisperer!