Hey there, comfort connoisseur! Ever feel like your front door is secretly moonlighting as an air conditioner in winter, or a heat lamp in summer? Do you pay more to heat or cool the great outdoors than your actual living room? If you nodded emphatically (maybe even threw a fist in the air), then my friend, you’re in the right place! We’re about to tackle one of the easiest, most rewarding DIY projects out there: weather stripping your door. Think of it as giving your door a nice, snug hug, and sending those pesky drafts packing!
No special carpentry skills needed, no secret handshakes with tools required. Just a little patience, a dash of enthusiasm, and an eagerness to save some cash on your energy bills. Let’s make your home the cozy sanctuary it deserves to be, shall we?
What You’ll Need (The Toolkit of Champions!)
Gather your supplies! Don’t worry, it’s not an intimidating list. Most of these you probably already have lying around, or they're super easy to grab from your local hardware store. Consider this your personal mission briefing:
- Weather Stripping Material: This is the star of the show! For the top and sides of your door frame, self-adhesive foam or V-strip weatherstripping is usually the easiest. It sticks right on! For the bottom, you’ll likely want a door sweep (the kind that attaches to the bottom of the door itself) or a door shoe (which slides onto the bottom of the door).
- Measuring Tape: Your trusty sidekick for precision. We want things snug, not sloppy!
- Scissors or Utility Knife: For cutting your weather stripping to size. Make sure they’re sharp enough to avoid a wrestling match with the material.
- Cleaner (like rubbing alcohol or degreaser) and Rags: We need a nice, clean surface for that adhesive to stick. Think of it as prepping for a very important sticker application.
- Screwdriver or Drill (optional): If you’re installing a door sweep that screws in, these will be your best buddies.
- Pencil or Marker: For marking your measurements.
- A Helper (optional, but always fun): Because everything’s better with a friend, even battling drafts!
The Main Event: Weather Stripping Your Door!
Alright, deep breaths! This isn’t brain surgery; it’s more like advanced sticker application. You got this!
Part 1: The Top and Sides (The "Swoosh" Zone)
This is where most of your sneaky drafts come slithering in. We're going to seal these gaps like pros.
- Clean It Up! First things first, grab your cleaner and rags. Wipe down the entire door frame where the weather stripping will go. We're talking top, sides, inside, outside – get rid of any dirt, dust, or lingering spiderwebs. A clean surface is key for that adhesive to hold tight! Let it dry completely.
- Measure, Measure, Measure! Use your tape measure to find the length of the top of your door frame. Then do the same for each side. It's always a good idea to measure twice, cut once – unless you enjoy creating abstract art with weather stripping scraps.
- Cut and Stick! Take your self-adhesive foam or V-strip. Cut a piece for the top section. Peel off a small section of the backing, align it carefully along the top of your door frame (make sure it's snug against where the door closes!), and slowly peel and press the rest as you go. Repeat for both sides. The goal is to create a nice, gentle compression when the door is closed, but not so much that the door won't latch!
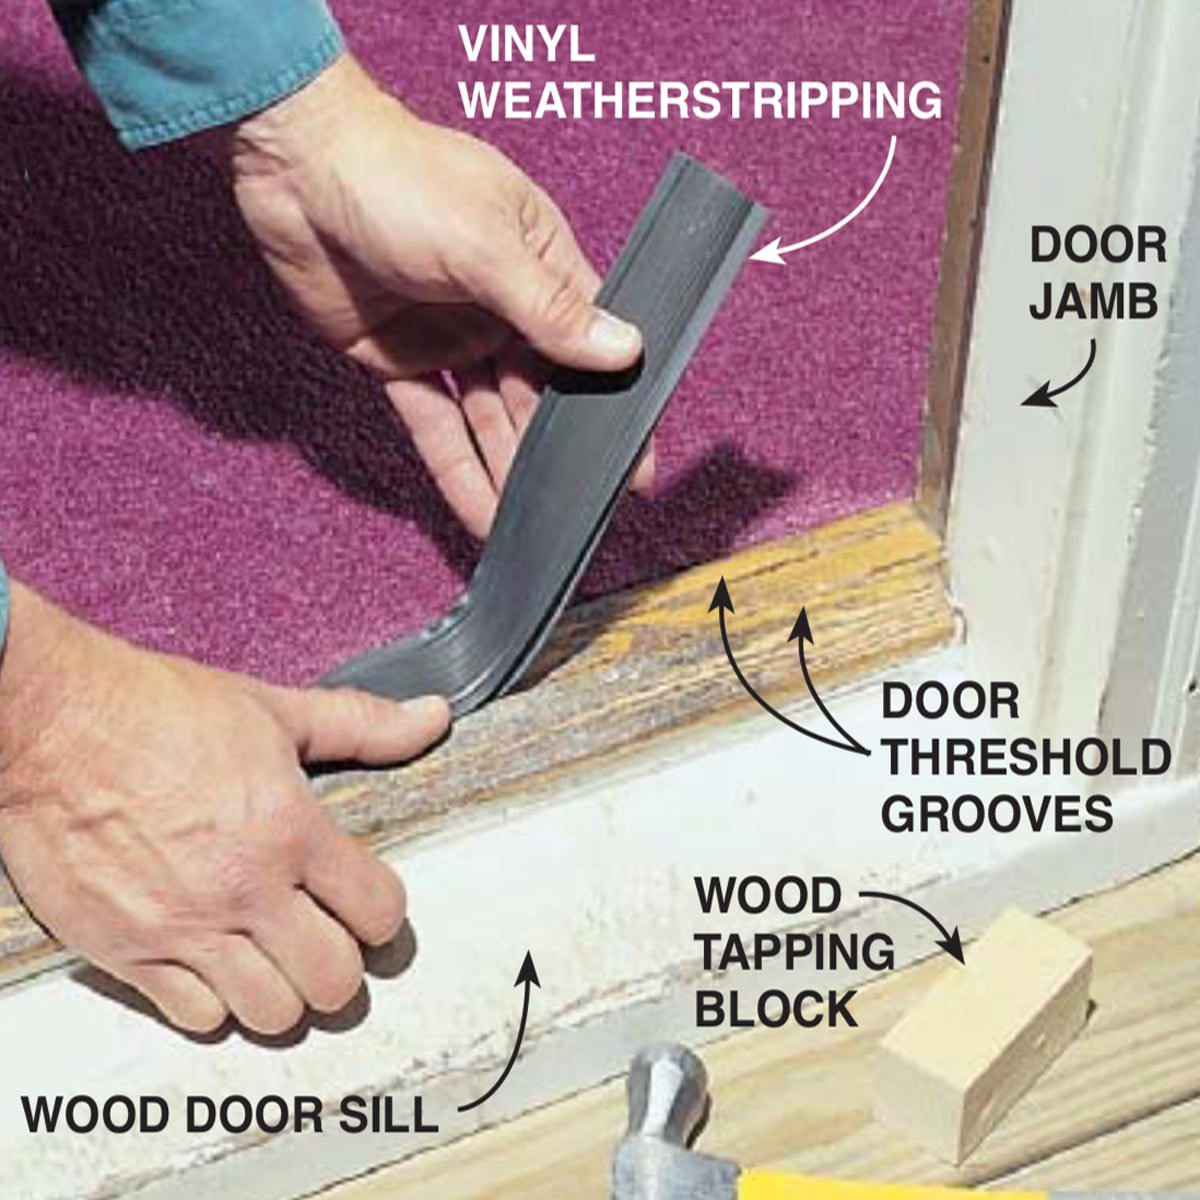
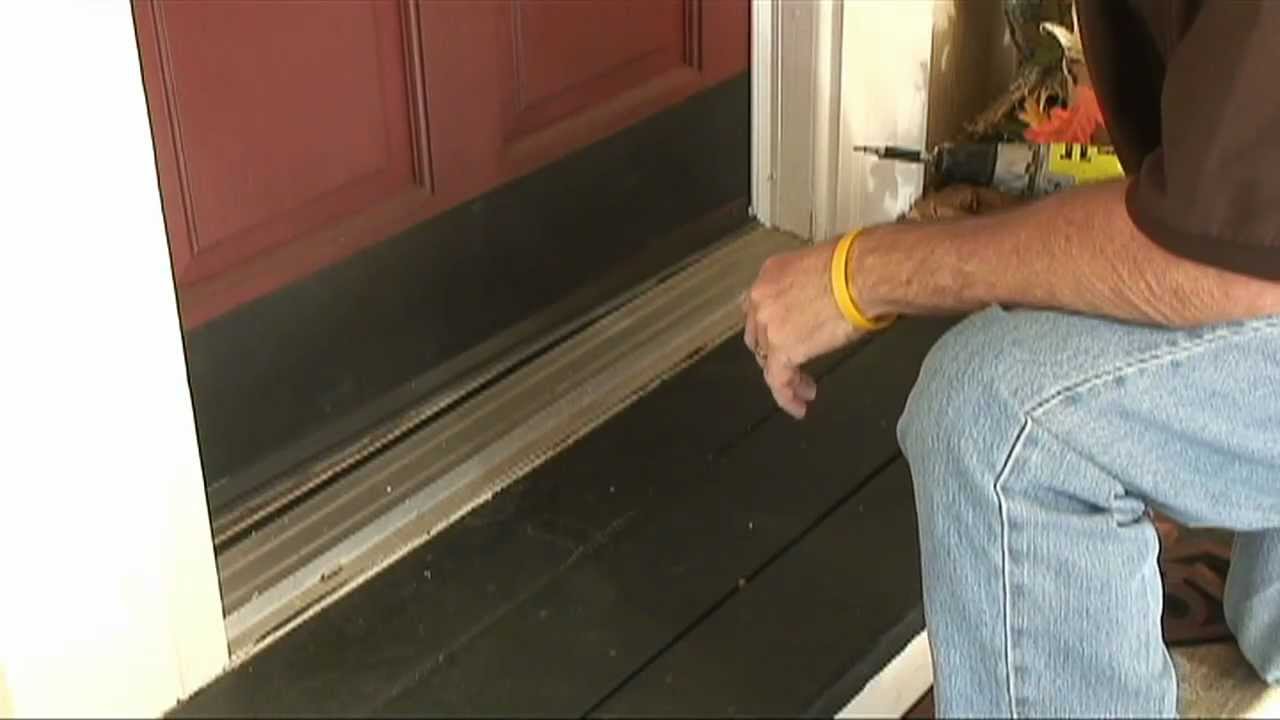
Part 2: The Bottom (The "Draft Dodger" Zone)
The bottom of your door is another major culprit for letting in unwanted air (and sometimes, tiny critters. Eek!). A door sweep or door shoe is usually the best solution here.
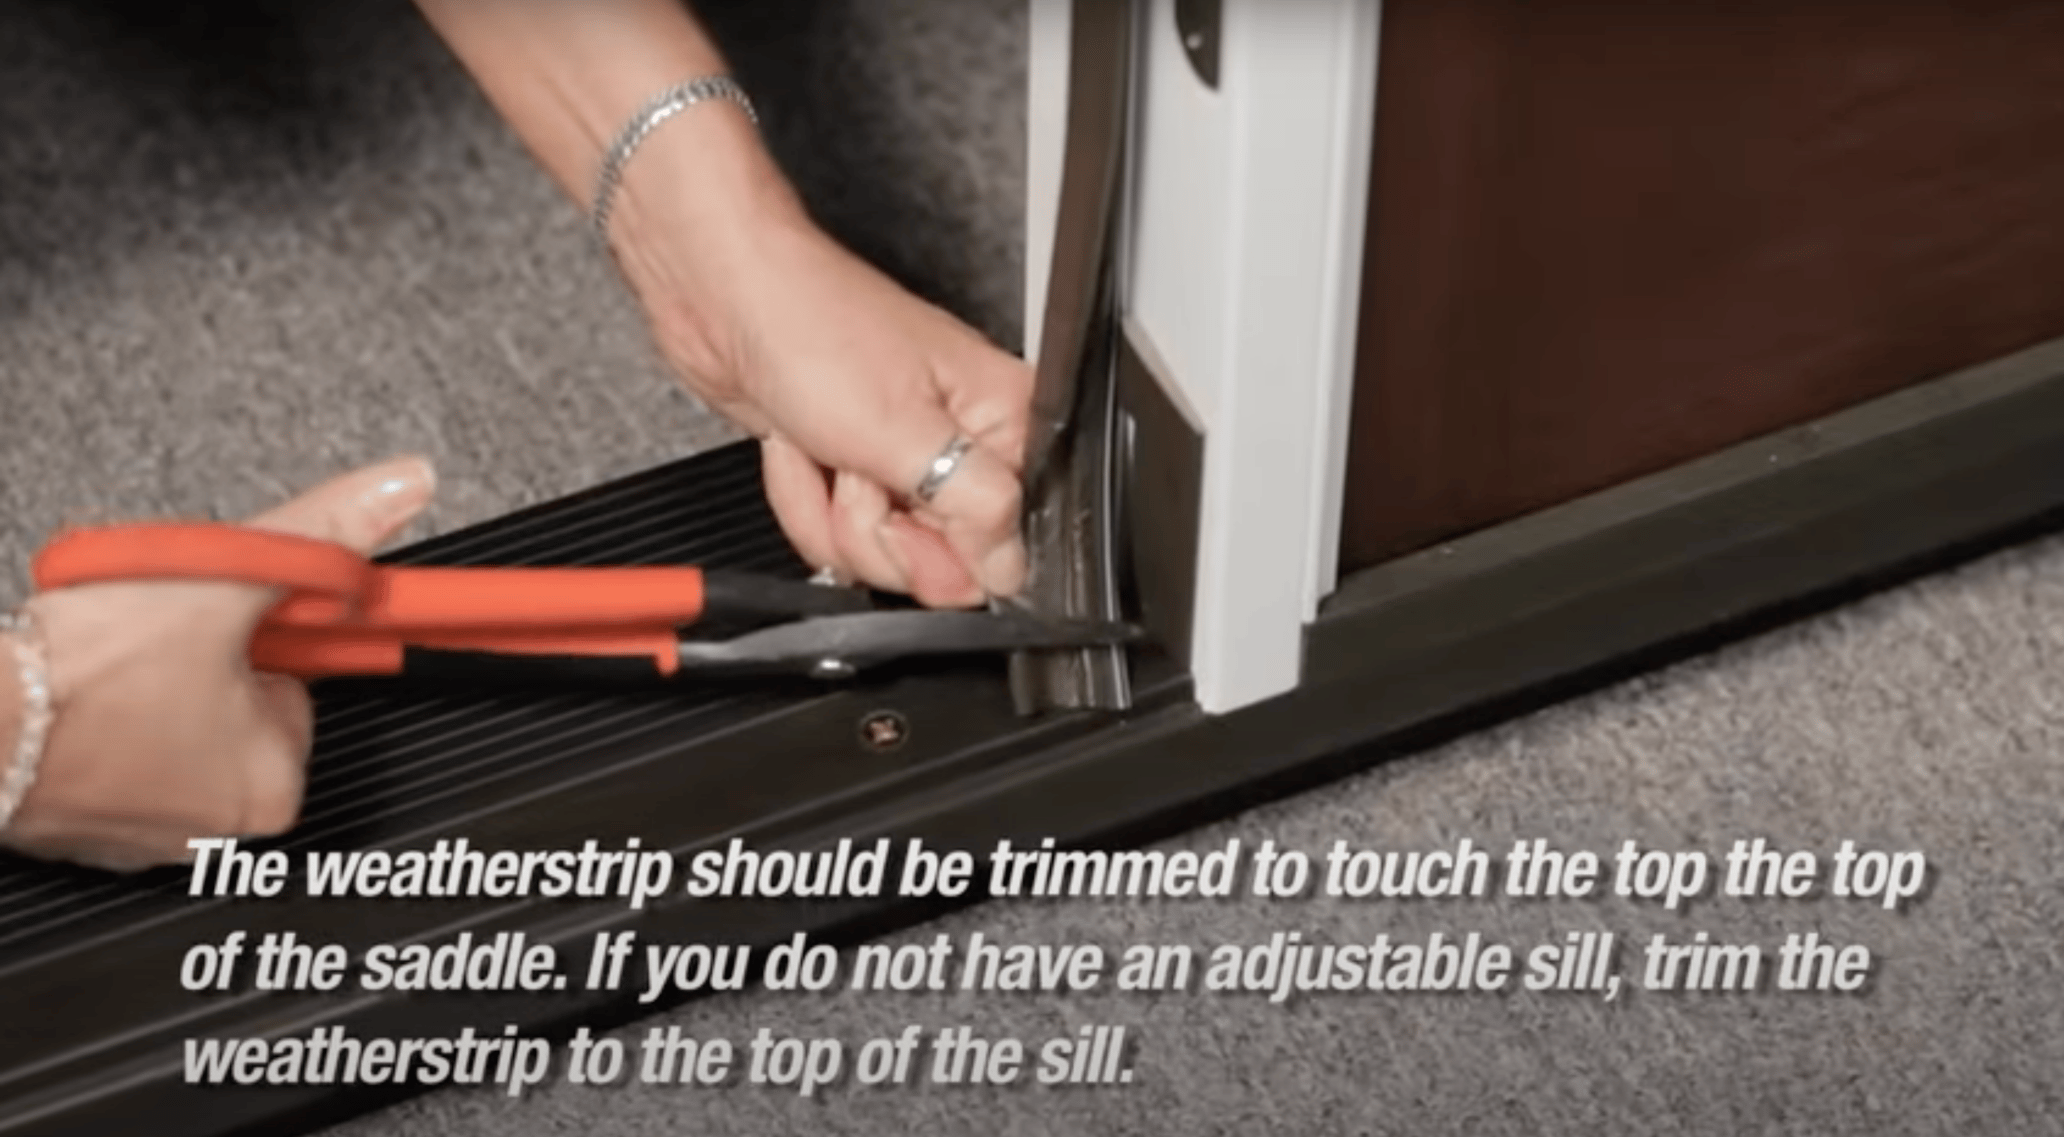
- Measure the Width: Measure the width of the bottom of your door. You’ll want the door sweep to extend across the entire width.
- Cut the Sweep: If your door sweep isn't already the correct size, use a utility knife (or even a hacksaw if it's a sturdier material) to cut it to the measured width.
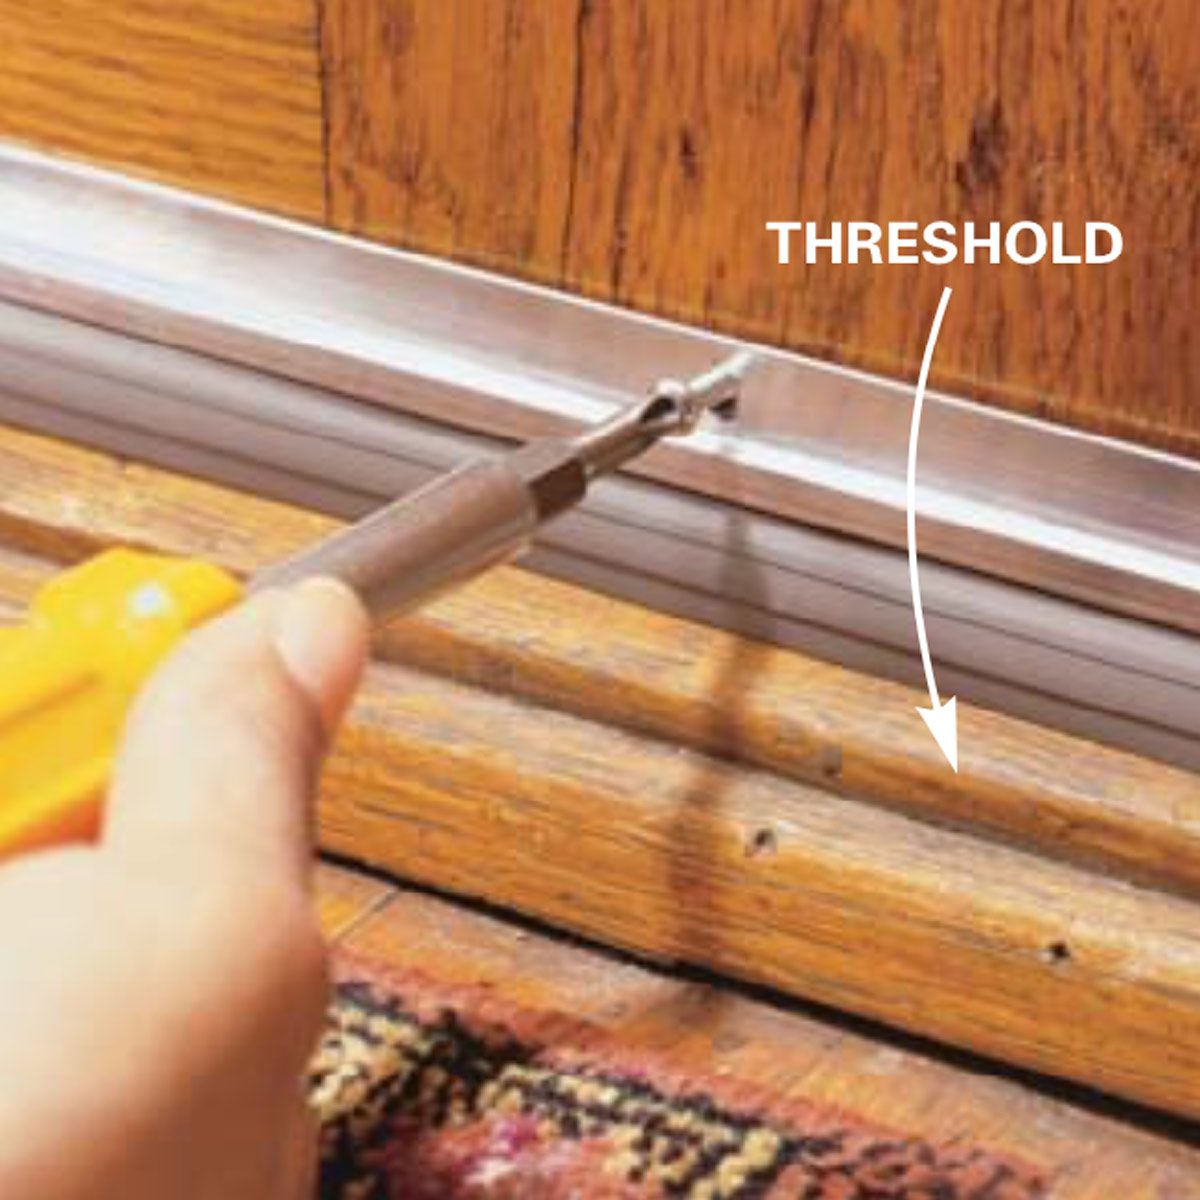
- Attach the Sweep: Depending on the type, this will either involve screwing it directly to the bottom of your door (make sure it clears the threshold when opening and closing!) or sliding a "door shoe" onto the bottom edge. Position it so the rubber or bristles just barely brush against the floor or threshold when the door is closed. This creates that perfect seal without dragging too much.
Pro Tips & Finishing Touches
A few extra nuggets of wisdom, just because we’re friends:
- Test It Out: Once everything is installed, close your door and really feel around the edges. Do you still feel a draft? If so, you might need to adjust a strip or add a small piece where there’s a gap.
- Light Test: For an extra-super-sleuth test, wait until dark and have someone shine a flashlight from outside while you’re inside. If you see light peeking through, that’s your target for adjustment!
- Don’t Overdo It: Weather stripping should create a seal, not make your door impossible to close. If you’re struggling to latch the door, you might have too much or too thick a strip.
You Did It! (The Grand Finale)
And there you have it, you magnificent DIY wizard! You’ve just successfully weather stripped a door. Take a moment to bask in the glow of your accomplishment. Your home is now a fortress against drafts, a beacon of coziness, and your wallet will silently thank you with every lower energy bill.
So go ahead, put on your comfiest socks, make a cup of your favorite hot beverage, and enjoy the blissful warmth (or cool crispness!) of your newly sealed sanctuary. You're not just handy, you're a home comfort superhero. Now, wasn't that a breeze? (Pun absolutely intended!)