Ever dreamed of being a home hero, saving money, and enjoying ultimate comfort, all with a few simple steps? Well, get ready, because we're diving into the wonderfully practical world of tuning up your AC unit! It might sound daunting, but trust us, it's one of those DIY tasks that's not only incredibly useful but also surprisingly satisfying. Imagine feeling that perfectly crisp, cool air on the hottest summer day, knowing you played a direct part in making your home an oasis. Plus, who doesn't love the idea of lower energy bills and a happier, longer-lasting air conditioner?
The purpose of a regular AC tune-up is simple: it’s about making your unit run as efficiently and effectively as possible. Think of it like taking your car in for an oil change; you wouldn’t skip that, right? Your AC is a workhorse, especially during peak seasons, and without a little TLC, it can start to falter. The benefits are massive: you'll enjoy better cooling performance, significantly lower energy bills (a dirty AC works harder, guzzling more electricity), improved indoor air quality, and a drastically extended lifespan for your entire system. It’s a win-win-win!
Ready to get started? Grab your toolbox (and maybe a good podcast!), because here’s your fun and easy guide to a DIY AC tune-up:
1. Safety First! Power Down!
This is the most crucial step. Before you touch anything, locate the circuit breaker that controls your AC unit and flip it off. For outdoor units, there might also be a disconnect switch near the unit itself. Always double-check that the power is completely off before proceeding. Safety is non-negotiable!
2. Filter Fun: The Breath of Fresh Air
Head indoors to your furnace or air handler and locate the air filter. Is it caked with dust bunnies? Probably! A dirty filter chokes your system, making it work overtime. Replace disposable filters every 1-3 months (or more often if you have pets or allergies). If you have a washable filter, give it a good clean according to manufacturer instructions. This simple step alone can make a huge difference in efficiency and air quality.
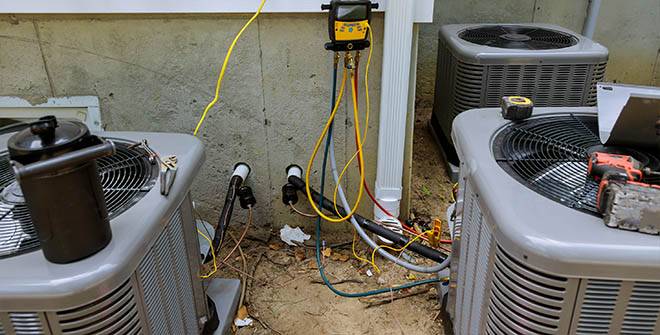
3. Outdoor Oasis: Give Your Condenser a Bath
Now, venture outside to your condenser unit (the big boxy one). Over time, leaves, grass clippings, and dirt can clog the delicate fins. Carefully use a soft brush or a gentle stream from your garden hose (spraying downwards, not directly into the fan motor) to clean off any debris from the sides. You want those fins to be sparkling clean so your unit can release heat efficiently. Also, clear away any plants or obstructions for at least two feet around the unit to ensure proper airflow.
4. Drain Line Detox: Prevent Potential Puddles
Inside, near your indoor unit, you’ll find a drain pan and a PVC drain line. This line removes condensation from your system. Over time, algae can build up, leading to clogs and water leaks. To prevent this, carefully pour a cup of distilled vinegar (not bleach, as it can damage components) down the access opening of the condensate drain line. This will help clear out any potential blockages and keep things flowing smoothly.
5. Final Check and Restart
Once you’ve completed these steps, do a quick visual inspection. Make sure all panels are securely fastened and there are no obvious loose wires or damaged components (if you spot anything major, it's time to call a professional!). Then, head back to your breaker box and restore power to your AC unit. Listen for that familiar hum and feel the cool air start to flow. You've done it!
Performing these few simple maintenance tasks can save you money, extend the life of your AC, and ensure your home stays beautifully cool all season long. You'll not only enjoy a more comfortable living space but also the undeniable satisfaction of being a true home hero. Give your AC the love it deserves, and it will return the favor with cool, refreshing air!