Let's Banish Those Sneaky Drafts!
Ever feel a sudden, icy kiss from an unseen force near your window? That, my friends, is a draft, and it's time for a playful, yet powerful, intervention! Get ready to become a bona fide Draft Destroyer and transform your chilly panes into fortresses of fabulous warmth.
We’re about to embark on an epic quest, armed with simple tools and a sprinkle of DIY magic. No more shivers, just pure, unadulterated snuggle factor! Let’s turn those frosty whispers into a distant, defeated memory.
Mission 1: The Caulk Crusaders (For Stationary Gaps!)
Your Arsenal for Caulk
First up, we tackle those pesky, unmoving gaps around your window frame. Think of them as tiny escape routes for your precious warmth! You'll need a caulk gun, a tube of all-purpose caulk (acrylic latex with silicone is a great choice!), a utility knife or sharp scissors, and a damp cloth for cleanup.
Imagine your caulk gun as a trusty steed and the caulk tube as your secret weapon. Prepare for battle!
The Caulk Reconnaissance Mission
Before you dive in, become a draft detective. Run your hand around the entire window frame, feeling for any chilly breezes. Pay extra attention to where the frame meets the wall, or where different parts of the frame join.
Mark these spots with a little piece of painter's tape if you need a reminder. No draft shall escape your keen eye!
Wielding Your Caulk Gun Like a Pro
Are you ready to perform surgery on your caulk tube? Snip that tip at a jaunty 45-degree angle, making sure the opening is just big enough to fill your detected gaps. Load the tube into your caulk gun; it should click right into place with a satisfying thud.
Now, practice! Squeeze the trigger gently until the caulk starts to ooze out like magic toothpaste. You want a steady, even flow.
Angle the gun so the tip is always pushing the caulk into the crack, not just laying it on top. Move smoothly and steadily, like an artist painting a perfect line. Think of it as creating a beautiful, air-tight seal, a little barrier against the frosty outside world!
If you mess up, no worries! That damp cloth is your superhero cape. Just wipe away the excess before it dries. Precision comes with practice, so don't be afraid to try.
Pro Tip for Caulk Confidence: If your caulk line isn't perfectly smooth, immediately run a damp finger (or a fancy caulk tool!) along it. It's like giving your caulk a high-five and telling it, "You look great!"
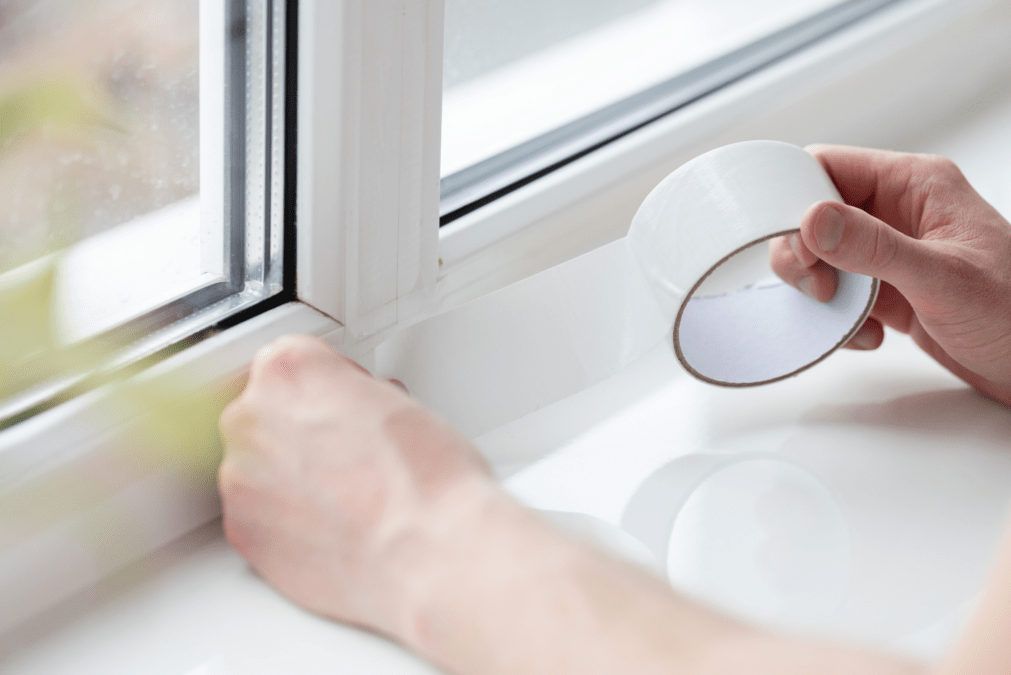
Mission 2: Weatherstripping Warriors (For Moving Parts!)
Gathering Your Weatherstripping Wonders
Next up, let's tackle those parts of the window that actually move, like where the sashes meet the frame. These are often prime culprits for letting in rogue drafts! We’re talking about weatherstripping, your flexible friend.
You’ll want self-adhesive foam strips or V-strips. Grab a measuring tape, some sharp scissors, and cleaning supplies (like rubbing alcohol or window cleaner).
Prepping the Battlefield
Before you apply anything sticky, make sure the surfaces are squeaky clean and dry! Any dust or grime will make your weatherstripping less effective, like trying to stick a sticker onto a crumbly cookie.
Give those window frames a good wipe down. A clean surface is a happy surface, ready to hug your new weatherstripping tightly.
The Art of Application
Measure the length of the gap you want to seal. Then, cut your weatherstripping a tiny bit longer, just to be safe. Peel back the adhesive backing a little at a time, like you're unwrapping a delicious treat.
Carefully press the weatherstripping firmly into place. For foam strips, put them on the sash where it meets the frame when closed. For V-strips, apply them to the side of the window frame, with the "V" facing outwards so the window sash compresses it when closed.
Make sure there are no gaps or wrinkles; you want a continuous, snug seal. Open and close your window a few times to test it out. Does it feel tighter? Did the draft disappear? Victory!
A Weatherstripping Revelation: "With every inch of weatherstripping, you're not just sealing a gap; you're building a tiny, invisible force field against the tyranny of the cold!"
Mission 3: Shrink Film Superheroes (For Total Window Domination!)
Your Shrink Film Stash
For a full-on draft obliteration, especially if your window is a serial offender, window shrink film kits are your secret weapon! These kits usually come with a plastic film, double-sided tape, and clear instructions. You'll also need a trusty hairdryer.
Think of this as giving your window an invisible, cozy sweater. You won’t even know it’s there, but your body will certainly thank you!
Taping Up a Storm
First, clean the window frame meticulously. Again, dust is the enemy of sticky things! Once it’s sparkling clean and dry, apply the double-sided tape provided in your kit around the entire perimeter of the window frame.
Be precise and make sure the tape is flat and smooth. This is the foundation of your cozy window fortress!
The Film Unfurling Frenzy
Carefully unroll the plastic film and press it onto the top strip of tape first. Then, slowly unroll it downwards, pressing it onto the side tapes as you go. You want the film to be as taut as possible, but don't pull so hard it rips!
Try to minimize wrinkles at this stage. It’s like trying to put a giant sticker on perfectly. Take your time, superhero!
The Hairdryer Magic Show
Now for the truly enchanting part! Grab your hairdryer and set it to a warm, gentle setting. Start moving the hairdryer slowly across the film, holding it a few inches away. Watch in awe as the film magically shrinks and tightens before your very eyes!
Wrinkles will smooth out, and the film will become taut and virtually invisible. It’s like performing a magic trick, turning a baggy plastic sheet into a clear pane of glass.
Hairdryer Wizardry Unleashed: "As the hairdryer hums, feel the power! You're not just shrinking plastic; you're *conjuring coziness* right before your very eyes!"
Mission 4: Rope Caulk Rebels & Draft Stopper Dynamos (Quick Fixes!)
The Mighty Rope Caulk
Need a super-fast, super-easy fix? Enter rope caulk (sometimes called Mortite). It looks like a long, soft piece of chewing gum, but it’s actually a fantastic temporary sealant.
Simply unroll a length, pull off a piece, and press it firmly into any gaps around your window sash or frame. No tools needed, just your awesome fingers! It’s perfect for renters or anyone who wants a quick, seasonal solution.
The Snazzy Draft Stopper
For drafts sneaking in from the bottom of your window, especially where the sills meet, a draft stopper is your friend! These are those charming, snake-like fabric tubes, often weighted, that you simply place at the base of your window.
They look cute, they add a touch of decor, and most importantly, they block those sneaky floor-level drafts. It’s the ultimate easy-peasy draft deterrent!
An Ode to Instant Coziness: "With rope caulk and draft stoppers, you're not just sealing; you're declaring an immediate, joyful cease-fire on all cold intrusions! Instant snuggle status achieved!"
Your Coziness Conquest!
Phew! You've done it! You’ve taken on those sneaky drafts and emerged victorious. Your windows are now guardians of warmth, and your home is officially a cozy kingdom. Take a moment to bask in the glow of your newfound warmth and congratulate yourself.
No more shivering, no more surprise chills, just pure, unadulterated comfort. Enjoy your wonderfully sealed, delightfully warm haven!