Hey there, DIY superstar! Ever stared at a blank patch of wall and thought, "Gee, a plug here would be just peachy"? Maybe you've got a lamp that's always stretching its cord like it's doing yoga, or a gadget that's constantly running on fumes because the nearest outlet is miles away. Well, guess what? Putting in a wall outlet isn't some mystical dark art reserved for electricians in capes. It's totally something you can learn!
Now, before we dive in, let's get something straight: we're talking about electricity here. It's super useful, but it also likes to remind us who's boss if we're not careful. So, safety isn't just a suggestion; it's our BFF for this project. Think of me as your cheerleading, slightly-nervous-about-shocks friend, guiding you through!
First Things First: Gather Your Crew (aka Tools & Supplies)
You wouldn't go to battle without your trusty sword, right? Same deal here. Here’s what you’ll want to have on hand:
- A new outlet (standard 15-amp, probably) and a matching faceplate.
- An old-work electrical box. These are super handy because they have little wings that clamp onto your drywall. No need to mess with studs!
- A voltage tester (non-contact is easiest and safest). This is your personal "is it off?" detective.
- A screwdriver set (flathead and Phillips).
- Wire strippers. These make wiring a breeze.
- A utility knife or a drywall saw.
- A pencil and a tape measure.
- Electrical tape (just in case!).
- A drill (optional, but helpful for pilot holes).
- And, of course, a big ol' dose of confidence!
Step 1: Operation "Lights Out!" (Seriously, Turn Off the Power)
This is the most important step. March on down to your electrical panel (that big metal box, usually in the basement, garage, or a utility closet). You need to find the breaker that controls the area where you're working. If you're unsure, or you live in a house built by gnomes with a mysterious electrical system, just flip the main breaker. Yes, the whole house goes dark. It's like a fun camping trip, but indoors!
Once you've flipped the breaker, grab your voltage tester. Go to an existing outlet nearby (or wherever you plan to tap into power) and test it. No beep? No light? Good. You're safe. Still beeping? Uh oh, wrong breaker. Back to the panel!
Step 2: Choosing Your Spot & Making the Cut
Pick the perfect spot for your new outlet. Make sure it's not directly above or below an existing outlet if you're trying to avoid a stud (most outlets are mounted to studs, but you're using an old-work box for a reason!). Use a stud finder if you have one, just to be extra sure. Generally, outlets are 12-18 inches from the floor, but you do you!
Now, take your new electrical box. Place it against the wall where you want it and trace around it with your pencil. This is your "cut line." Carefully use your utility knife or drywall saw to cut out the traced rectangle. Be precise, but don't fret too much if it's not perfect – the faceplate hides a multitude of sins!
Step 3: Fishing for Wires (The "Where Did That Come From?" Part)
Okay, this can be the trickiest part, especially if you're tapping into an existing circuit that's a few feet away. You need to get an electrical cable (typically 14/2 or 12/2 Romex, depending on your circuit's amperage) from an existing power source (like a nearby outlet or light switch box) to your new hole.
You might need to use a "fish tape" or just be creative with a stiff wire to guide the cable through the wall cavity. If you're lucky, there's already some slack or an easy path. Always ensure the power is off when connecting or disconnecting wires from an existing box! Pull enough wire through your new hole to give you about 6-8 inches of slack to work with. Think of it like giving yourself room to tie a fancy knot!
Step 4: Wiring Up Your New Best Friend (The Outlet)
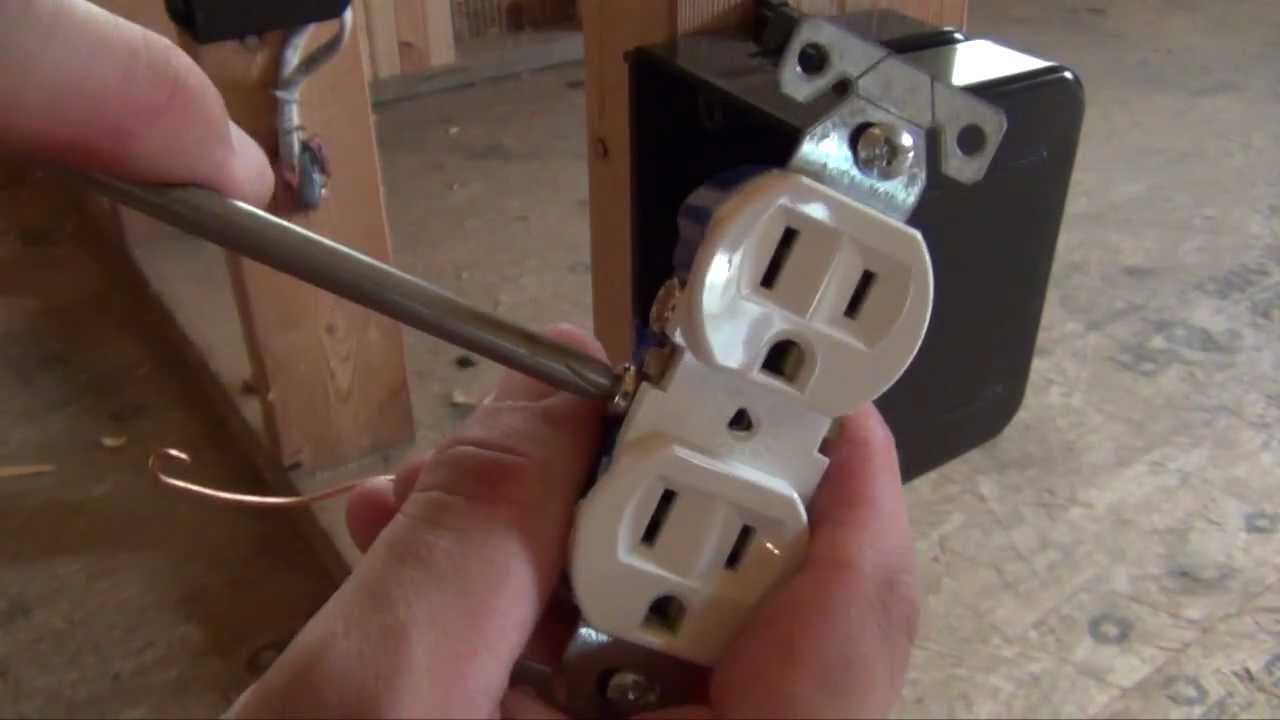
Now for the main event! Take your wire strippers and carefully remove about 3/4 inch of insulation from the ends of the three wires inside your cable:
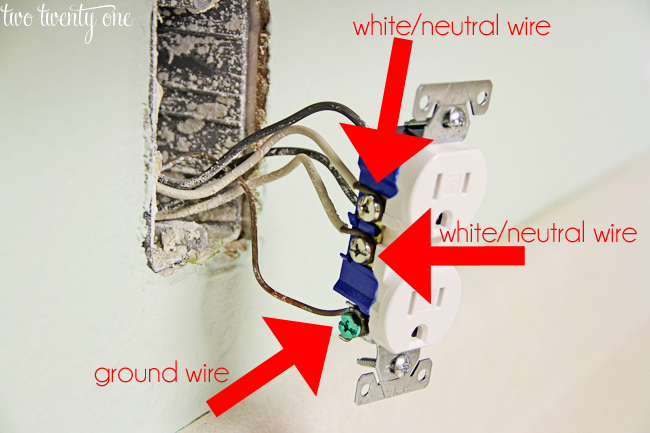
- Black wire: This is your hot wire. It goes to the brass (gold) screw on the side of the outlet.
- White wire: This is your neutral wire. It goes to the silver screw.
- Bare copper (or green) wire: This is your ground wire. It goes to the green screw.
Bend each wire end into a small hook shape with your pliers. Loop it clockwise around the corresponding screw and tighten it down firmly. Make sure no bare wire is sticking out from under the screws. If you have any extra bare copper from the cable jacket, wrap it with electrical tape for good measure.
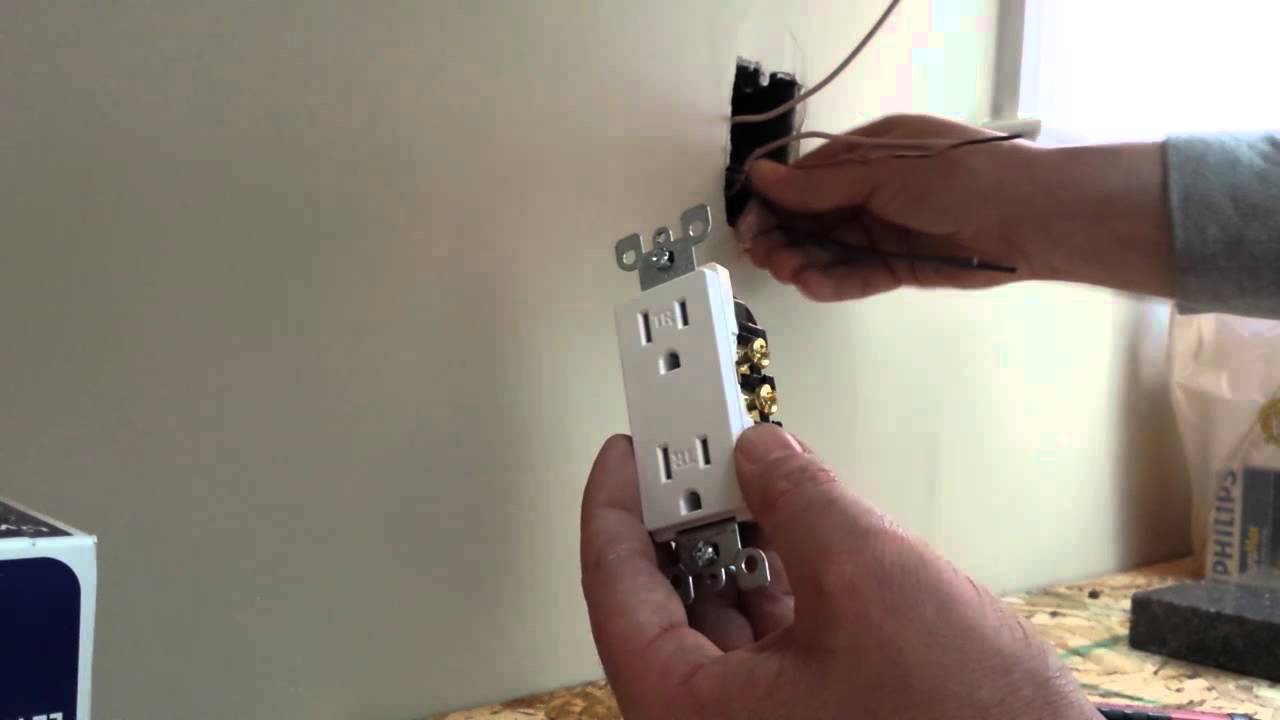
Step 5: Mounting and Final Touches
Gently fold the wires back into the electrical box. Push the box into the hole you cut. Those handy little wings on the old-work box? They'll have screws you tighten, which makes them pivot and clamp onto the drywall, securing the box firmly in place. Tighten 'em up!
Now, screw your new outlet into the electrical box. Don't overtighten; just snug. Attach the faceplate, and marvel at your handiwork. It's looking good!
Step 6: The Moment of Truth (Power On & Test)
Head back to the breaker panel and flip that breaker back on. Walk over to your new outlet, plug something simple in (like a lamp or a phone charger), and... VOILA! Let there be power! Give yourself a high-five, a fist pump, or even a little happy dance. You just brought electricity to life (safely, might I add)!
You Did It!
See? That wasn't so scary, was it? You just tackled a home improvement project that many shy away from. You've learned new skills, saved some money, and now have a perfectly placed outlet that's ready to serve all your plugging-in needs. Go forth and power your world, one perfectly installed outlet at a time. Who knew you had an inner electrician just waiting to shine? Keep that DIY spirit glowing!
:max_bytes(150000):strip_icc()/tips-for-wiring-outlets-and-switches-1824668-hero-5c1c9847042c4caa9397bf5caa3d9661.jpg?strip=all)