Alright, folks, let's talk base molding. You know, those unsung heroes that run along the bottom of your walls, giving your room that nice, polished, "I actually tried" look. They're like the socks of your walls – without them, things just feel a little… unfinished, a bit exposed, and frankly, some gaps are just begging for a baseboard to come along and cover their shame. Installing them might sound like a big, scary DIY project, but trust me, it’s more like a puzzle with some power tools involved. And who doesn't love a good puzzle, especially one that ends with a prettier room?
Ever stared at that tiny, embarrassing gap where your wall meets the floor? Or perhaps a slightly larger, more defiant gap that screams, "I am a house built by mere mortals!" Base molding is here to save the day, to put a lovely ribbon on your room, and to hide all sorts of little imperfections that would otherwise stare back at you every single morning. It’s the architectural equivalent of a good concealer, and we all need that sometimes, right?
Gather Your Troops (a.k.a. Tools)
First things first, let’s talk about your arsenal. You don't need to be a seasoned contractor, but a few key players will make your life a whole lot easier. Think of it as assembling your Avengers team:
- A miter saw: This is your Iron Man. It's the star of the show for those perfect angled cuts. If you don't own one, consider renting or borrowing. Just make sure you get a quick tutorial – it's less scary than it looks, promise!
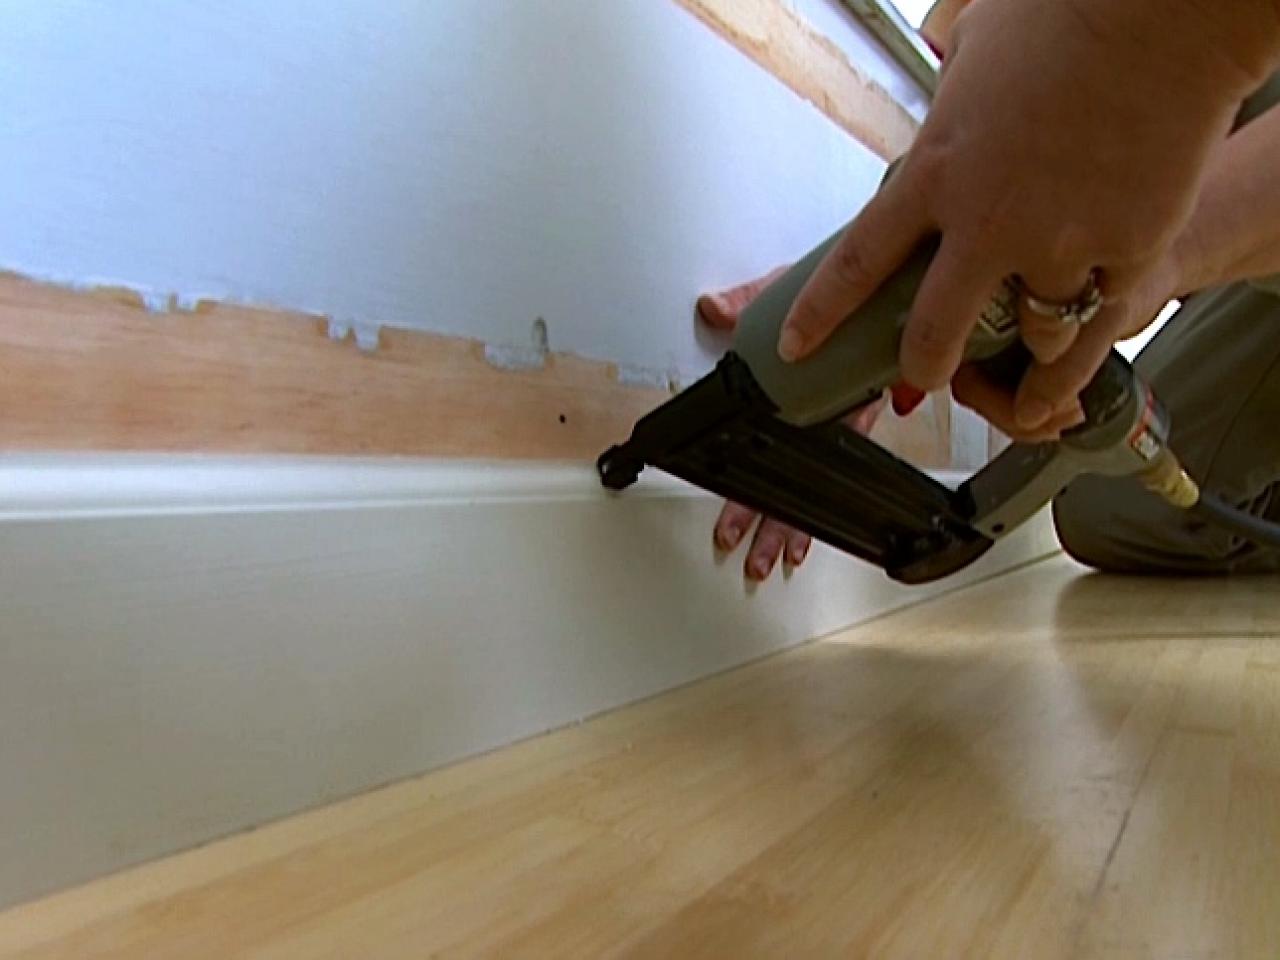
- A nail gun: Your Thor. Powerful, satisfying, and makes quick work of fastening. A finish nailer is ideal. The satisfying *thwack* sound is strangely therapeutic.
- A good old tape measure: Your Captain America. Reliable, essential, and always there to back you up. Just try not to lose it every five minutes, like I do.
- A stud finder: Your Hawkeye. Locates the hidden framework in your walls for secure nailing. Beeps are your friend.
- A caulk gun and caulk: Your Black Widow. Smooth, subtle, and fills in all the little gaps beautifully. More on this magic potion later.
- Safety glasses: Your Nick Fury eye patch, but for both eyes! Absolutely non-negotiable. Protect those peepers!
- And of course, the base molding itself! Don't forget the main character.
The Groundwork (Preparation is Key!)
Before you unleash your inner carpenter, take a moment to prep. Clear the room like you're preparing for a dance-off. Move furniture, roll up rugs – give yourself space to work. It’s like trying to find a clear spot on your teenager's floor; sometimes you just gotta make room.
Now, for the fun part: measuring. This is where the old adage, "measure twice, cut once" truly shines. Or, if you're me, "measure twice, cut once, realize you messed up, measure again, cut again, then buy more wood." Don't be shy with your tape measure. Get those numbers right. Sketch out your room if it helps, noting lengths and corner types.
Next up, use your stud finder. Mark those studs lightly with a pencil along the bottom of your wall. These are the anchors for your nails, giving your baseboards something solid to hold onto. It's like finding the skeleton of your house – fascinating, and crucial.
The Great Angle Adventure (Cutting!)
This is where the miter saw truly earns its keep. Most corners in a room are 90-degree angles. To make your baseboards meet snugly, you'll be cutting them at a 45-degree angle. Imagine a pizza slice – you want the crusts to meet perfectly. For an outside corner (think of a wall that juts out), both pieces will be cut at 45 degrees, one facing left, one facing right, so they form a crisp point.
For an inside corner (where two walls meet inward), you have a couple of options. You can do two opposing 45-degree cuts, just like the outside corner, but this can sometimes leave a small gap. The more pro (and slightly more involved) method is called coping. This is where you cut one piece straight and then essentially jigsaw the end of the second piece to perfectly fit the profile of the first. It’s a bit like creating a custom puzzle piece. But honestly, for your first rodeo, two 45s for inside corners, with a little help from caulk later, will often look just fine!
Pro tip: Always do a test cut on a scrap piece of molding first. It's like a dress rehearsal for your cuts. Better to waste a small scrap than a long, beautiful piece.
Nail It Down (Installation Time!)
Alright, you've got your perfectly cut pieces. Now it's time to bring them home. Start with your longest straight wall. Place a piece of molding against the wall, lining it up with your pencil marks for the studs. Then, using your nail gun, drive nails into the molding where you marked those studs. Aim for a nail near the top and one near the bottom of the molding for each stud. Hear that satisfying *thwack*? That’s the sound of progress, my friend.
When you get to the corners, fit your pre-cut pieces together. It’s a moment of truth, like assembling a particularly tricky Lego set. If your cuts were good, they should meet beautifully. Don't worry if there are tiny, tiny gaps. This is where our secret weapon, caulk, comes in. It’s like the makeup for your walls, filling in all those small imperfections and making everything look seamless and professional.
Continue around the room, one wall at a time, until all your baseboards are installed. When you need to join two pieces of molding on a long wall (because your wall is longer than a single piece of molding), you can do a scarf joint. This is two 45-degree cuts facing the same direction, overlapping each other. It creates a stronger, less noticeable seam than a simple butt joint.
The Grand Reveal (Finishing Touches)
Once all your molding is nailed in, grab that caulk gun. Run a thin bead of caulk along the top edge where the molding meets the wall, and along any internal corners that have small gaps. Smooth it out with a wet finger or a caulk tool. Caulk hides a multitude of sins, trust me. It’s your best friend for a flawless finish.
After the caulk dries, it's time to paint! If your molding isn't pre-primed or pre-painted, give it a good prime, then apply your chosen paint color. This is where all your hard work truly pays off. The fresh coat of paint will make everything look crisp and new.
Step back. Take it all in. You just installed base molding! It might not be "perfect" by professional standards, but it’s *yours*, and it looks fantastic. You've added character, covered those pesky gaps, and given your room a sophisticated, finished feel. Now go forth and conquer your next DIY adventure – perhaps tackling crown molding? (Just kidding... unless you're feeling brave!)


:strip_icc()/placing-white-trim-against-wall-c8fa06d8-bcaf091f30ef4488abf959f7f58c519a.jpg)