Ever been there? You're cruising along, living your best life, maybe rearranging the furniture, and BAM! You hear that dreaded *snip*. Or maybe it was a curious pet, a rogue vacuum cleaner, or just plain old clumsiness. Suddenly, your beloved lamp, your trusty blender, or that essential phone charger is staring at you with a forlorn,
Think about it. In a world full of disposable everything, wouldn't it be awesome to actually fix something? To breathe new life into an item that's perfectly good, save a few bucks, and keep a little less waste out of our overflowing planet? Plus, there's just something incredibly satisfying about looking at a working appliance and thinking, "I did that!"
Why Bother? Beyond Just Saving a Buck!
Okay, sure, saving money is a big one. Power cords can be surprisingly expensive to replace, especially for specific appliances. But honestly, the real win here is the massive boost to your DIY confidence. Once you tackle a simple cord repair, you start looking at other household quirks with a new eye. "Can I fix that leaky faucet?" "What about that wobbly chair?" Suddenly, a world of possibilities opens up!
It's also a small act of rebellion against planned obsolescence. Why buy new when a little elbow grease (and some electrical tape) can make the old good as new? You're not just fixing a cord; you're cultivating a mindset of resourcefulness and problem-solving that'll serve you well in all areas of life. Seriously, it's pretty empowering!
Is It for YOU? A Quick Reality Check
Before we dive in, a quick safety note: this guide is for relatively low-voltage household items like lamps, small kitchen appliances (blenders, toasters), phone chargers, etc., where the cord is cut but the appliance itself is otherwise sound. We're talking basic two or three-prong cords, not heavy-duty machinery or anything that looks like it belongs in a power plant. If you're dealing with anything that looks *scary*, involves high wattage, or if you're ever unsure, please err on the side of caution and consult a professional or just replace the item. Your safety is always priority number one!
The Mighty Mend: Your Superpower Steps!
Ready to get your hands a little dirty (and totally safe)? Let's go!
Step 1: Unplug, Unplug, UNPLUG! (Seriously!)
This cannot be stressed enough. Before you even *think* about touching that cord, make absolutely certain it's disconnected from the power source. No exceptions! Imagine trying to fix a leaky pipe with the water still on. Same idea, but with electricity. We want sparks of joy, not actual sparks!
Step 2: Gather Your Trusty Tools
You don't need a whole workshop! A few basics will do:
- Wire strippers: These are your best friend. They look like pliers but have different-sized notches for stripping wire insulation without damaging the wires inside.
- Electrical tape: High-quality stuff, please! Not duct tape.
- Wire connectors (optional but recommended): Those little plastic caps that twist onto wires to join them. Or, if you're feeling brave, a soldering iron and heat shrink tubing. For most simple fixes, good old connectors or a careful twist-and-tape will work.
- A utility knife or strong scissors: For cutting away damaged cord sections.
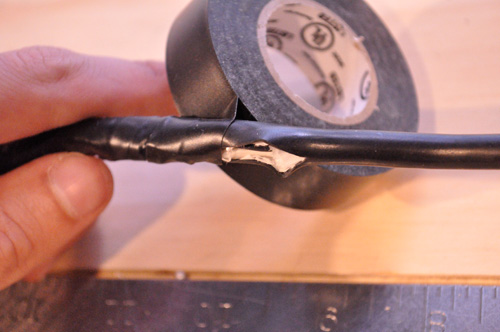
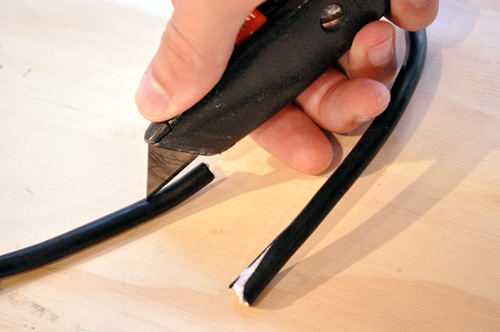
Step 3: Assess the Damage and Make a Clean Cut
Is it a clean snip, or a frayed, mangled mess? Whatever the situation, your first move is to cut out the damaged section entirely. Use your utility knife or strong scissors to make a clean, straight cut on both sides of the damaged part. You want crisp ends to work with, not a rat's nest. Remember, we're aiming for a strong connection here!
Step 4: Strip Those Wires!
Now for the fun part! Gently strip about half an inch to an inch of the outer insulation from both ends of the two pieces of cord you just cut. Inside, you'll likely see two or three smaller, insulated wires (a "hot" wire, a "neutral" wire, and possibly a "ground" wire). Carefully strip about half an inch of insulation from the ends of these smaller wires too. Be gentle! You don't want to nick the copper strands inside.
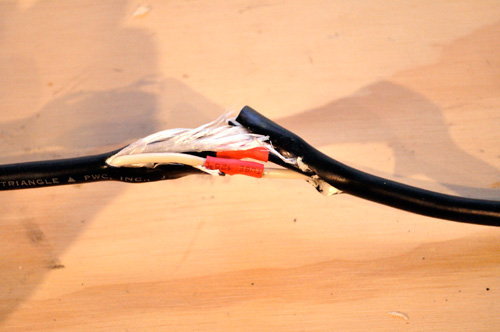
Step 5: Connect 'Em Up!
This is where the magic happens. You need to connect the *matching* wires from each side of the cut cord. Typically, colors will match (e.g., black to black, white to white, green to green). Twist the exposed copper strands of matching wires tightly together. If you have wire connectors, twist them onto the twisted wires until they're snug and secure. If you're just using tape, ensure your twist is super tight and neat.
Step 6: Insulate, Insulate, Insulate!
Once your connections are solid, it's time to insulate. Wrap each individual twisted connection with electrical tape, making sure no copper is exposed. Then, gather all the insulated connections together and wrap the entire repair area with several layers of electrical tape. You're aiming for a sturdy, well-insulated, and almost invisible repair. Think of it as giving your cord a cozy, protective blanket!
Step 7: The Moment of Truth (Carefully!)
Plug your newly repaired cord into an outlet. Then, cautiously plug in the appliance. Keep an eye (and ear) out for anything unusual – strange smells, buzzing, or sparks. If all goes well, your appliance should spring back to life! Congratulations, you just saved an item from the landfill and probably your wallet from an unnecessary purchase!
More Than Just a Cord
See? That wasn't so scary, was it? This isn't just about fixing a cord; it's about fostering a mindset. It's about looking at problems as opportunities for learning and growth. It's about empowering yourself to be a little more self-sufficient, a little more resourceful, and a lot more confident in your own abilities. You've now got a practical skill that will save you time, money, and stress, all while giving you that awesome "I fixed it!" feeling.
So, the next time something small breaks around the house, don't automatically reach for your wallet or the trash can. Take a moment, assess the situation, and ask yourself: "Can I fix this?" You might be surprised at what you're capable of. This little power cord fix is just the beginning of your DIY adventures. Go forth, be bold, and mend your way to a more empowered and resourceful life!