Ever walked into a room, glanced up, and thought, "Wait a minute... is that a dust bunny convention happening on my ceiling?" You're not alone! Vent cleaning is one of those often-overlooked chores, like remembering to water the houseplants *before* they dramatically wilt. But just like that refreshed fiddle-leaf fig, a clean vent can seriously uplift your home's vibe and air quality.
Think of your home's vents as the unsung heroes of your indoor climate. They're diligently moving air around, keeping you cozy in winter and cool in summer. But over time, they become silent collectors of dust, dander, pollen, and all sorts of microscopic bits that make up the fascinating world of household dust. And, let's be honest, nobody wants to breathe in yesterday's forgotten snack crumbs and the ghost of pet hair past.
Why Bother? Beyond the Aesthetics
You might be thinking, "Out of sight, out of mind, right?" Wrong! Cleaning your vents isn't just about making your space look Instagram-ready (though it certainly helps). It’s about real-deal benefits for your health and your wallet.
- Breathe Easier: Accumulated dust and allergens in vents can be a nightmare for allergy sufferers and asthmatics. A clean vent means cleaner air circulating through your home, reducing sneezes and sniffles.
- Boost Efficiency: When vents are clogged, your HVAC system has to work harder to push air through. This extra effort can lead to higher energy bills and increased wear and tear on your system. Think of it as your furnace or AC trying to run a marathon with a weighted vest – it's just not efficient!
- Fresher Smells: Dust and grime can harbor odors. Cleaning your vents can contribute to a noticeably fresher-smelling home, helping you achieve that elusive "clean house" scent.
Fun Fact: Did you know that household dust is a complex cocktail of dead skin cells (mostly yours!), pet dander, pollen, textile fibers, insect fragments, and even tiny bits of cosmic dust? Talk about a rich tapestry of life in your living room!
Gather Your Vent-Cleaning Arsenal
Good news: you won't need any fancy gadgets or a degree in HVAC engineering. Most of what you need is probably already lurking in your cleaning caddy or garage:
- A screwdriver (flathead or Phillips, depending on your vent covers).
- A powerful vacuum cleaner with a brush attachment and a crevice tool.
- Microfiber cloths or old rags.
- Warm water and a mild all-purpose cleaner or dish soap.
- A sturdy brush (an old toothbrush or a scrub brush works wonders).
- Optional: A dust mask (if you're particularly sensitive or tackling very dusty vents).
The Easy-Breezy Guide to Sparkling Vents
Step 1: Safety First! Power Down
Before you get started, head to your thermostat and switch your HVAC system to "off." This prevents any surprise drafts and ensures you're not poking around a live system. Safety first, always!
Step 2: The Initial Dust Buster
Grab your vacuum with the brush attachment. Gently vacuum the surface of the vent cover. This will pick up the loose, easy-to-reach dust and prevent it from flying all over the place once you remove the cover. Think of it as a pre-game warm-up.
Step 3: Uncover the Mystery
Using your screwdriver, carefully unscrew the vent cover. Most covers have two to four screws. Place the screws in a small bowl or zip-top bag – trust us, those tiny screws love to play hide-and-seek under the couch.
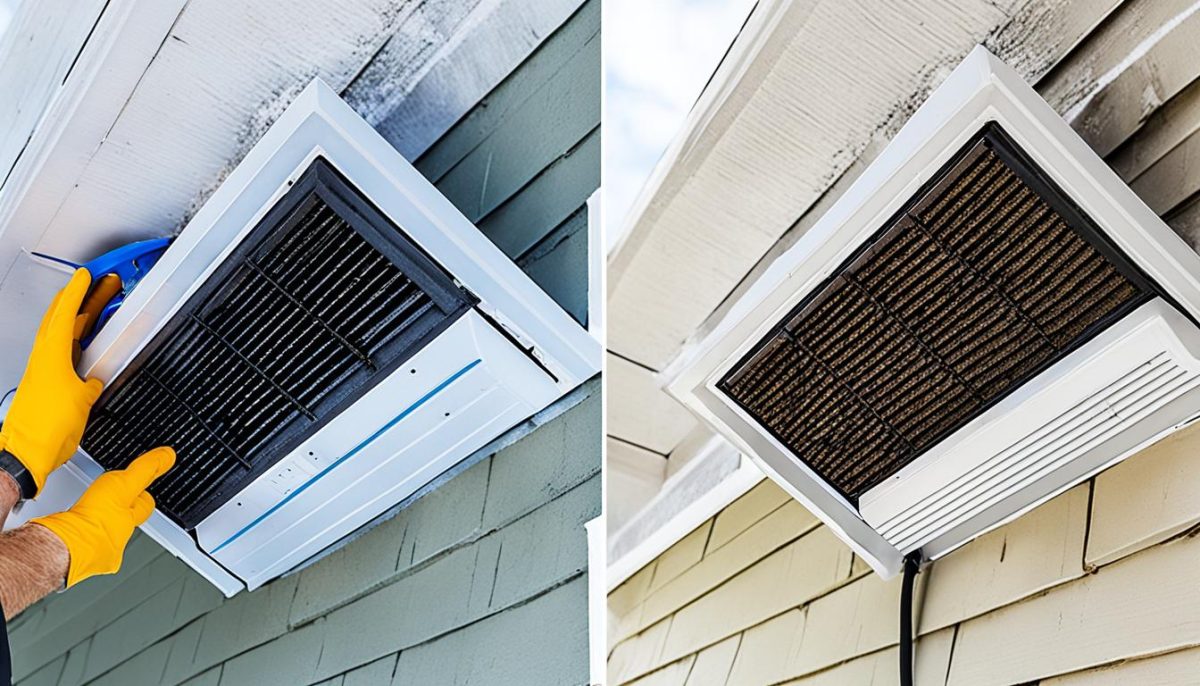
Step 4: A Spa Day for Your Vent Cover
Take the removed vent cover to a utility sink or bathtub. Fill it with warm, soapy water (a squirt of dish soap works perfectly). Let the cover soak for about 15-20 minutes. This will loosen up stubborn grime. Then, use your brush to scrub away any remaining gunk. Rinse thoroughly and let it air dry completely. You can also give it a quick wipe-down with a microfiber cloth to speed up the process.
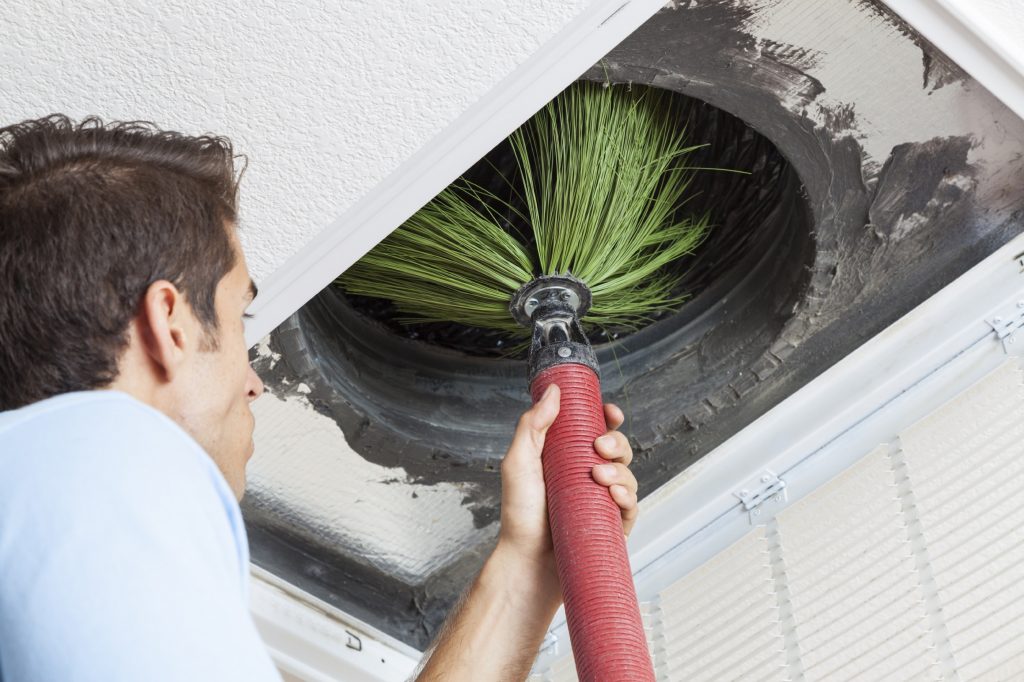
Step 5: Dive into the Duct
Now for the slightly less glamorous part: the inside of the duct. Use your vacuum's crevice tool or a long, slender brush to reach as far as you comfortably can into the ductwork. Be gentle and avoid pushing anything too far in. You're just trying to remove the obvious dust and debris from the immediate opening. If you notice a truly alarming amount of gunk deep inside, it might be time to consider professional duct cleaning.
Step 6: The Grand Finale: Reassembly
Once the vent cover is completely dry, carefully screw it back into place. Don't overtighten the screws – snug is good! Once all the covers are back on, head back to your thermostat and switch your HVAC system back to "auto" or your preferred setting.
Keep the Good Vibes Going: Maintenance Tips
To keep your vents looking and performing their best, aim to do this deep clean at least once or twice a year, especially if you have pets or allergies. In between deep cleans, a quick vacuum with a brush attachment during your regular cleaning routine will make a world of difference. And here's a crucial one: don't forget to regularly change your HVAC air filters! A clean filter helps trap airborne particles before they even reach your vents.
A Little Reflection
Cleaning vents might not be the most glamorous chore on your list, but there's something incredibly satisfying about tackling those often-forgotten corners of our homes. It's a small act of care, not just for your house, but for your own well-being. It’s a reminder that even the invisible details contribute to the overall harmony and comfort of our living spaces. So go ahead, conquer those dusty vents, and enjoy the breath of fresh air – you've earned it!