Hey there! Grab a coffee, pull up a chair. We need to talk about something… epic. You know that heart-stopping moment? Your phone’s at 2%, you’re miles from a wall socket, and the world just decided to end? Yeah, we’ve all been there. It’s an absolute catastrophe, right?
That’s where a power bank swoops in, cape flapping, ready to save your digital life. But what if I told you that you could totally, absolutely, maybe build one yourself? Crazy, I know! But also… kinda cool, right? Like being a tech superhero, but without the spandex.
So, You Wanna Be a Power Bank Architect?
First thought: “Is this even possible?” Second thought: “Am I going to electrocute myself?” Good questions! Let’s tackle them. Yes, it’s absolutely possible. And no, you shouldn't electrocute yourself if you’re careful. Big emphasis on careful there. This isn’t rocket science, but it’s also not, like, baking a cake. There are some spicy bits to consider.
Why would you even bother, though? I mean, you can just buy one, right? True! But where’s the fun in that? Building your own means you get to pick the exact guts, maybe even make it super chunky with enough juice to power a small village (okay, slight exaggeration, but you get the idea). Plus, the bragging rights? Immeasurable.
What Do We Need for This DIY Adventure?
Alright, let’s get down to the nitty-gritty. What do you actually need to turn some random parts into a portable power savior? Think of it like a techie recipe. You need ingredients!
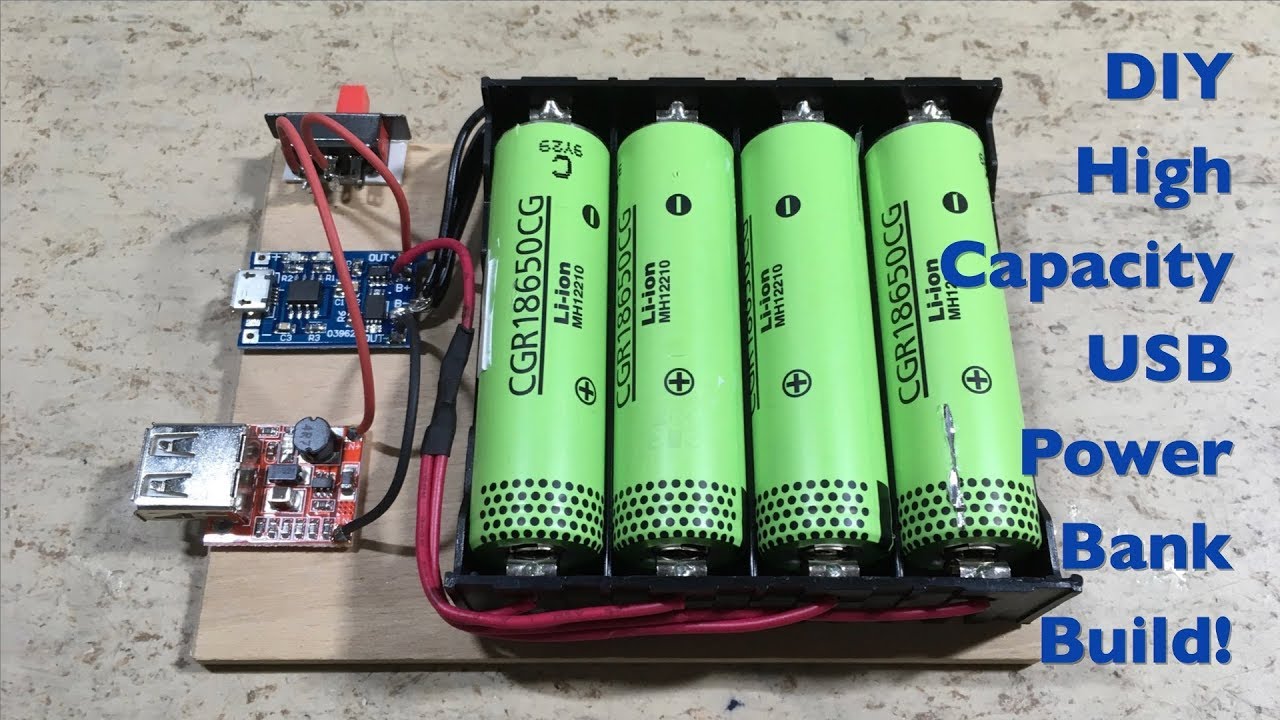
1. The Guts: Batteries!
This is where the magic happens. We’re talking about lithium-ion batteries, typically 18650 cells. You know, those cylindrical ones that look like slightly oversized AA batteries? They pack a punch. But here’s the thing: safety first, always! Seriously, don’t just yank them out of old laptop batteries unless you know what you’re doing and can test their health. Go for reputable new ones. You want good, healthy cells, not sad, wonky ones.
And a quick aside: lithium-ion batteries are amazing, but they demand respect. Treat them right, and they’ll treat you right. Treat them badly… well, let’s not go there. Just be gentle and precise!
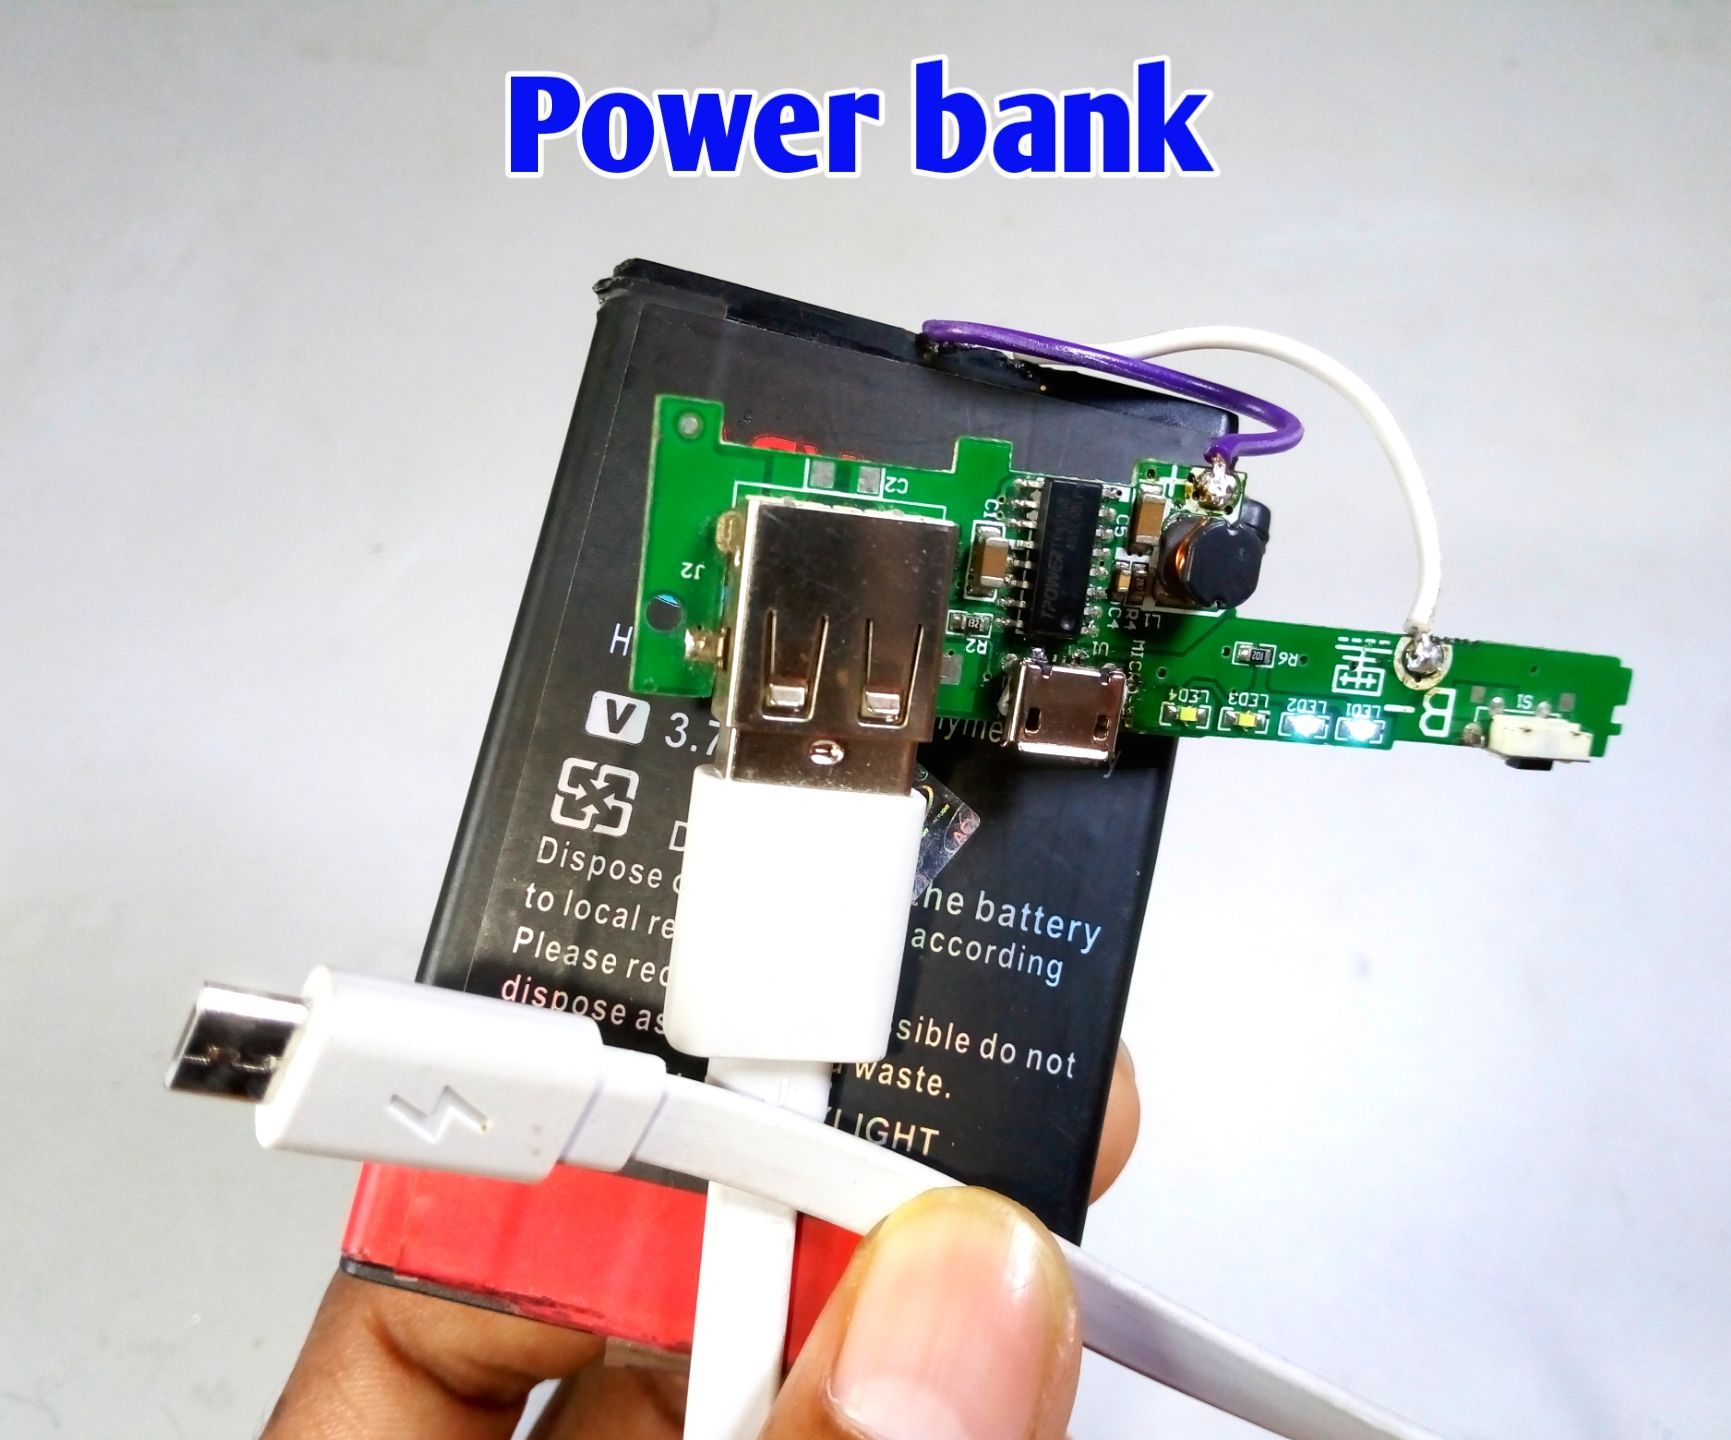
2. The Brains: A Charging/Discharging Module (PCB)
This little circuit board is the unsung hero. It manages everything: making sure your batteries don't overcharge (bad!), don't over-discharge (also bad!), and safely delivers power to your phone. It usually has the USB output ports and micro-USB input for charging the power bank itself. Do not skip this part! It's the "brains" for a reason. Get a good quality one.
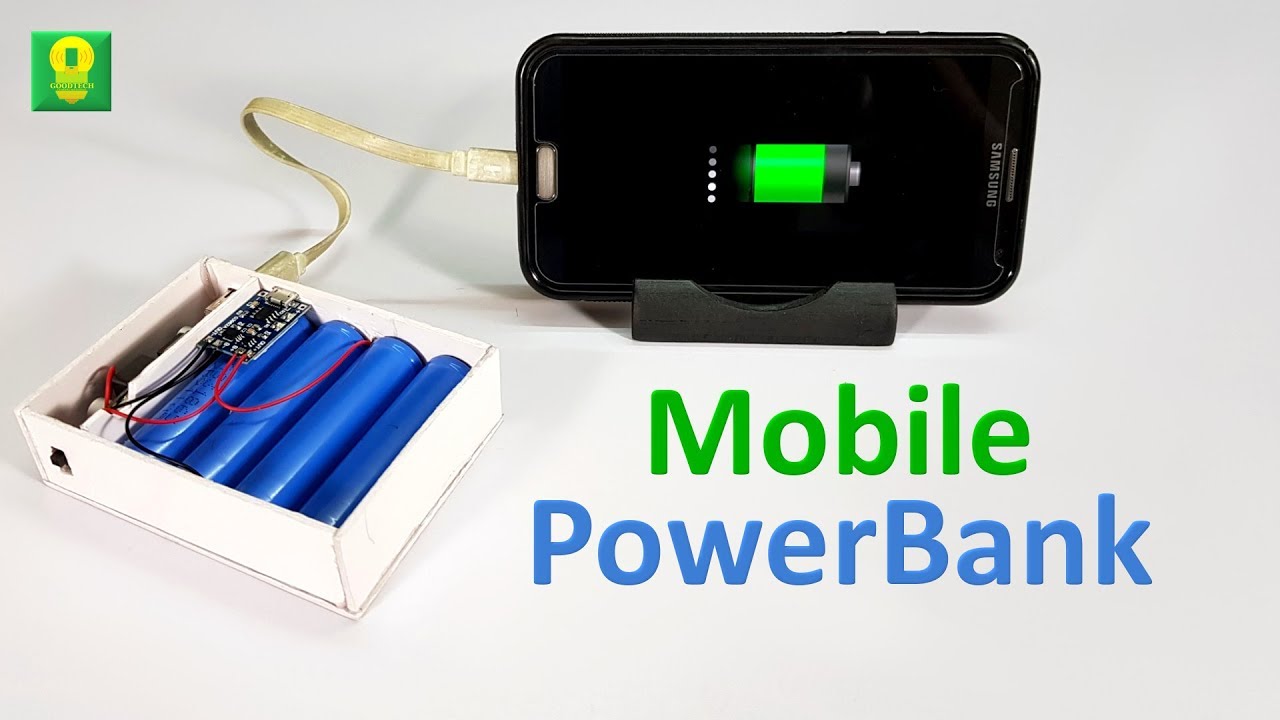
3. The Skin: A Case!
You can buy a ready-made plastic enclosure designed for power banks, which is probably the easiest route. Or, if you’re feeling extra crafty, you could 3D print one, or even fashion something out of wood or sturdy plastic. The point is, those exposed wires and batteries need a home. A nice, protective home. Something that looks… less like a science experiment and more like a finished product.
4. The Connectors: Wires and USB Ports
Pretty straightforward. You'll need some wires to connect the batteries to the module, and the module itself will usually have the USB-A output ports and a micro-USB (or USB-C if you're fancy) input for charging. A soldering iron will likely be your best friend here. If you've never soldered before, don't worry, it's a super useful skill to learn, and there are tons of beginner tutorials out there!
The "How-To" (The Super Simplified Version)
Okay, so you’ve got your parts. Now what? In a nutshell:
- Wire up the batteries to the module. Pay super close attention to positive (+) and negative (-) terminals. Getting this wrong is… not ideal.
- Mount everything inside your chosen case. Make it snug, secure, and make sure those USB ports are accessible.
- Close it up! Admire your handiwork.
- Test it! Charge it up fully, then try charging your phone. Does it work? Is anything getting suspiciously hot? (Hopefully not!)
Seriously, each step needs care and maybe a YouTube tutorial or two. It's about being methodical and patient, not just slapping things together. We're aiming for a reliable power bank, not a fire hazard, right?
A Final, Non-Negotiable Word: SAFETY!
I cannot stress this enough: lithium-ion batteries are not toys. Misuse can lead to overheating, swelling, fire, or even explosions. Always:
- Use protected cells or a quality protection circuit board.
- Double-check polarity before connecting anything.
- Never short-circuit the batteries.
- Don't use damaged cells (dented, punctured, swollen).
- Work in a well-ventilated area.
- Have a plan for a thermal event (like a bucket of sand or a fire extinguisher, seriously).
Don't let this scare you off, but absolutely let it make you respectful of the process. If you follow instructions, use good quality components, and take your time, it's a perfectly achievable and rewarding project.
So, Is It Worth It?
Honestly? For pure cost savings, maybe not always. A decent ready-made power bank isn’t crazy expensive. But for the sheer satisfaction of building something awesome with your own two hands? For the learning experience? For the thrill of plugging in your phone and seeing that charging icon pop up, knowing you made that happen? Absolutely!
It’s a fantastic entry point into DIY electronics, and it leaves you with a genuinely useful gadget. Just remember: stay safe, have fun, and enjoy becoming the guru of portable power. Who knows, maybe your next project will be a solar-powered charging station for your backyard! Dream big, my friend!