Tig Welding Without Filler Rod

You know that feeling, right? You're there, torch in one hand, filler rod clutched awkwardly in the other, trying to get that perfect TIG weld. Your dominant hand is doing the fancy torch work, making tiny circles or walking the cup, while your other hand is trying to gracefully feed a piece of metal into a molten puddle without dipping it, sticking it, or just generally making a mess. It's a delicate dance, often more like a clumsy tango with a very hot partner.
Now, what if I told you there are times you can just... ditch the filler rod entirely?
Yep, you heard me. Sometimes, with TIG, you can skip the rod and simply fuse the two pieces of metal together, relying solely on their own melting magic. It's like finding out you don't always need that extra ingredient for a perfect recipe. Mind-blowing, isn't it? This little trick is called autogenous welding, and it’s a pretty neat skill to have in your welding arsenal.
Must Read
What’s the Big Deal About Going Rod-Less?
So, why would you want to do this? Well, for starters, it can simplify things immensely. No more fumbling with a filler rod! Your focus shifts entirely to torch control, arc length, and puddle manipulation. It's almost zen-like, honestly.
But it’s not just about making your life easier (though that’s a huge bonus, let’s be real). Autogenous welding offers some distinct advantages:
- Cost Savings: No filler rod means no filler rod expense. Simple math, folks.
- Reduced Heat Input: Often, you can use less amperage when you're just fusing the base metal. This is a game-changer for thin materials, drastically reducing distortion and warpage.
- Clean Aesthetics: When done right, an autogenous weld can be incredibly clean, sometimes almost invisible. It’s pure fusion, creating a seamless joint that looks fantastic.
- Material Purity: You're not introducing any foreign material. This can be critical for certain applications where maintaining the exact alloy composition of the base metal is paramount.
When to Go Rod-Less (And When to Stick with It)
This isn't a "one size fits all" solution, obviously. There are specific scenarios where autogenous welding shines. Think about:

Edge welds: If you're joining two pieces of sheet metal along an edge, you can often just melt the edges together. It creates a really tidy, low-profile seam. Perfect for custom metal boxes or enclosure panels.
Thin gauge butt joints: Got two pieces of super thin stainless steel or aluminum that need to be butt-welded? If your fit-up is absolutely, positively perfect (and we'll get to that in a sec), then autogenous welding can give you a beautiful, flat bead with minimal heat input.
Cosmetic welds: Sometimes, the strength isn't the primary concern, but the look is. Think decorative pieces or anything where a smooth, barely-there joint is desired.

Repairing cracks on thin material: If you have a fine crack in, say, a thin aluminum casting or a stainless steel exhaust component, and you can get in there with a TIG torch, sometimes just melting the crack back together is all it takes.
Now, when not to go rod-less? If there's a gap, if you need significant strength, or if you're working with thicker material that would require too much heat to fuse completely without filler, then stick with the rod. It's there for a reason, after all!
The Golden Rules for Your Rod-Less Journey
If you're ready to give this a shot, remember these non-negotiables:

1. Fit-up is EVERYTHING. Seriously. I can't stress this enough. If there's a gap, even a tiny one, you'll blow through or end up with a nasty undercut. The pieces need to be touching perfectly, snug as a bug in a rug.
2. Cleanliness is Next to Weldliness. Just like with any TIG weld, your material needs to be surgically clean. Wire brush, acetone, grind if necessary. Any contaminants will cause porosity, sugaring, or just a generally ugly, weak weld. Don't skip this step, trust me.
3. Amperage Control is Key: You'll generally use less amperage than if you were introducing filler, but it still needs to be enough to quickly form a puddle. Too little, and you're just scratching the surface. Too much, and you're blowing holes. Start low and creep up.
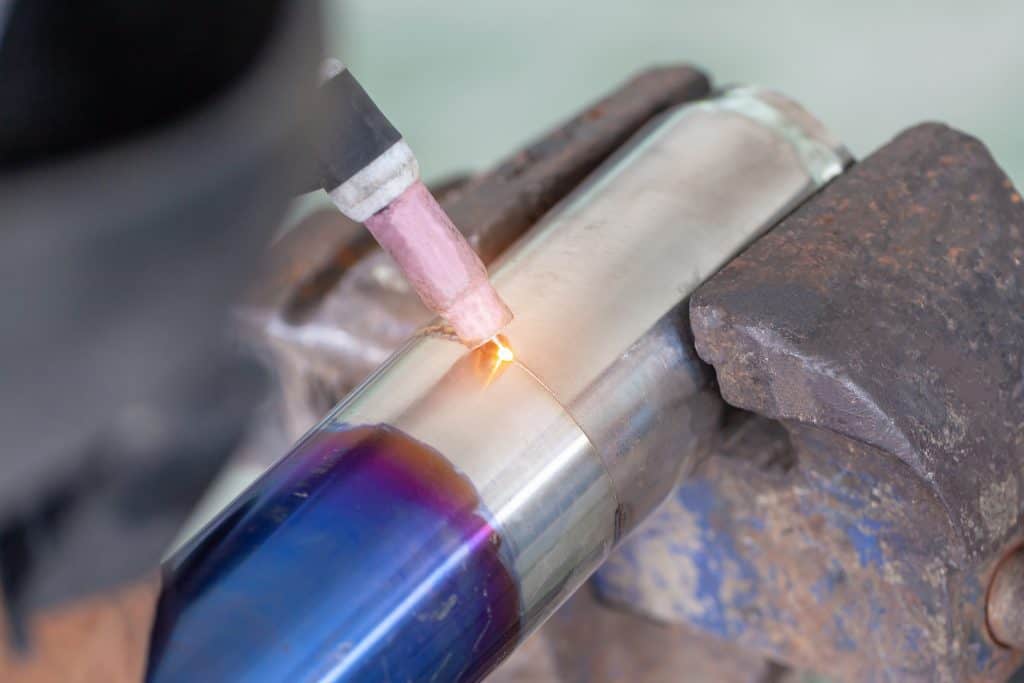
4. Shielding Gas: Don't skimp on the argon. Good gas coverage is crucial for preventing oxidation, especially on stainless steel. Keep that cup close and your post-flow adequate.
5. Practice, Practice, Practice: Like any welding technique, this takes a bit of finesse. Grab some scrap, get your fit-up perfect, and just go for it. You'll develop a feel for the puddle movement and how the metal wants to flow.
It’s a different kind of challenge, but incredibly rewarding when you pull off that perfectly fused, rod-less bead. So, next time you're setting up for a TIG project on some thin material, consider giving your filler rod a little break. You might just discover a new favorite way to lay down a bead. Happy fusing, my friend!