Stanley Pour Over Set How To Use
Ah, the Stanley Pour Over Set. It sits there, stoic and undeniably green, promising a simpler path to your morning brew. You might eye it suspiciously. Is it a secret puzzle? A mystical artifact?
Perhaps you've unwrapped this magnificent gadget, held it in your hands, and thought, "Now what?" Fear not, intrepid coffee adventurer. The quest for glorious java is closer than you think.
Many ponder the intricate mechanics of such a device. Do I need a special degree? A secret handshake with a barista? The answer, delightfully, is no.
Must Read
Embracing the Zen of the Stanley Pour Over Set
Let's cut to the chase, shall we? This isn't rocket science, despite what some fancy coffee blogs might imply. The Stanley Pour Over Set is designed for straightforward coffee bliss.
Your journey begins with water. Yes, good old H₂O. Find a kettle, any kettle, and fill it. Don't overthink this part; it's just water.
Then, bring that water to a boil. Watch the bubbles. Marvel at the steam. This is your first step towards liquid gold.
Step 1: The Water Warming Ceremony
While your water heats, admire your Stanley Pour Over Set. It’s sturdy, isn’t it? Built for adventures, or just for surviving your sleepy mornings.
Some folks insist on specific temperatures. They'll tell you 200 degrees Fahrenheit, no more, no less. But honestly? Just off the boil is perfectly fine for your first few tries.
If the water is too hot, you might scald the coffee. If it’s too cool, you get a weak brew. But the difference is often subtle, especially when you're just starting out.

Step 2: The Grounds Gathering Guild
Next, grab your coffee grounds. This is where personal preference truly shines. Are you a dark roast enthusiast? A light roast connoisseur?
The Stanley Pour Over Set welcomes all grinds. However, a medium grind is usually the sweet spot for pour over method. Not too fine, not too coarse.
Place a paper filter into the cone of your Stanley Pour Over Set. Some people rinse the filter with hot water first. This warms the cone and washes away any papery taste.
You can totally skip the rinsing part if you're in a hurry. The world won't end. Your coffee will still be delicious.
Now, scoop your coffee grounds into the filter. How much? Again, this is where your taste buds come into play. A general rule of thumb is about one to two tablespoons per 6 ounces of water.
Level the grounds gently. Give them a pat. Tell them you appreciate their service.
Step 3: The Assembly Affirmation
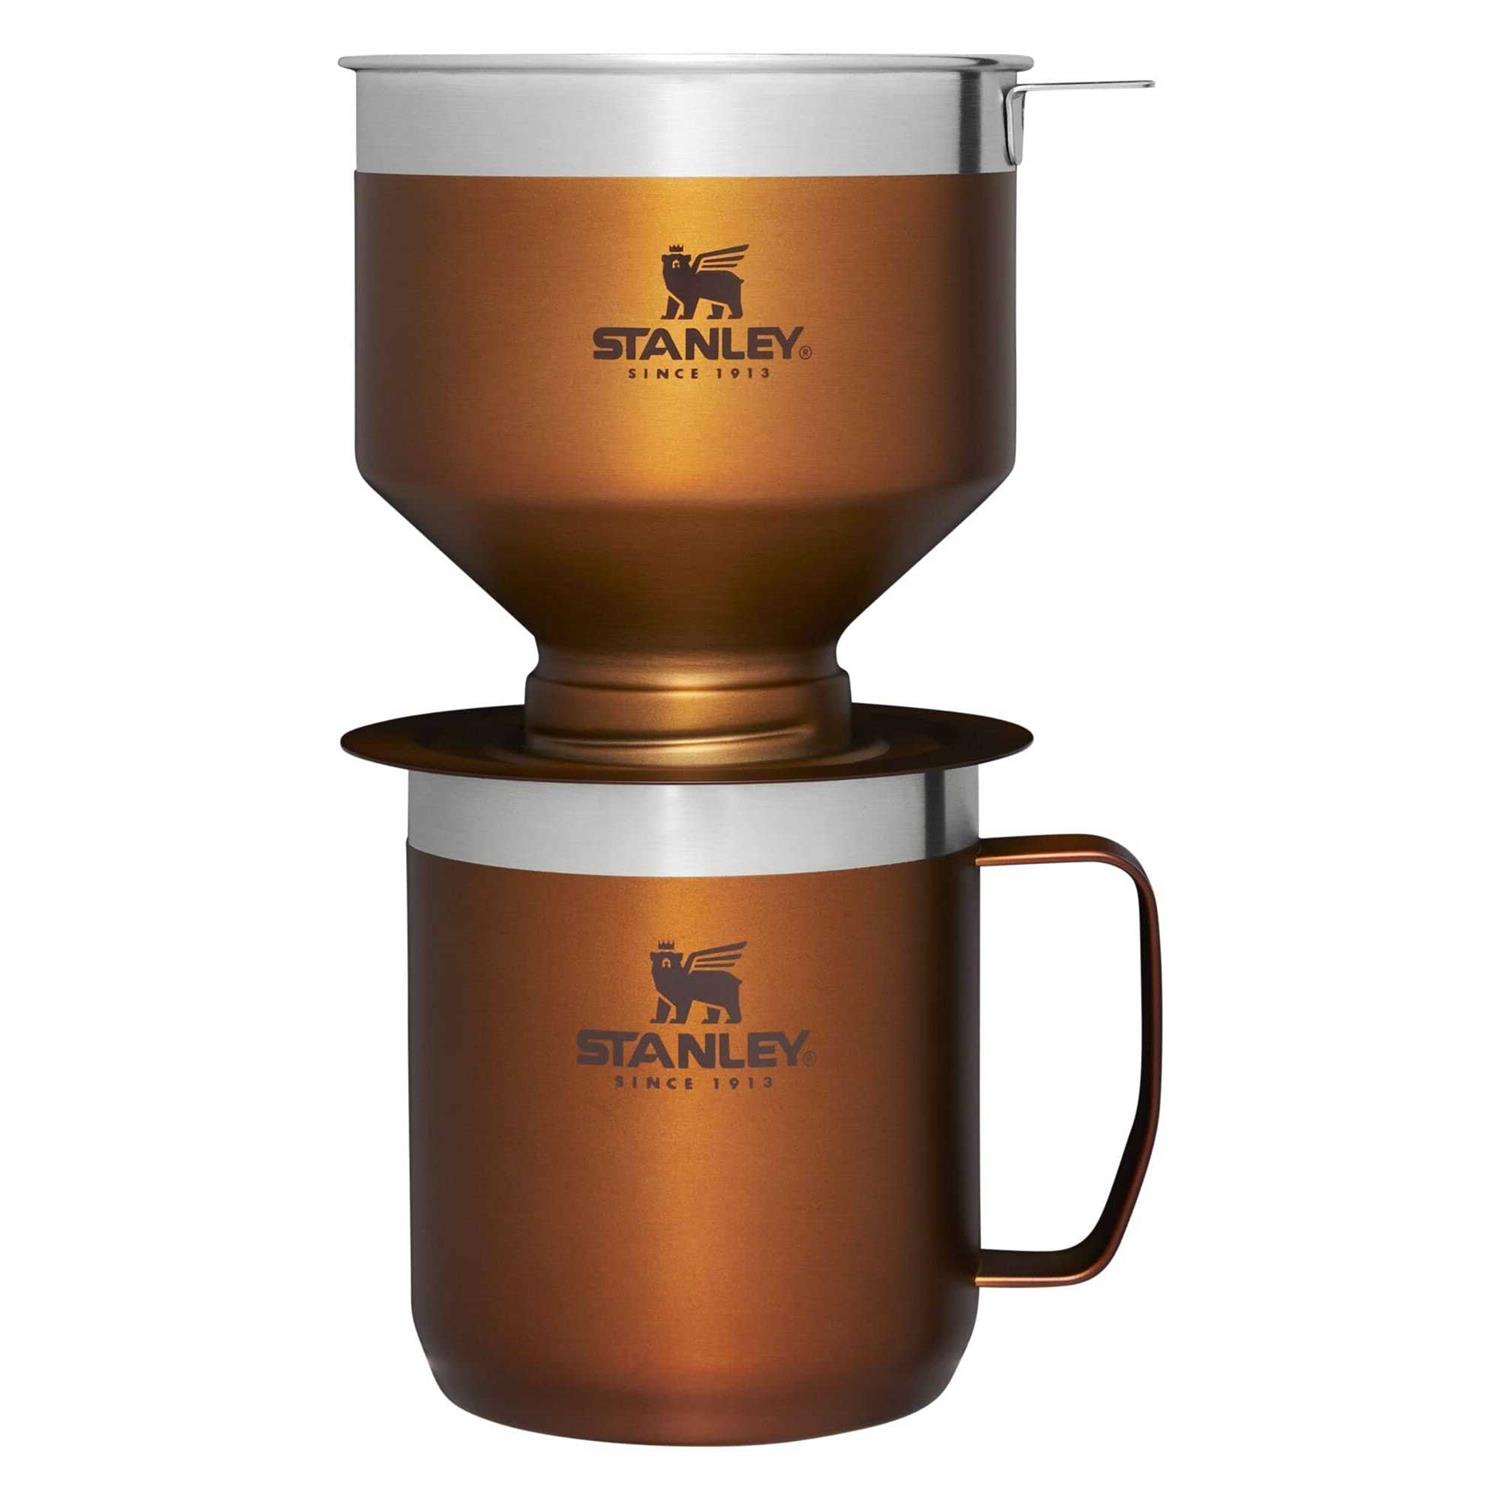
Place the assembled Stanley Pour Over Set directly onto your favorite mug. A Stanley mug works wonderfully for this, keeping your brew warm for ages.

Make sure it's stable. A wobbly pour over is an unhappy pour over. And a potential mess. Nobody wants a messy start to their day.
The cone should sit snugly on the rim of your cup. It’s designed to be universally friendly, fitting most standard mugs.
Step 4: The Pouring Performance Ponderings
Now, the moment of truth. Your water is boiled. Your grounds are ready. Your mug is waiting.
Take your kettle, or whatever you used to boil the hot water. Pour a small amount of water over the grounds, just enough to saturate them. This is called the "bloom."
Watch as the grounds puff up, releasing their glorious aromas. This is
the magic happensmoment, where the coffee gases escape.
Wait about 30 seconds for this bloom. It’s important, they say. It helps extract more flavor. Or maybe it just gives you a moment to breathe before your coffee.
After the bloom, continue pouring the rest of your hot water slowly and steadily. Pour in a circular motion, starting from the center and spiraling outwards, then back to the center.

Try to avoid pouring directly onto the sides of the paper filter. Keep the water over the coffee bed itself. This ensures even extraction.
Don't rush it. This isn't a race. The beauty of the pour over method is in its meditative pace.
Keep pouring until you've reached your desired amount of coffee in the mug. Or until the pour over cone is empty. Whichever comes first.
Step 5: The Anticipation Appreciation
Once all the water has dripped through, carefully remove the Stanley Pour Over Set from your mug. Be careful, as it might be hot and still dripping slightly.
Place it on a plate or in the sink. You've done it! The hard part is over.
Now, take a moment. Inhale the rich aroma wafting from your mug. This is the reward for your minimal effort.
Step 6: The Unveiling of Utter Deligh
Your coffee is ready. No fancy buttons, no complicated settings. Just you, your Stanley Pour Over Set, and a delicious cup of coffee.

Stir it if you like. Add cream or sugar if that’s your jam. Or drink it black and savor the pure taste.
The whole process, from heating water to sipping, is about slowing down. It’s about the ritual.
Some might try to convince you there's a secret, hidden technique. That only true coffee masters can wield the Stanley Pour Over Set. This is pure hogwash.
The truth is, it's incredibly forgiving. It wants you to make good coffee, and it makes it easy.
So, next time you stare at your Stanley Pour Over Set, remember this: it’s not a mystery. It’s an invitation.
An invitation to enjoy the simplicity of a well-made coffee. An invitation to relax. And maybe, just maybe, an invitation to smile at how uncomplicated something so satisfying can be.
Go forth and brew, magnificent coffee makers. Your Stanley Pour Over Set awaits its simple, glorious destiny. Enjoy every single sip.