Shielding Gas In Mig Welding
Alright, so picture this: You’re all geared up, safety glasses on (obviously!), fresh wire in the feeder, ground clamp perfectly placed. You pull the trigger, the arc lights up, and you’re moving that gun like a seasoned pro. You finish the bead, lift your helmet, and… boom. Swiss cheese. A glorious, bubbly mess that looks less like a weld and more like something a pigeon sneezed onto your project. Sound familiar? Been there, done that, bought the T-shirt that says "My First Weld Was A Porous Disaster."
For a long time, I just couldn't figure it out. Was it my technique? My travel speed? Was the universe just conspiring against my dreams of building awesome metal stuff? Nope, turns out, the universe, much like a good buddy, was just trying to tell me I was missing one tiny, but absolutely crucial, ingredient: the shielding gas. And trust me, it’s not just some fancy extra; it’s the unsung hero of your MIG welding world.
What Even IS Shielding Gas? And Why Do I Need It?
Think of it like this: when you’re MIG welding, you’re essentially creating a super-hot, molten puddle of metal. This puddle, my friend, is incredibly vulnerable. The air around us – yep, the stuff you’re breathing right now – is packed with things like oxygen and nitrogen. These elements are great for keeping us alive, but absolutely terrible for molten metal. If they get into your weld puddle, they react, cause all sorts of nasty stuff like porosity (those little bubbles we talked about), brittleness, and a general loss of structural integrity. Basically, they turn your strong weld into a weak, ugly mess.
Must Read
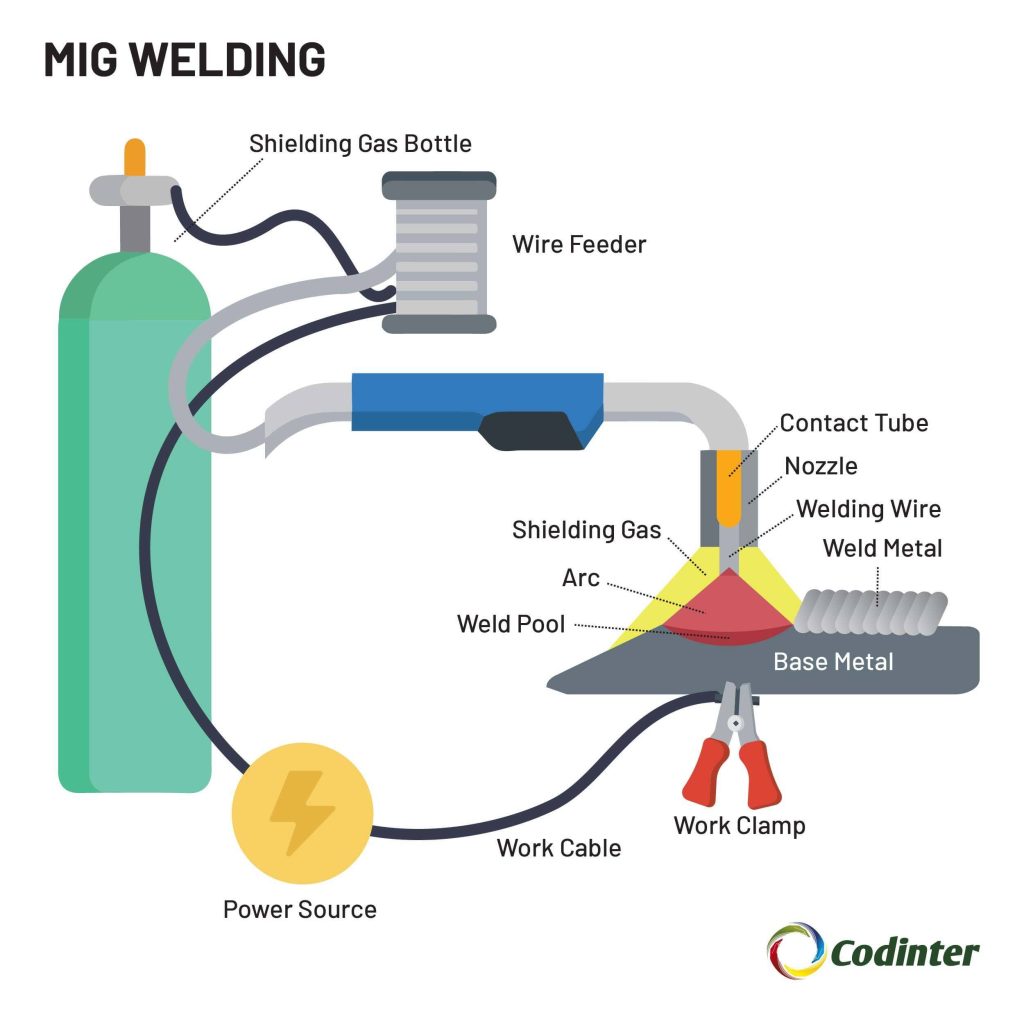
That’s where shielding gas swoops in like a superhero with an invisible force field. It flows out of your MIG gun's nozzle, creating a protective cloud around the arc and the molten puddle. This cloud pushes away the atmospheric nasties, allowing your weld to cool down in a nice, clean, oxygen-free environment. Presto! Strong, clean, beautiful welds.
The Main Contenders: Who's Who in the Gas Bottle Gang?
You’ll hear about a few different types, and picking the right one is like choosing the perfect condiment for your burger – it really makes a difference!
-
CO2 (Carbon Dioxide): This is often the cheapest option, and it delivers a super hot, deeply penetrating arc. Great for mild steel, especially if you need good fusion on thicker material. The downside? It tends to produce more spatter (those little metal BBs that stick everywhere) and a slightly harsher arc. Pure CO2 is reactive, meaning it participates in the welding process, which helps with penetration but can also make the weld bead a bit rougher. If you're welding mild steel on a budget, this is your guy.
-
Argon: On the other end of the spectrum, pure argon is an inert gas. It doesn't react with the molten metal at all. This makes it perfect for welding non-ferrous metals like aluminum and stainless steel. It gives a very stable arc, minimal spatter, and a super smooth bead. But for mild steel? Not so much – it tends to create a narrow, "fingering" penetration and a high, crowned bead that isn't ideal for structural work.
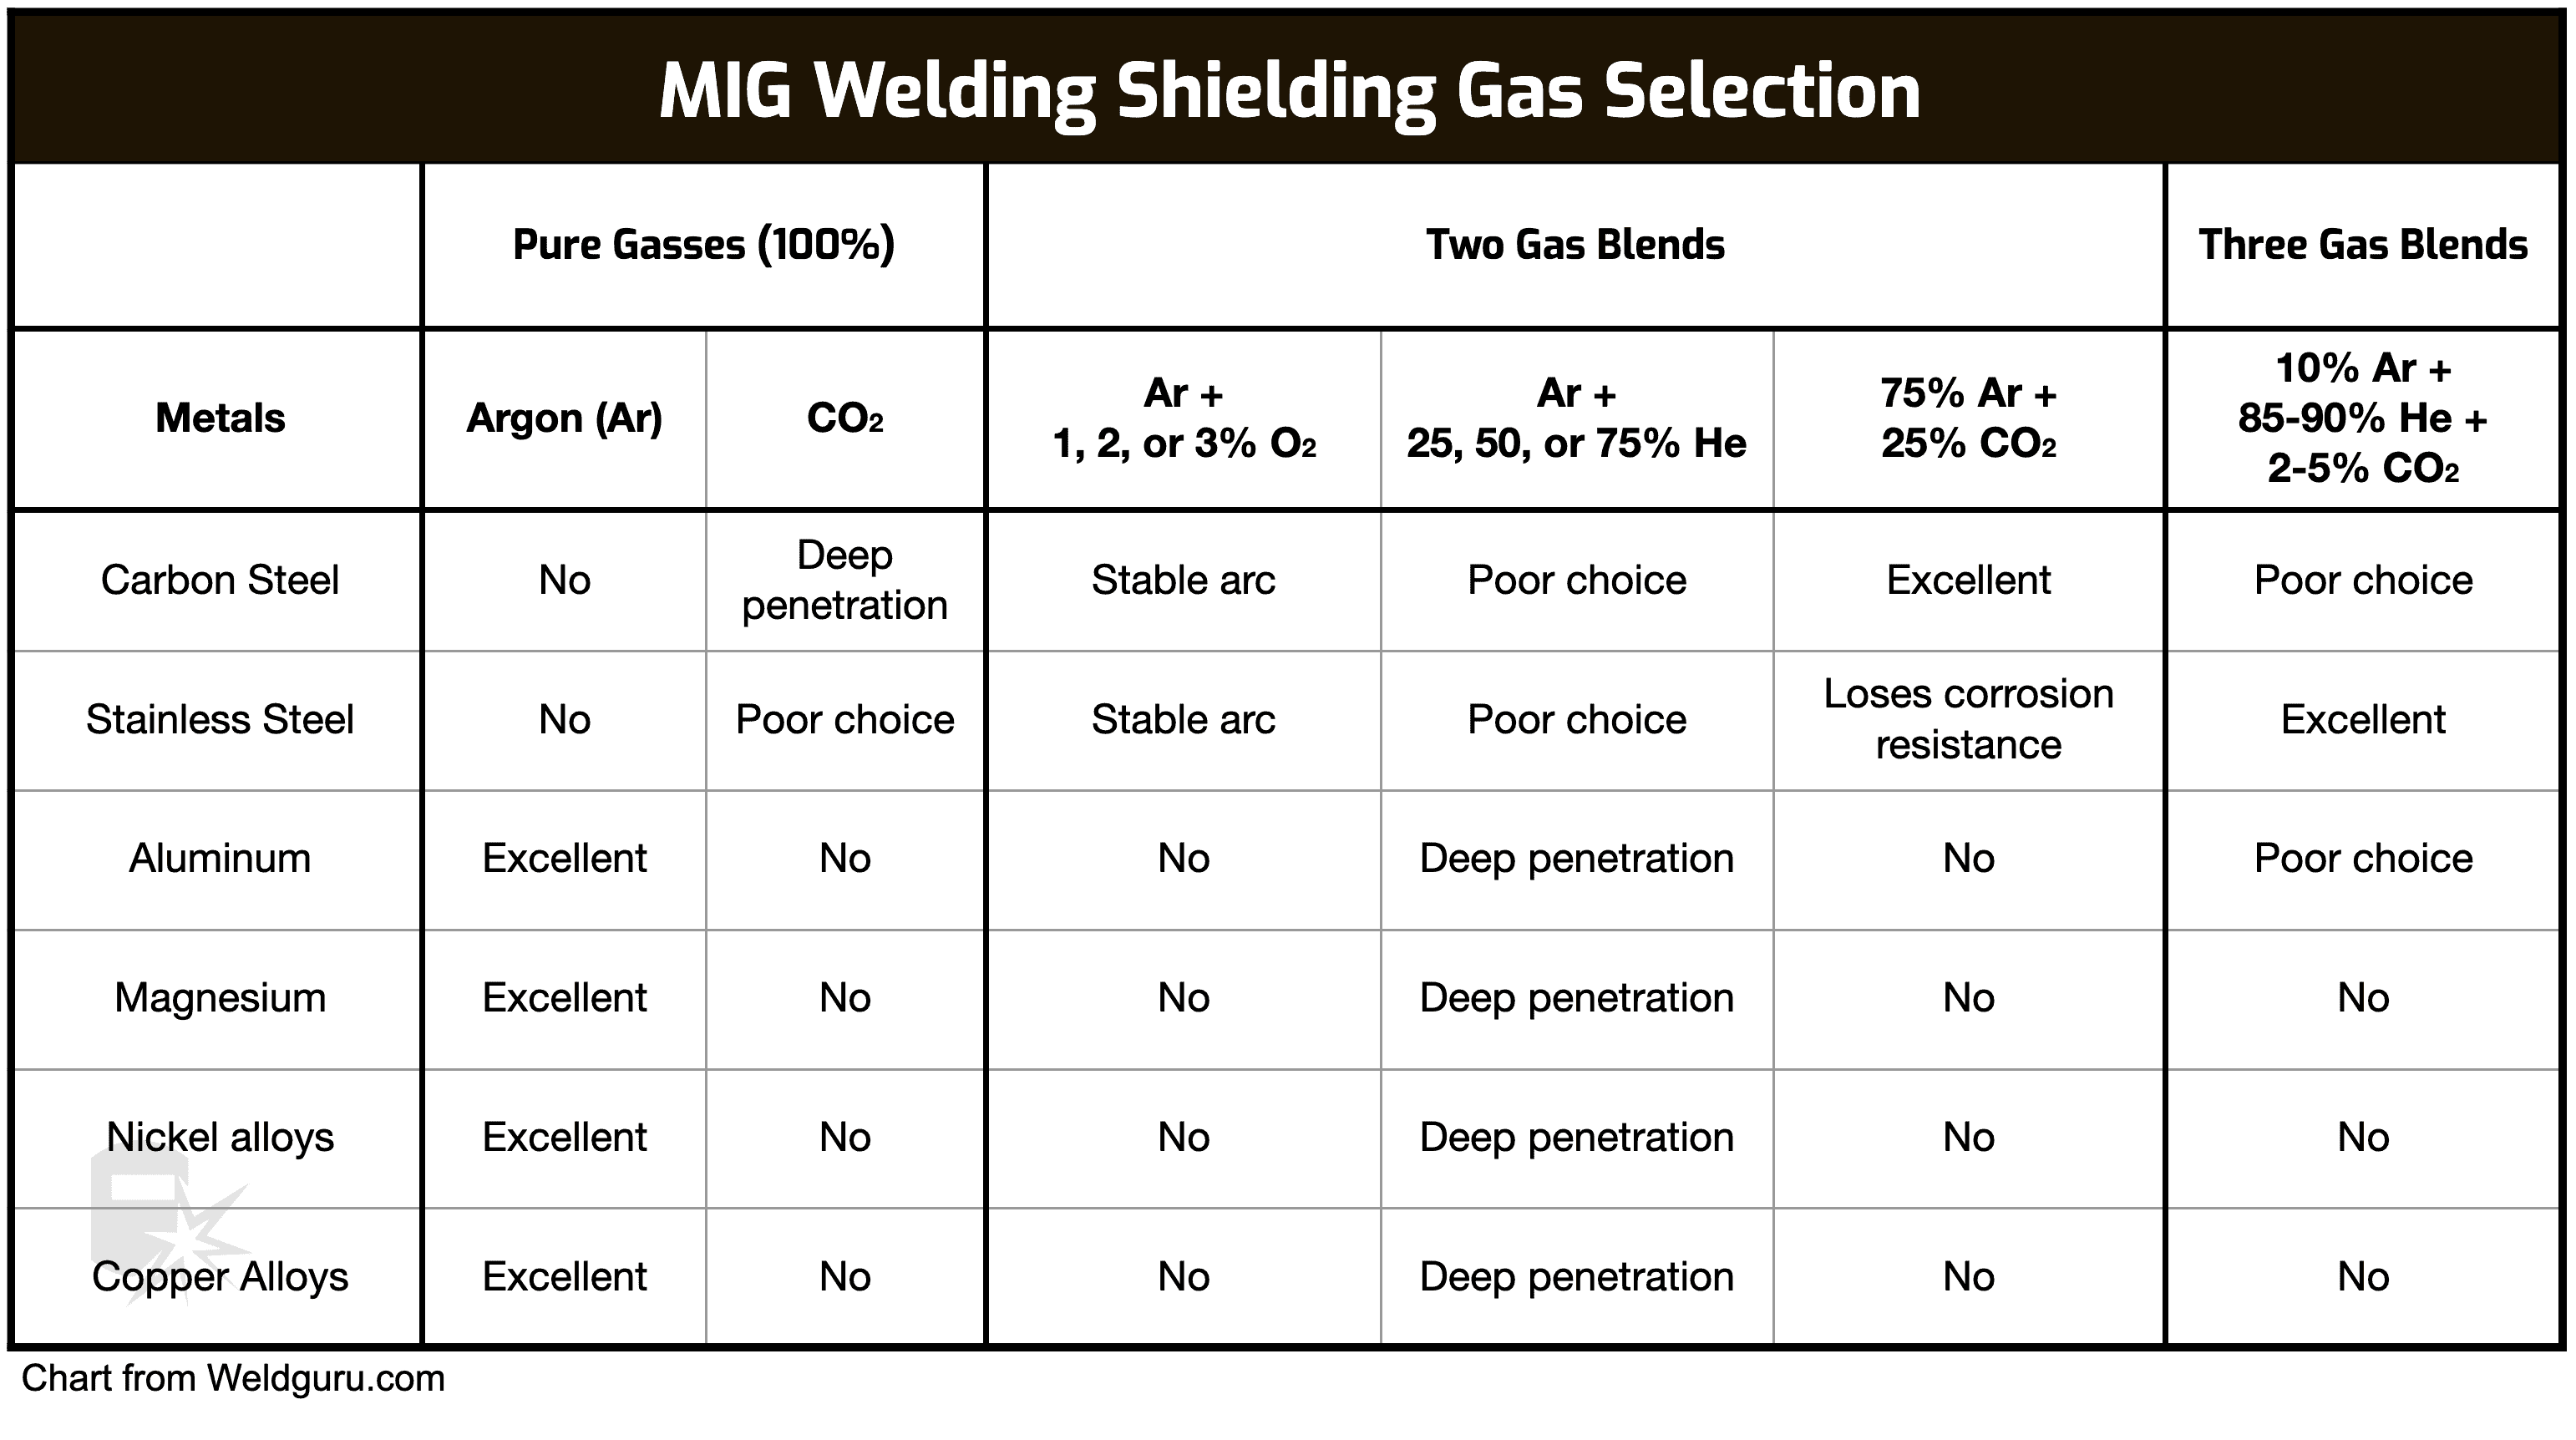
Best Gas for MIG Welding: What to Use (with Chart) -
Argon/CO2 Mix (e.g., 75% Argon / 25% CO2, often called C25): Ding ding ding! For most hobbyists and even many professionals welding mild steel, this is the golden ticket. It combines the best features of both: the arc stability and smooth transfer of argon, with the penetration-boosting properties of CO2. You get less spatter than pure CO2, a more stable arc, and excellent bead appearance. It's the ultimate all-rounder for general mild steel fabrication. If you're just starting out with MIG on steel, this is almost certainly what you want.
Flow Rate: The Goldilocks Zone
It's not just having the right gas; it's about having the right amount of it. You'll typically set your flow rate in cubic feet per hour (CFH) on a flowmeter attached to your gas bottle regulator. Too little gas, and you're back to Swiss cheese welds because the shield isn't strong enough. Too much, and you're not only wasting gas (which isn't cheap!), but you can actually create turbulence that pulls atmospheric air into your weld puddle. Go figure, right?

A good starting point for most MIG welding on mild steel is somewhere between 15-25 CFH. Always check your machine's manual or do a quick online search for specific recommendations based on your wire size and material thickness. And hey, make sure you're not welding in a super drafty area – wind can literally blow your protective gas shield away, leaving your weld exposed!
The Takeaway: Don't Skimp on the Shield!
Seriously, if you're pulling your hair out over bad MIG welds, and you've checked your wire speed, voltage, and stick out, then for the love of all that is metal, check your gas. Is the bottle open? Is it full? Is it the right type for your material? Is your flow rate set correctly? A surprising number of welding headaches can be traced back to these simple questions.
Shielding gas isn't just an accessory; it's fundamental to achieving strong, clean, and visually appealing MIG welds. It's the invisible guardian of your molten metal, making all the difference between a project you're proud of and one that ends up in the scrap bin. So, next time you gear up, give a little nod to that gas bottle. It's doing more work than you think! Happy welding, my friend!
