Ever stood mesmerized, watching a welder at work? Sparks flying, metal hissing, and then — voilà! — two pieces of metal become one, strong as ever. It's like magic, right? Well, behind every great magician is a trusty wand, and in the world of welding, that wand is often a Mig Gun. And let me tell you, understanding its insides isn't just smart; it's a secret superpower waiting to be unlocked!
Imagine you've got this incredible tool, buzzing with potential, ready to fuse steel like butter. But what happens when it throws a little tantrum, or a part needs replacing? That's where your new best friend, the Miller Mig Gun Parts Diagram, swoops in like a superhero with a blueprint! It's not some dry, dusty technical manual; think of it as a super-easy roadmap to keeping your welding wizardry in tip-top shape.
Peeking Inside Your Mig Gun: The Cast of Characters!
Let's take a whirlwind tour of your Mig Gun's anatomy. Don't worry, we're not doing surgery; we're just getting to know the fantastic team that makes all that welding magic happen!
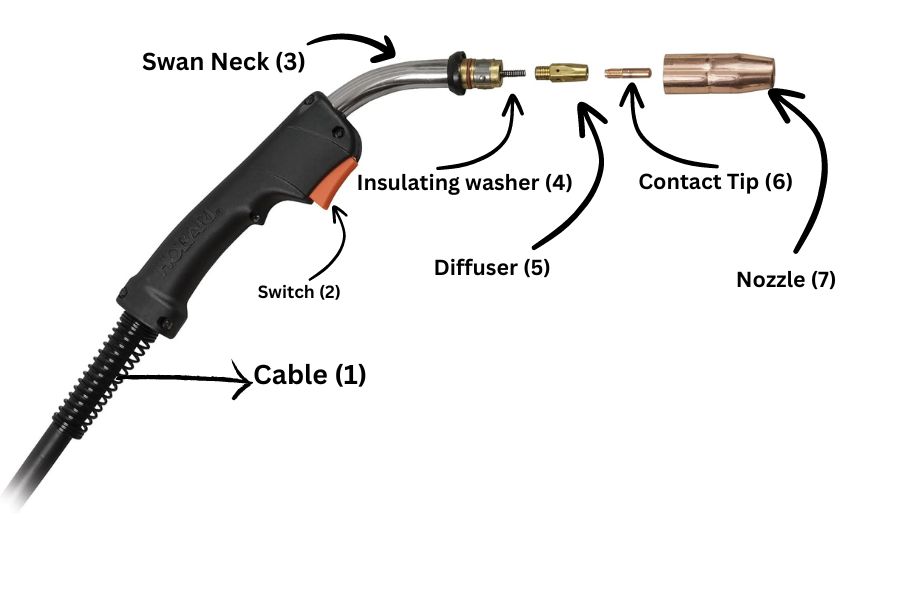
This is the flashy part, right at the tip where all the sparks fly.
The Nozzle: Think of this as the megaphone for your shielding gas. It’s usually a shiny copper cup that directs the invisible bodyguard gas around your weld pool, protecting it from naughty air impurities. If your welds look rough, sometimes this little hero just needs a good clean or a swap-out!
The Contact Tip: Oh, this little champ! It's the tiny, unassuming piece where the actual welding wire zips through and gets electrically charged. It takes a serious beating, getting scorching hot as it delivers the juice. Because it's literally making contact, it wears out like crazy. A fresh contact tip is like giving your gun a shot of espresso – instant performance boost!
The Gas Diffuser: Tucked behind the contact tip, this is the unsung hero, the orchestrator of gas flow. It makes sure that lovely shielding gas spreads out evenly, like a perfect fog, giving your weld consistent protection. If your gas flow is wonky, this might be the culprit. It's the ultimate party planner for your gas!
The "Inner Workings" – Keeping it Smooth!
These parts are a bit more hidden but just as vital for a seamless operation.
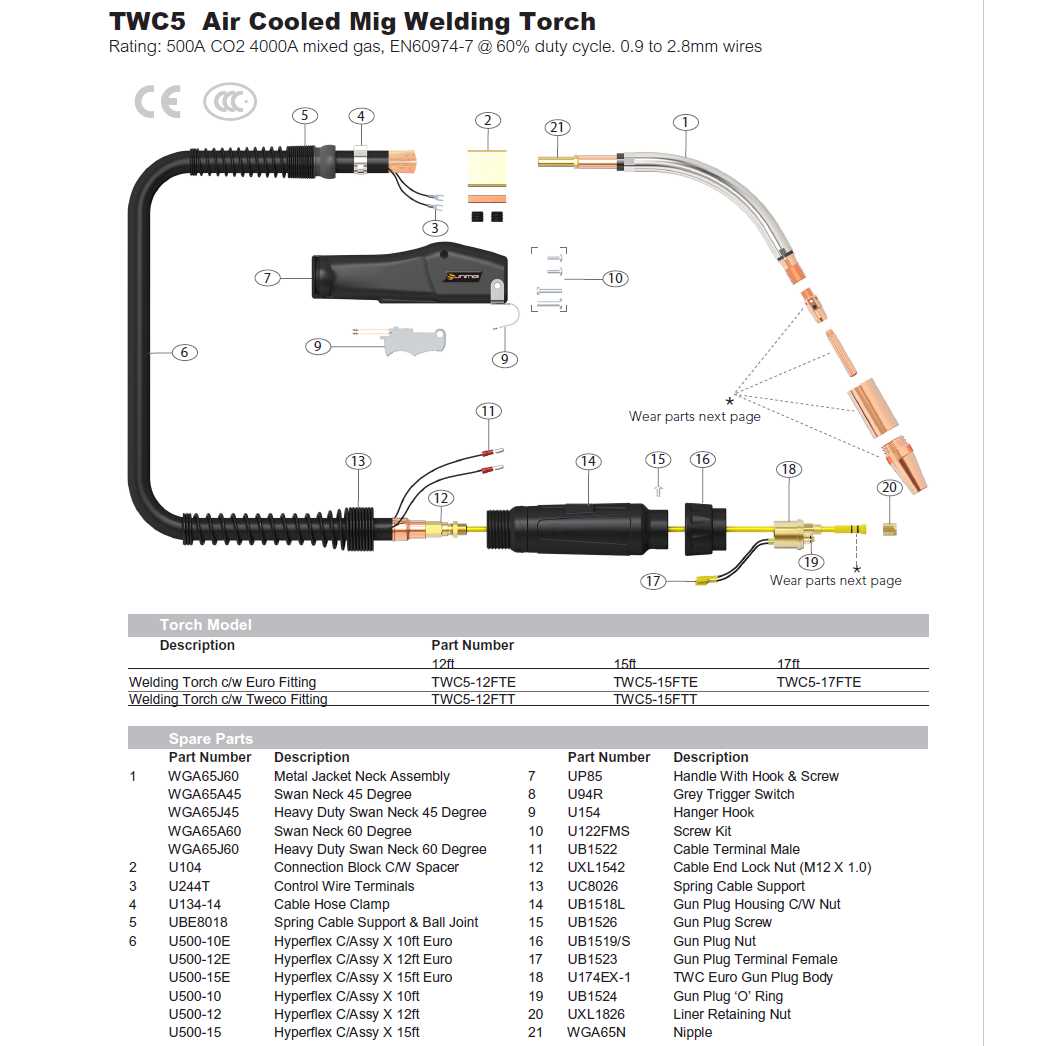
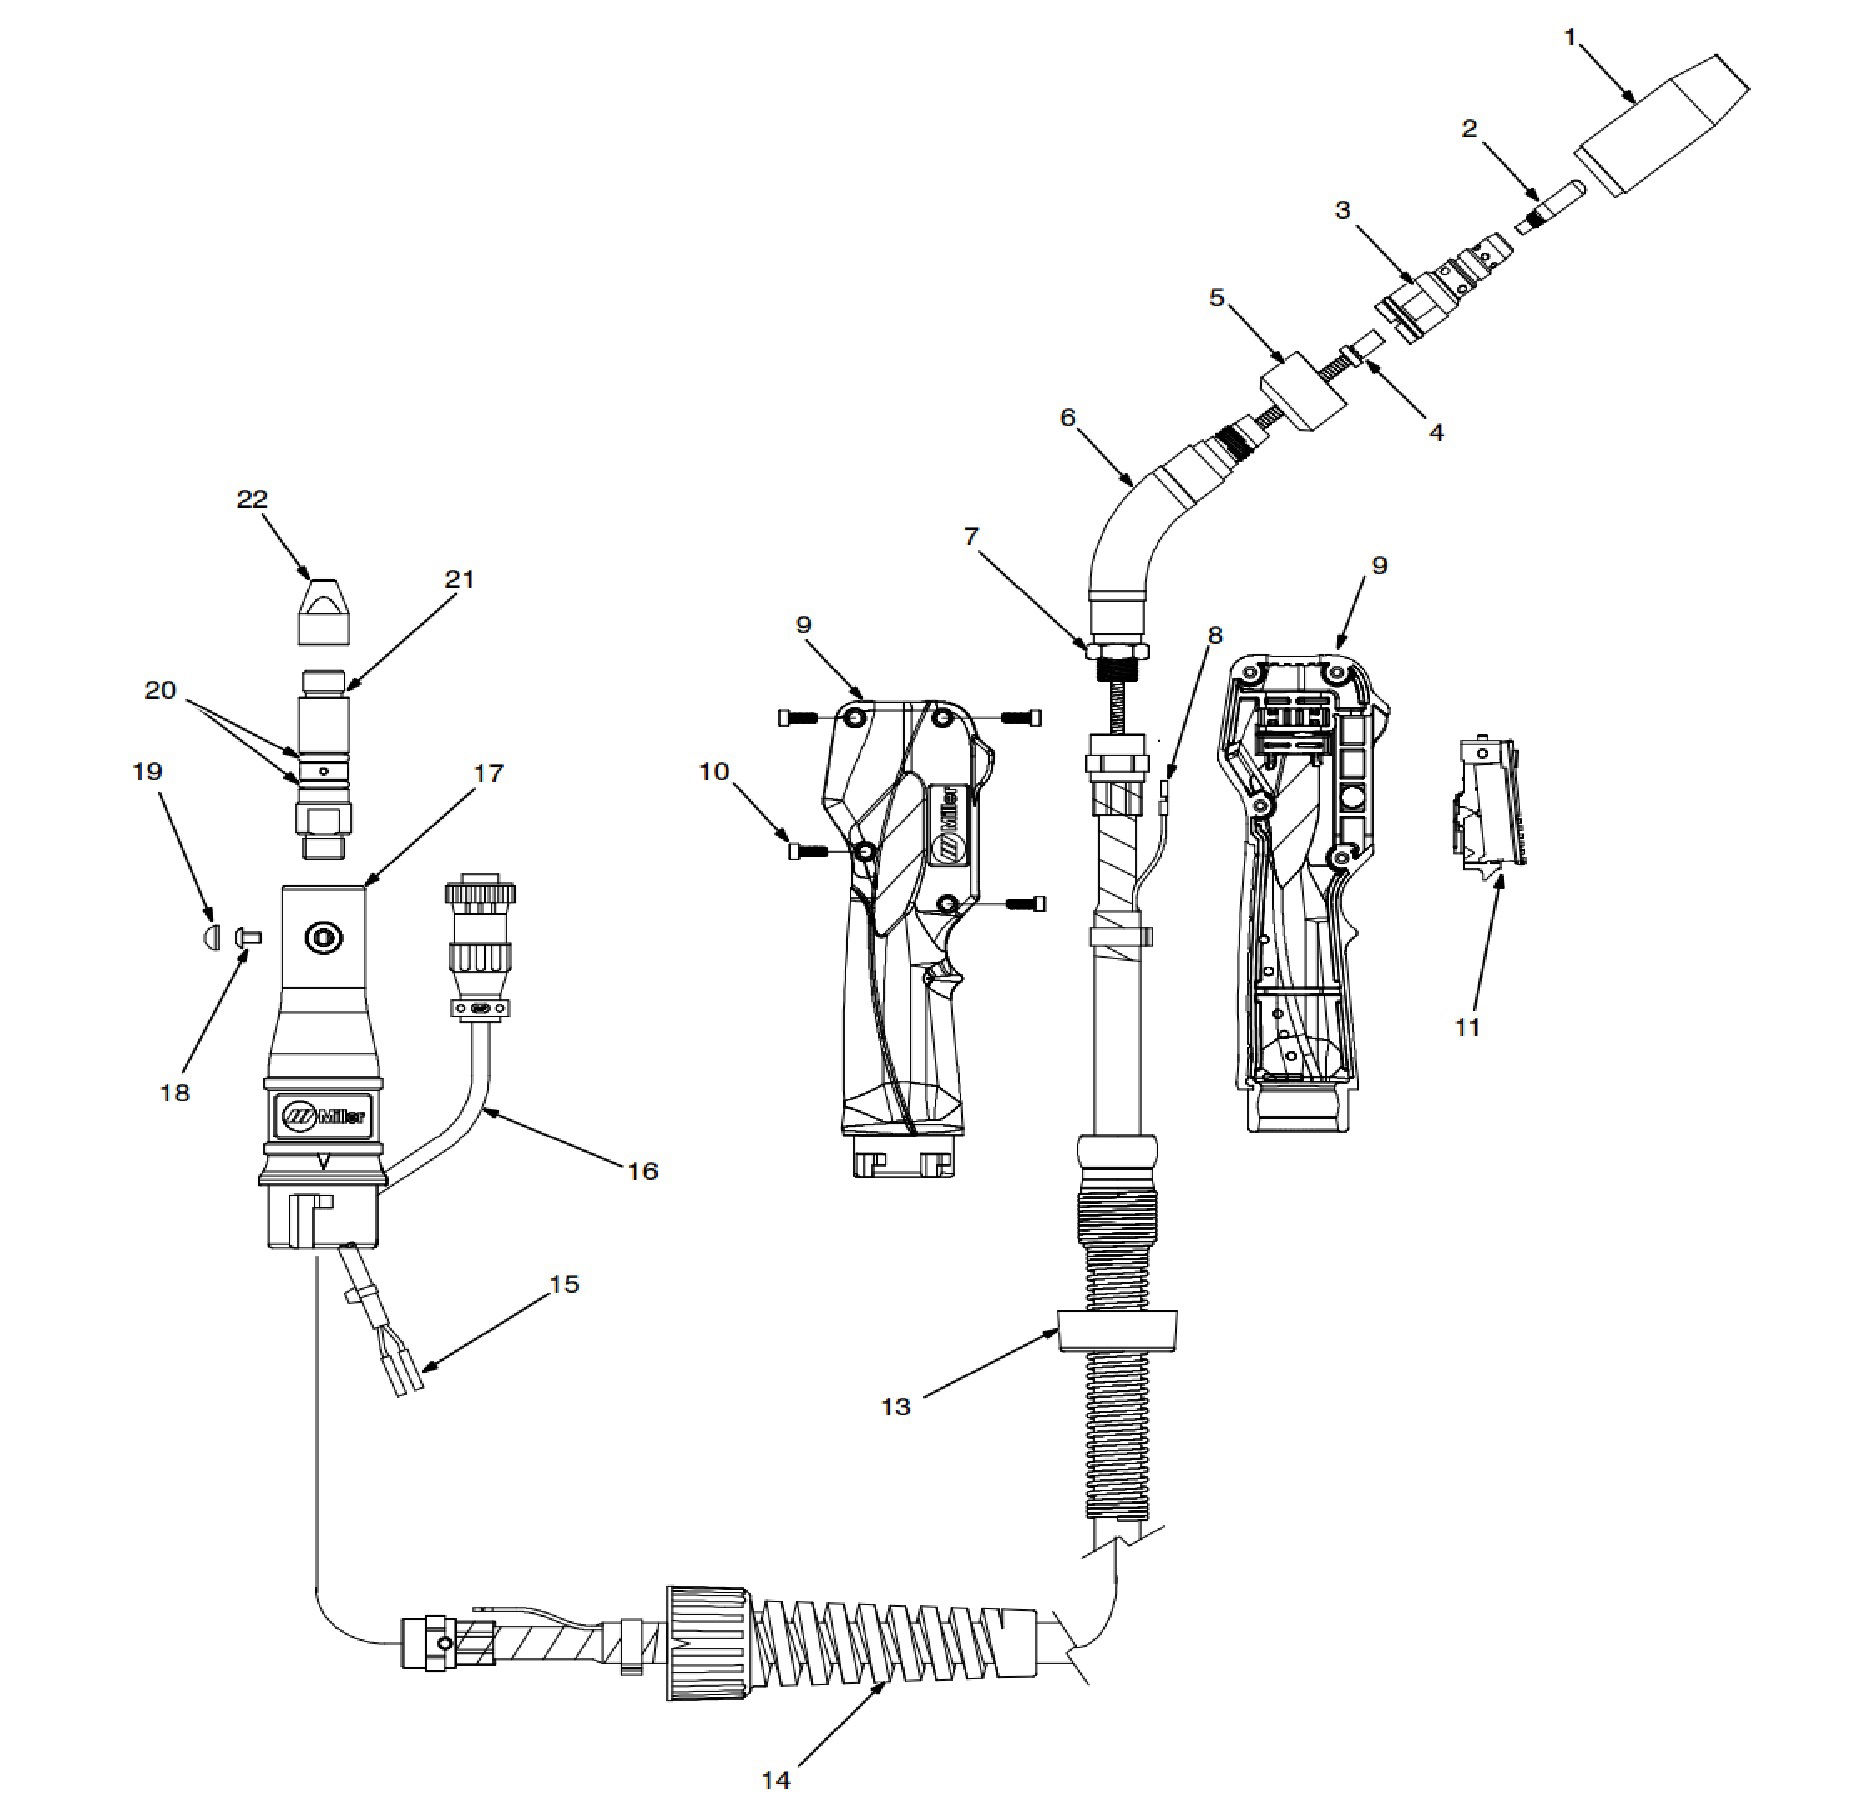
Mig Gun Parts Diagram Detailed Breakdown
The Liner: Imagine a super-slick highway running all the way through your Mig Gun cable, from the wire feeder to the contact tip. That's your liner! Its job is to guide the welding wire smoothly, without any hitches or snags. A clogged or worn liner is like a traffic jam on that highway – no wire, no weld, just frustration! Keeping it clean and replacing it when needed ensures your wire feeds like a dream.
The "Control Center" – You're In Command!
This is where you take the reins and direct the show.
The Handle & Trigger: Ah, your ergonomic command center! The handle gives you a comfy grip, and that satisfying click of the trigger is your direct command to start the welding party. It’s like the "go" button for awesome!
The Cable Assembly: This is the mighty umbilical cord connecting your gun to the welding machine. It carries power, shielding gas, and the welding wire itself. Treat it with respect, avoid kinks and crushing, and it’ll serve you faithfully for ages!
"Knowing your Mig Gun's parts is like having the cheat codes for perfect welds. Seriously, it's that empowering!"
Mig Gun Diagram at Amelia Woodhouse blog
Why Bother with the Diagram, You Ask?
Because nobody likes a guessing game when their trusty tool needs a little TLC! With a Miller Mig Gun Parts Diagram, you instantly know what each component is called, where it goes, and which replacement part you need. No more scratching your head, no more ordering the wrong bit. It's pure efficiency, wrapped in an easy-to-understand visual aid. Plus, Miller is a top-notch brand, meaning their parts are usually readily available and designed to fit perfectly, making your life oh-so-much easier.
So, next time you pick up your Mig Gun, remember it's not just a chunk of metal and plastic. It's a finely tuned, albeit robust, instrument with a team of tiny, dedicated parts working in harmony. And now, you're practically an expert on its inner workings, armed with the knowledge from that fantastic Miller Mig Gun Parts Diagram. Go forth, weld wisely, and have fun making sparks fly! You're a true welding whisperer now!