Mig Weld Vertical Up Or Down
Alright, gather 'round, curious minds! Today, we're diving into a sparkly, sizzling debate that has welders everywhere pondering: When you're welding something straight up and down, do you go... well, up or down?
It sounds like a trick question, doesn't it? But in the fascinating world of metal joining, this choice is as crucial as picking the right socks for a dance-off.
The Great Gravity Gauntlet: Up vs. Down!
Imagine you're painting a really tall wall. Do you start at the top and let gravity help you drip your way down? Or do you bravely push upwards, defying the pull of the earth?
Must Read
That's essentially the fiery dilemma facing folks using a MIG welder on a vertical surface. It's a clash of styles, a dance with physics, and honestly, a whole lot of fun to talk about.
Team Downhill: The Smooth Operator
"Why fight gravity when you can ride it like a wave?" - The unofficial motto of downhill welders.
Let's talk about going downhill first. Think of it like a leisurely stroll down a gentle slope. It feels natural, it's often faster, and it can be incredibly satisfying.
You start at the top of your vertical piece of metal, trigger your MIG gun, and let that molten magic flow downwards. It's almost like syrup pouring off a stack of pancakes, but way, way hotter and much more permanent.
This method is often considered the speed demon's choice. You can zip along, laying down a bead that looks clean and pretty, almost like a perfect little ripple on a pond.
For thinner metals, like that sheet metal on your garden shed (if it needed a patch!), going downhill is often the ticket. It gets the job done without putting too much heat into the thin material.
This careful heat application prevents thinner metals from warping into a sad, crinkled mess. It’s like drawing a line with a super-fast crayon.
The weld puddle, that shimmering pool of liquid metal, just wants to follow gravity's lead, making it feel wonderfully cooperative. Some folks swear by the beautiful appearance of a good downhill weld.

It can look very uniform, smooth, and aesthetically pleasing, a real showstopper for lighter applications. It's perfect for when a neat finish is key.
However, and here's where the plot thickens slightly, going downhill means you're moving with gravity. The molten metal can sometimes outrun the penetration into the base material.
This means the weld might not dig as deep into the base metal as other methods. Think of it as surface-level charm.
It looks great, but maybe isn't built to withstand the force of a thousand angry giants trying to pull it apart. It’s perfect for non-structural stuff, where a good seal and a neat look are top priority.
So, if you’re fixing a fence post that just needs to look presentable and hold up against a gentle breeze, downhill welding might be your new best friend. It’s often quicker to learn and master for those visually appealing, less demanding tasks.
Embrace the flow, feel the speed, and let gravity be your co-pilot with a good old downhill run! It’s the laid-back, chill method for those shiny, quick fixes.
Team Uphill: The Mighty Mountaineer
"Challenge accepted, gravity!" - The determined mantra of uphill welders.
Now, let's flip the script and talk about going uphill. This is where you grab gravity by the collar and say, "Not today, old friend!"
Imagine climbing a mountain, one careful step at a time, building solid footing as you go. That's the spirit of an uphill weld: slow, steady, and incredibly strong.
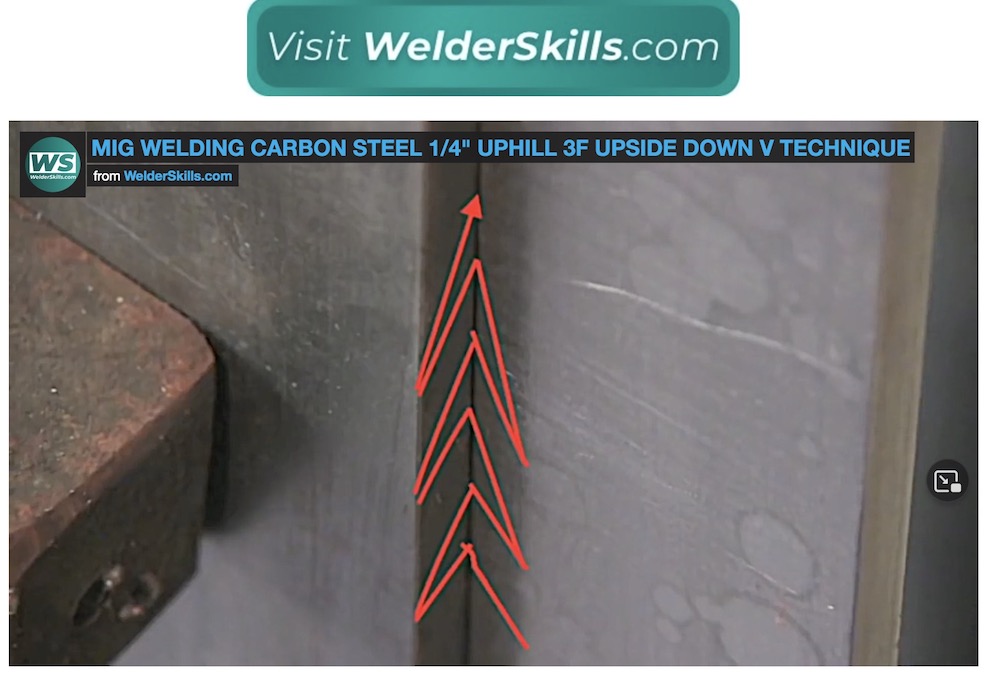
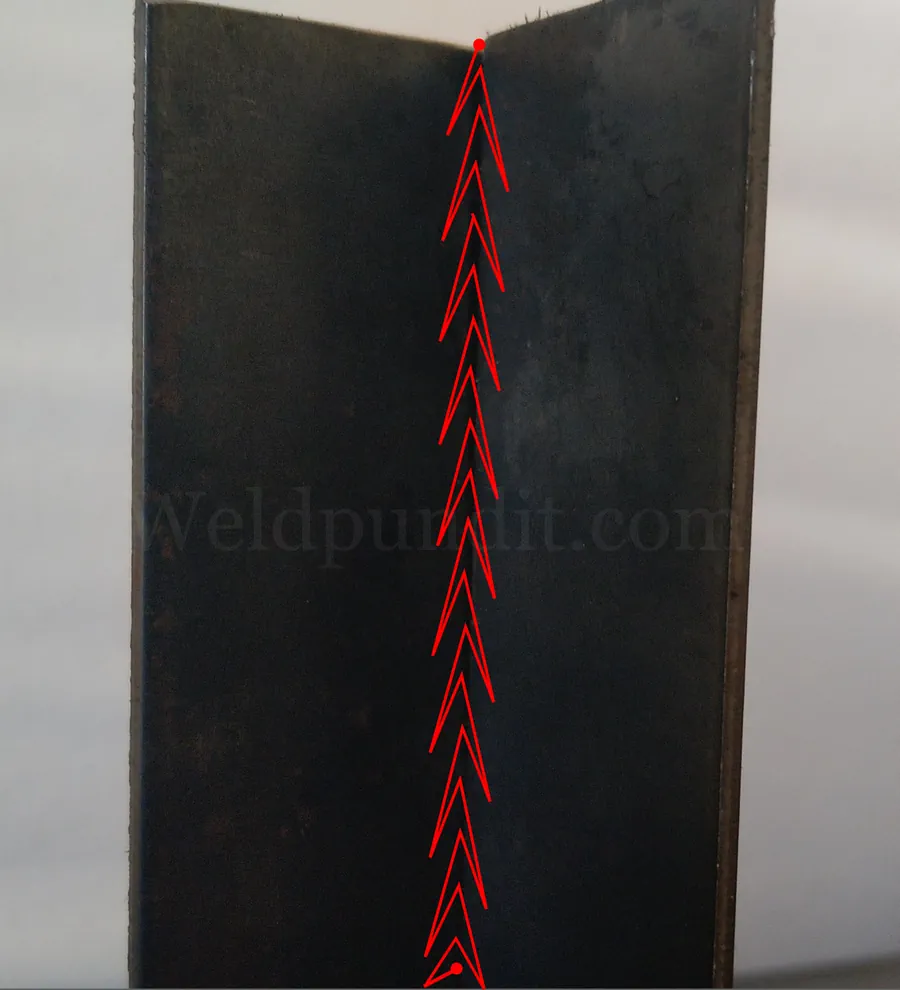
You start at the bottom of your vertical joint and patiently push that fiery puddle upwards, layer by deliberate layer. It’s like building a tiny, super-hot brick wall, one molten brick at a time.
This technique is all about fighting gravity to make sure the molten metal has plenty of time. This ensures it truly fuses deeply into both pieces of metal.
You're essentially stacking that molten puddle on itself, defying its urge to drip. When you need maximum strength, when something absolutely, positively cannot break, uphill is usually the way to go.
Think bridges, heavy machinery, or anything that carries a serious load. It creates what welders call excellent penetration.
That means the weld metal isn't just sitting on top; it's practically shaking hands with the metal beneath it, becoming one with it in a truly powerful bond. It's a bit slower, requiring more focus and a steadier hand.
You're constantly coaxing that molten pool, telling it to "stay put!" as you move inch by precious inch upwards. The heat input is higher, which means the metal gets good and toasty.
This ensures that deep, robust fusion. This is especially vital for thicker materials that need a truly substantial connection.
Think of it as building a skyscraper versus laying a garden path. One needs deep foundations and incredible strength, the other needs to look nice and handle foot traffic.
Both are valid, but for different purposes! An uphill weld often results in a slightly rougher, more stacked appearance, like rows of perfectly laid coins.
It might not win beauty contests against a smooth downhill pass, but its strength is undeniable. It’s the go-to for structural integrity.
For when that weld absolutely has to hold, no questions asked, you’re building a fortress, not just a facade. So, for those hefty projects, where durability and unwavering strength are non-negotiable, embrace the grind!
Go uphill, defy gravity, and forge a bond that could probably hold two planets together. It’s a true test of skill and patience.
The Verdict: No Wrong Answers (Mostly!)
So, which one is better? The swift river or the towering mountain? Well, my friends, it's not a competition where one always wins!
Both downhill and uphill vertical welding techniques have their glorious moments to shine. It all depends on the job at hand, the type of metal, and what kind of superhero strength you need from your weld.
For those quick, neat, non-structural fixes on thinner materials, downhill is your speedy pal. It’s like getting a perfect, smooth haircut – quick and stylish!
But when you're building something that needs to withstand the apocalypse, something truly beefy and structural, then strapping on your climbing gear for an uphill battle is the way to go.
It’s about choosing the right tool for the job, just like you wouldn't use a tiny spoon to dig a swimming pool. Each method has its own unique superpower.
Ultimately, whether you're gracefully flowing downwards or heroically pushing upwards, welding is an art form. It's about skill, precision, and a little bit of fiery magic.
So next time you see a welder working vertically, give a little nod of appreciation. They’re either gracefully dancing with gravity or boldly wrestling it into submission!
Keep those sparks flying and remember, the best weld is always the one that’s done safely and effectively for the task at hand. Now go forth and ponder your next vertical adventure!