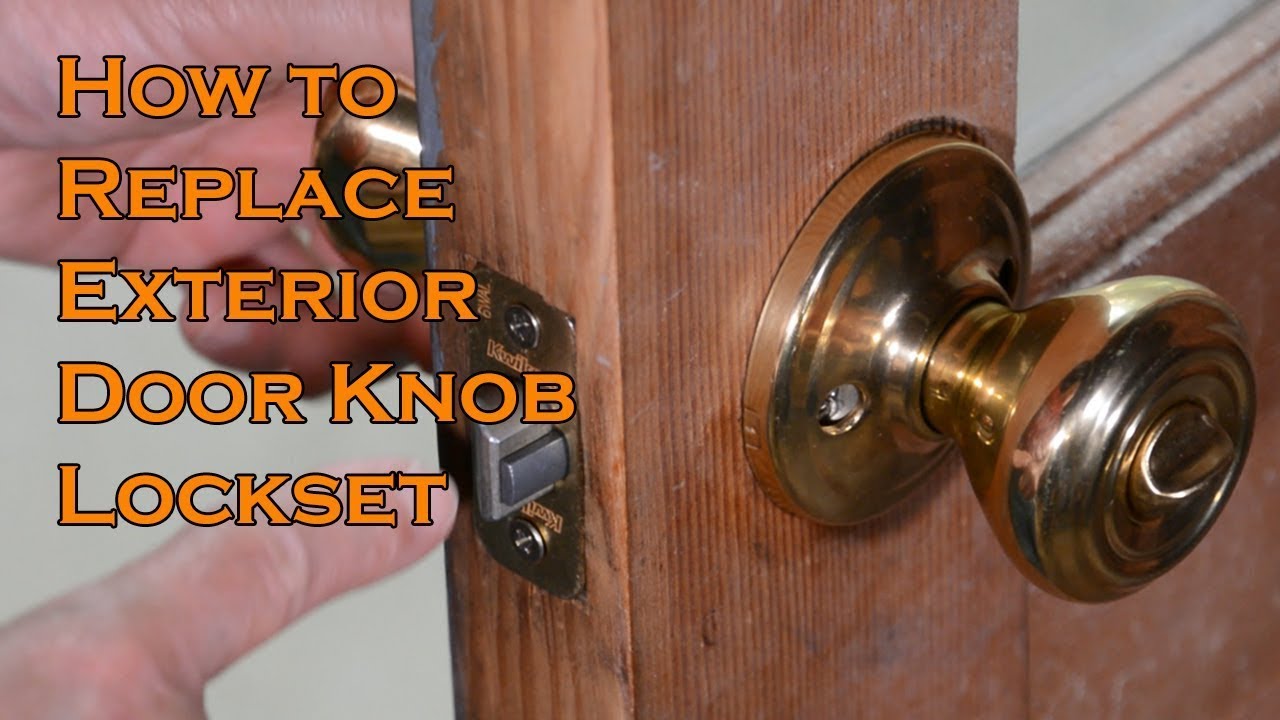
Kwikset Front Door Lock Set Installation

Alright, settle in, grab your metaphorical (or actual) beverage, because we're about to embark on a tale of daring, tools, and the glorious transformation of your front door. Forget battling dragons; today, we're tackling something far more common, yet equally noble: Kwikset front door lock set installation.
You know the drill. Your old lock. It's seen better days. Maybe it wiggles like a loose tooth, maybe the key sticks like gum on a hot sidewalk, or perhaps—and this is my personal favorite—it just looks at you with a weary sigh every time you try to turn it. Mine? It was giving off serious "I'm about to spontaneously combust" vibes, plus the handle had more play than a Shakespearean drama club. It was time for an upgrade, a new guardian for the castle.
The Grand Kwikset Unboxing: A Ritual of Anticipation
First things first, you've got your shiny new Kwikset lock set. Congratulations! This isn't just a lock; it's a promise of security, a beacon of peace, and honestly, a surprisingly elegant piece of door jewelry. Kwikset, for the uninitiated, is like the friendly giant of door security. They make things easy. They understand that not everyone has a PhD in advanced locksmithery (which, by the way, sounds like an awesome degree). Their instructions are typically a marvel of clarity, practically holding your hand through the whole process.
Must Read
Before you even think about touching the door, do a quick inventory. Open that box! Inside, you’ll find the exterior knob/lever, the interior knob/lever, the latch assembly (that little doo-hickey that goes into the door edge), the strike plate (for the door frame), and a bag of screws. And of course, the keys. Don't lose those! They're kind of important, unless you enjoy the thrill of being locked out.
Arming Yourself: The Essential Toolkit (Spoiler: It’s Not Much)
You’re probably picturing a scene from a heist movie, right? Lasers, sophisticated gadgets, maybe a tiny robot? Nope. For this mission, your arsenal is wonderfully minimalist. You’ll mostly need a Phillips head screwdriver. That’s it! Maybe a flathead if your old lock is feeling particularly stubborn or you need to pry something gently. Some folks like a tape measure or a pencil, but honestly, Kwikset's usually designed to fit existing standard holes. So, put away your angle grinder. For now.
Stage One: Evicting the Old Curmudgeon
Now, for the satisfying part: banishing the old lock. This is where you channel your inner home improvement warrior. Most old locks are held on by two screws on the interior side of the door. Find them, usually on the plate connecting the interior handle to the exterior one. Grab your trusty screwdriver, say a fond (or not-so-fond) farewell, and unscrew them.
Once those screws are out, the interior and exterior halves of the lock should separate easily. Sometimes they need a gentle wiggle or a persuasive tap. Then, turn your attention to the edge of the door. There's another plate there, holding the latch mechanism in place, usually with two more screws. Remove those, and the entire old latch mechanism should slide out. Hold it up, admire its decrepitude, and then, with a flourish, toss it into the "goodbye forever" pile. You've earned this moment.
Stage Two: Welcoming the New Latch – The Door’s Embrace
Ah, the Kwikset latch. It’s the unsung hero, the quiet workhorse. Grab your new latch. You’ll notice it has a small bolt that extends and retracts. Before you insert it into the door edge, pay attention to the little arrow or "UP" marking. Ensure the bevel (the slanted edge of the bolt) faces the direction the door closes. This is super important for smooth operation and not accidentally becoming a permanent resident of your own home.

Slide the latch into the hole in the door edge. It should fit snugly. Then, secure it with the two smaller screws provided in your Kwikset kit. Don't overtighten them, but make sure they're firm. This latch is the foundation of your new security empire!
Stage Three: The Heart of the Matter – Assembling the Main Lock
This is where the magic really happens. Take your exterior knob or lever (the one with the keyhole). Insert its "tailpiece" (the flat metal bit that sticks out the back) through the cross-bore hole in your door, making sure it goes through the center hole of the latch mechanism you just installed. It’s like threading a needle, but with less eye-strain.

Now, grab your interior knob or lever. Here's the crucial bit: it has two prongs or a slot that needs to align with the tailpiece from the exterior side. Carefully bring the interior and exterior pieces together. You're basically making a sandwich with your door in the middle. The goal is for those prongs to slide neatly into the slots or holes of the exterior piece, engaging the mechanism. Sometimes a little jiggle is required, a gentle push and pull, like you’re trying to coax a squirrel into a bird feeder.
Stage Four: The Grand Fastening and the Moment of Truth
Once the interior and exterior pieces are happily connected, you'll find two long screws. These are your heavy-duty fasteners, the ones that hold everything together like a superhero's belt. Insert them through the interior side, threading them into the exterior piece. Use your screwdriver to tighten them. Important: Tighten them evenly, alternating between screws, until the lock is snug against the door, but not so tight you warp the door or crack the finish. Think "firm handshake," not "wrestling a bear."
Before you even think about putting away your tools, it’s test time! Close the door (don't latch it yet). Turn the knob/lever. Does the latch bolt move smoothly? Great! Now, open the door and use your key in the exterior cylinder. Does it turn easily? Does it extend and retract the bolt? Fantastic!

Now, close the door and engage the latch. Try the key from the outside and the turn-piece from the inside. Does it lock and unlock without a hitch? Does it feel solid? If so, congratulations, you've just become a Kwikset lock installation maestro!
The Finishing Touches and Bragging Rights
Finally, the strike plate. This is the metal piece that goes on your door frame where the latch bolt slides in. It might be held on by two small screws. Remove the old one, put the new Kwikset one in its place, and secure it. This ensures a smooth close and proper latching. Plus, it just looks better.
Step back. Admire your handiwork. You, my friend, have just completed a home improvement task that many would shy away from, opting instead for an expensive professional. You’ve saved money, gained a new skill, and reinforced the security of your abode. Plus, think of the bragging rights! Next time someone mentions a sticky lock, you can casually drop, "Oh, I just installed a Kwikset myself last week. Piece of cake." And watch their jaws drop. You're not just installing a lock; you're building confidence, one secure door at a time. Go forth and enjoy your new, perfectly functional, and supremely secure front door!