How To Weld Stainless Steel With A Mig Welder
Alright, buckle up buttercup, because we're about to dive headfirst into the gleaming world of stainless steel MIG welding! Think it's some arcane art reserved for grizzled professionals? Nah! With a little know-how, you can be laying down beautiful beads and crafting all sorts of shiny, durable projects. Intrigued? You should be!
Why stainless steel, you ask? Because it's awesome! It’s corrosion-resistant, looks fantastic, and is incredibly strong. Think outdoor furniture that lasts a lifetime, custom kitchen fixtures, or even adding a touch of sleek, modern design to your existing projects. The possibilities are, quite frankly, endless. And who doesn't want endless possibilities?
Gearing Up for Glory
First things first, you'll need the right equipment. Don't worry, you probably already have most of it if you're dabbling in MIG welding. Here’s the shopping list:
Must Read
- A MIG Welder: Obviously! Make sure it's capable of handling stainless steel. Some models are better suited than others, so do a little research.
- Stainless Steel Wire: This is crucial! Use 308L or 316L stainless steel MIG wire, depending on the type of stainless steel you're welding. Don't even think about using regular steel wire. Trust me on this one.
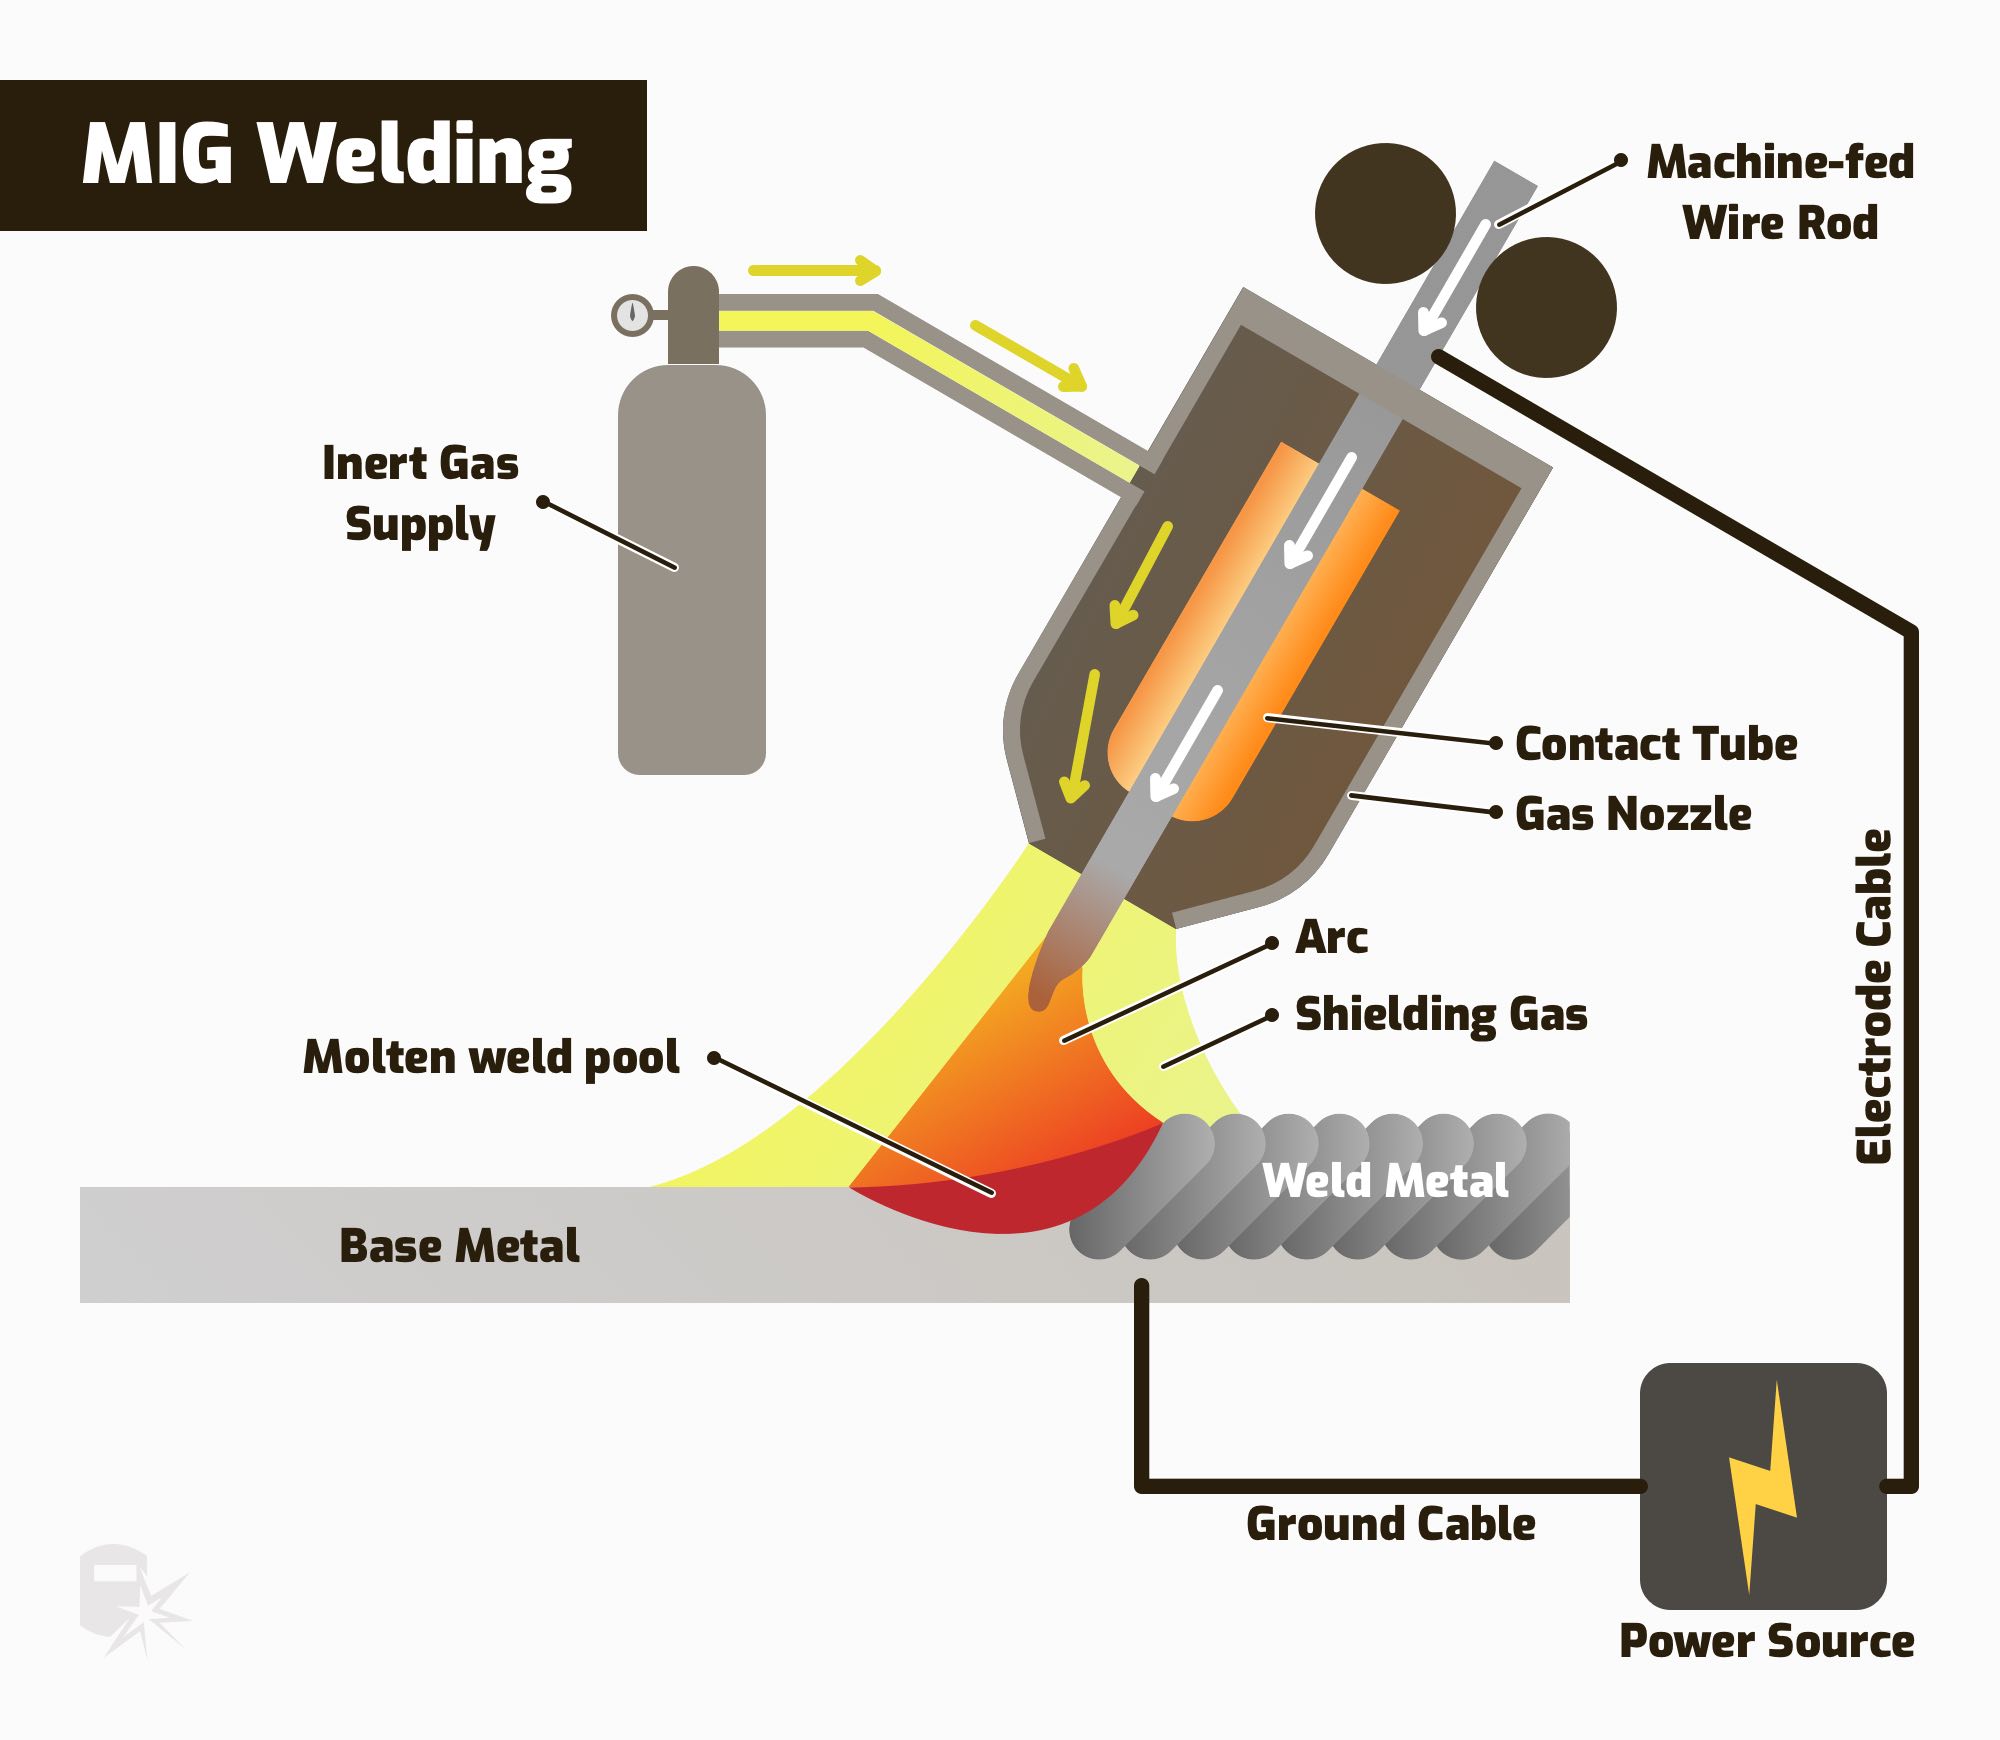
- Shielding Gas: You'll want a special blend of Argon and CO2 (usually 98% Argon/2% CO2), or pure Argon. This protects the weld from atmospheric contamination. Think of it as your weld's personal bodyguard.
- Personal Protective Equipment (PPE): Safety first! Welding helmet (auto-darkening is a game-changer), welding gloves, a welding jacket or apron, and safety glasses are non-negotiable. Seriously, protect your peepers!
- A Wire Brush (Stainless Steel): For cleaning the metal before and after welding. Regular steel brushes can contaminate the stainless.
- A Grinder: For cleaning up any imperfections or removing excess weld.
See? Not too scary, right? Once you've got your gear sorted, it's time for the fun part!
Prepping for Perfection
Preparation is key to a successful weld. Think of it like baking a cake; you wouldn't just throw all the ingredients in a bowl and hope for the best, would you? (Okay, maybe you would, but the results probably wouldn't be pretty.)
- Cleanliness is Next to Weld-liness: Thoroughly clean the stainless steel with a stainless steel wire brush or a suitable solvent. Remove any dirt, grease, oil, or rust. Contamination is the enemy of a good weld!
- Fit-Up is Fundamental: Ensure the pieces you're welding fit together snugly. Gaps can lead to weak and ugly welds. Nobody wants ugly welds!
- Tack It: Tack weld the pieces together at several points to hold them in place before you run the full weld. Think of it as temporarily gluing everything together before you commit.
Welding Wizardry: Getting Down to Business
Alright, here's where the magic happens! Remember, practice makes perfect, so don't be discouraged if your first few attempts look like abstract art. We've all been there.
- Dialing In Your Settings: Consult your welder's manual for recommended settings for stainless steel. Start with a lower voltage and wire feed speed and gradually increase them until you achieve a smooth, consistent arc. It's a bit of a balancing act.
- Technique is Everything: Use a smooth, consistent travel speed. You can use a pushing or pulling technique, depending on your preference. Experiment to see what works best for you. Don't be afraid to try new things!
- Keep it Clean: After each weld, clean the weld area with a stainless steel wire brush to remove any slag or discoloration. A clean weld is a happy weld!
- Interpass Temperature: Try to keep the temperature of the metal down when welding. Stainless steel is prone to warping and distortion if you get it too hot. Let the metal cool between passes, particularly with thinner stock.
Important Tip: Stainless steel is more sensitive to heat than mild steel. Overheating can cause discoloration and weaken the weld. Use a slightly lower amperage and faster travel speed than you would for mild steel. And patience, my friend. It's a virtue, especially in welding.

Troubleshooting Time: When Things Go Wrong
Let's be real, things don't always go according to plan. But don't fret! Here are a few common problems and their solutions:
- Porosity (Bubbles in the Weld): Could be caused by inadequate shielding gas coverage, contaminated metal, or incorrect welding parameters. Double-check your gas flow, clean the metal thoroughly, and adjust your settings.
- Undercut (Grooves Along the Edge of the Weld): Often caused by excessive amperage or a slow travel speed. Reduce your amperage and increase your travel speed.
- Burn-Through (Melting Through the Metal): Caused by excessive amperage or a slow travel speed on thin material. Reduce your amperage and increase your travel speed, or use a backing material to help dissipate heat.
See? Even when things go sideways, there's usually a fix. Welding is all about learning from your mistakes (and celebrating your successes!).

Welding stainless steel with a MIG welder might seem daunting at first, but with a little practice and patience, you'll be creating beautiful and durable projects in no time. The rewards are well worth the effort. Not only will you gain a valuable skill, but you'll also unlock a whole new world of creative possibilities. So, grab your helmet, fire up that welder, and get ready to make some sparks fly! And who knows, maybe you'll even invent the next great stainless steel…thingamajig!
Now, go forth and weld! The world needs your shiny creations!