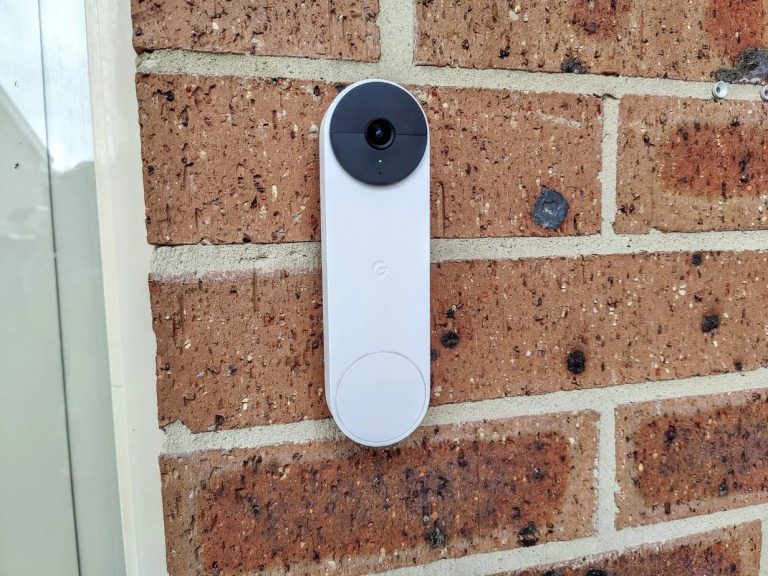
How To Take Off Google Nest Doorbell

Alright, so you've got a Google Nest Doorbell, and for whatever reason – maybe you're moving house, giving your front door a fresh coat of paint, or perhaps you're just curious about what's behind the magic – you need to take it off. Don't sweat it! This isn't brain surgery, and you certainly don't need to call in a tech wizard or a demolition crew. Think of it more like carefully detaching a Lego piece, not tearing down a wall.
We're going to walk through this together, step-by-step, with zero fuss and maximum chill. You'll be surprised how straightforward it is. No need for a superhero cape or a toolbox the size of a small car. Just a little patience and maybe a paperclip. Yes, really.
So, why would you even bother taking it off? Maybe you're relocating to a new pad and want to bring your trusty guardian with you – it's like saying goodbye to a beloved houseplant, but smarter. Or perhaps it's time for an upgrade, and your current Nest is about to get a well-deserved retirement, making way for the shiny new model. Maybe it's just being a bit temperamental, and you need to reset it, like giving a grumpy toddler a time-out. Whatever your reason, let's get that doorbell detached!
Must Read
Step 1: Safety First! Power Down
This is the big one, the most important step, and the one that will make your future self thank you. Before you start fiddling with anything electrical, we need to turn off the power. Think of it like turning off the main water supply before you try to fix a leaky tap – it just makes sense, right?
Head to your electrical panel (often in a basement, garage, or utility closet). It's usually a grey metal box with a bunch of switches. You're looking for the breaker that controls your doorbell. Sometimes it's labeled, sometimes it's a mystery. If it's unlabeled, you might have to do a bit of detective work:
- Guess and Check: Flip one that looks promising (often labeled "exterior," "front door," or "lights") and see if your doorbell goes silent.
- Trial and Error: If all else fails, you can flip the main breaker for a few minutes, but just make sure you warn anyone else in the house so they don't lose their online game mid-battle!
Once you think you've got it, verify it's off. Press the doorbell button. If it doesn't chime and its indicator light is off, you're golden! If it still rings or glows, try another breaker. Don't proceed until you're absolutely sure the power is disconnected. This is about keeping your fingers safe and sound, like keeping cookies away from a hungry dog before dinner.

Step 2: Find the Secret Release
Now that the power's off, it's time to actually get the doorbell off its mount. Most Nest doorbells (like the Hello or the wired Nest Doorbell) have a small release point, usually a tiny hole or a small button/tab on the bottom of the device. It's like the hidden button on a toy car that makes the trunk pop open.
You'll need a special tool that usually comes with your Nest Doorbell. But if you're like most of us and that tool has mysteriously vanished into the Bermuda Triangle of your junk drawer, a straightened paperclip or a very small eyeglass screwdriver will do the trick just fine. Seriously, a paperclip is often the hero here.
Locate that tiny hole or tab. It's usually quite discreet, so you might need to lean in a bit.
Step 3: The Gentle Unclip
With your trusty paperclip (or Nest tool) in hand, insert it into the tiny hole on the bottom of the doorbell. You should feel a slight click or resistance. This is you releasing the latch that holds the doorbell securely in place. Don't force it, just a gentle push, like trying to coax a shy cat out from under the sofa.
Once you've pressed the release, you can usually gently pull the bottom of the doorbell outward, away from the wall. Then, once the bottom is free, lift the entire unit upwards off its mounting plate. It should just unhook from the top. Think of it like taking a picture frame off a wall hook – a little lift, then pull away.
If it's being stubborn, apply gentle pressure with the paperclip while simultaneously trying to pull the bottom of the doorbell away. It might take a couple of tries, but it will come loose. No wrestling match needed!

Step 4: Say Goodbye to the Wires (Carefully!)
Now that the doorbell unit itself is off, you'll see a couple of wires connected to the back of it. These are the low-voltage wires that power your doorbell and allow it to ring. They're usually held in place by small screws.
Using a small Phillips head or flathead screwdriver (depending on your model), gently loosen the screws that hold these wires. You don't need to unscrew them completely – just enough so that the wires can slide out easily. Think of it like loosening your shoelaces, not taking the whole shoe apart.
Carefully remove each wire. Remember which wire went into which terminal if you plan on reinstalling it later, though with low-voltage doorbell wires, the polarity usually isn't critical. Still, it's good practice. These little wires are like tiny electrical spaghetti, so handle them with care.

Once the wires are detached, your Google Nest Doorbell is completely free! Victory!
Step 5: Tidy Up (Optional but Recommended)
If you're truly done with the doorbell in that spot – maybe you're patching the wall or painting – you can also remove the mounting plate that was screwed into your wall. This is usually held on by two or more screws. Just grab your screwdriver and undo them. It's like taking down the picture hook after the picture is gone, leaving a nice clean slate.
Now, if you plan on leaving the wires exposed, it's a good idea to cap them off with electrical tape or wire nuts, especially if there's any chance someone might accidentally switch the power back on. Better safe than sorry, like putting a lid on a pot of hot soup.
And that's it! You've successfully detached your Google Nest Doorbell. See? No fuss, no drama, just a little know-how and maybe a paperclip. Now you can move it, upgrade it, or just give your front door the fresh look it deserves. You’re practically an expert now!