How To Replace Weather Stripping Around Door

Okay, folks, gather 'round! Today, we're tackling a project so simple, so satisfying, it's practically therapeutic! We're going to banish those drafts, those sneaky breezes that whisper "winter is coming" even when it's July! We're going to replace the weather stripping around your door!
Seriously, if you can spread peanut butter on bread (and I assume you can, unless you're a highly sophisticated robot reading this), you can absolutely conquer this. It’s easier than parallel parking, less stressful than choosing what to watch on Netflix, and way more rewarding than finally folding that mountain of laundry. Ready to get started?
Step 1: Operation Identify the Enemy (a.k.a., Assess the Situation)
First things first, you need to figure out what you're dealing with. Channel your inner Sherlock Holmes (minus the deerstalker hat, unless you really want to). Examine the weather stripping around your door. Is it cracked? Crumbling? Has it mysteriously vanished into another dimension? Maybe your dog thought it was a chew toy. It happens!
Must Read
Run your hand along it. Feel those gaps? Feel that icy chill seeping through? Yeah, that’s wasted energy (and your hard-earned money) flying right out the door! This is why we're here, people! To stop the madness!
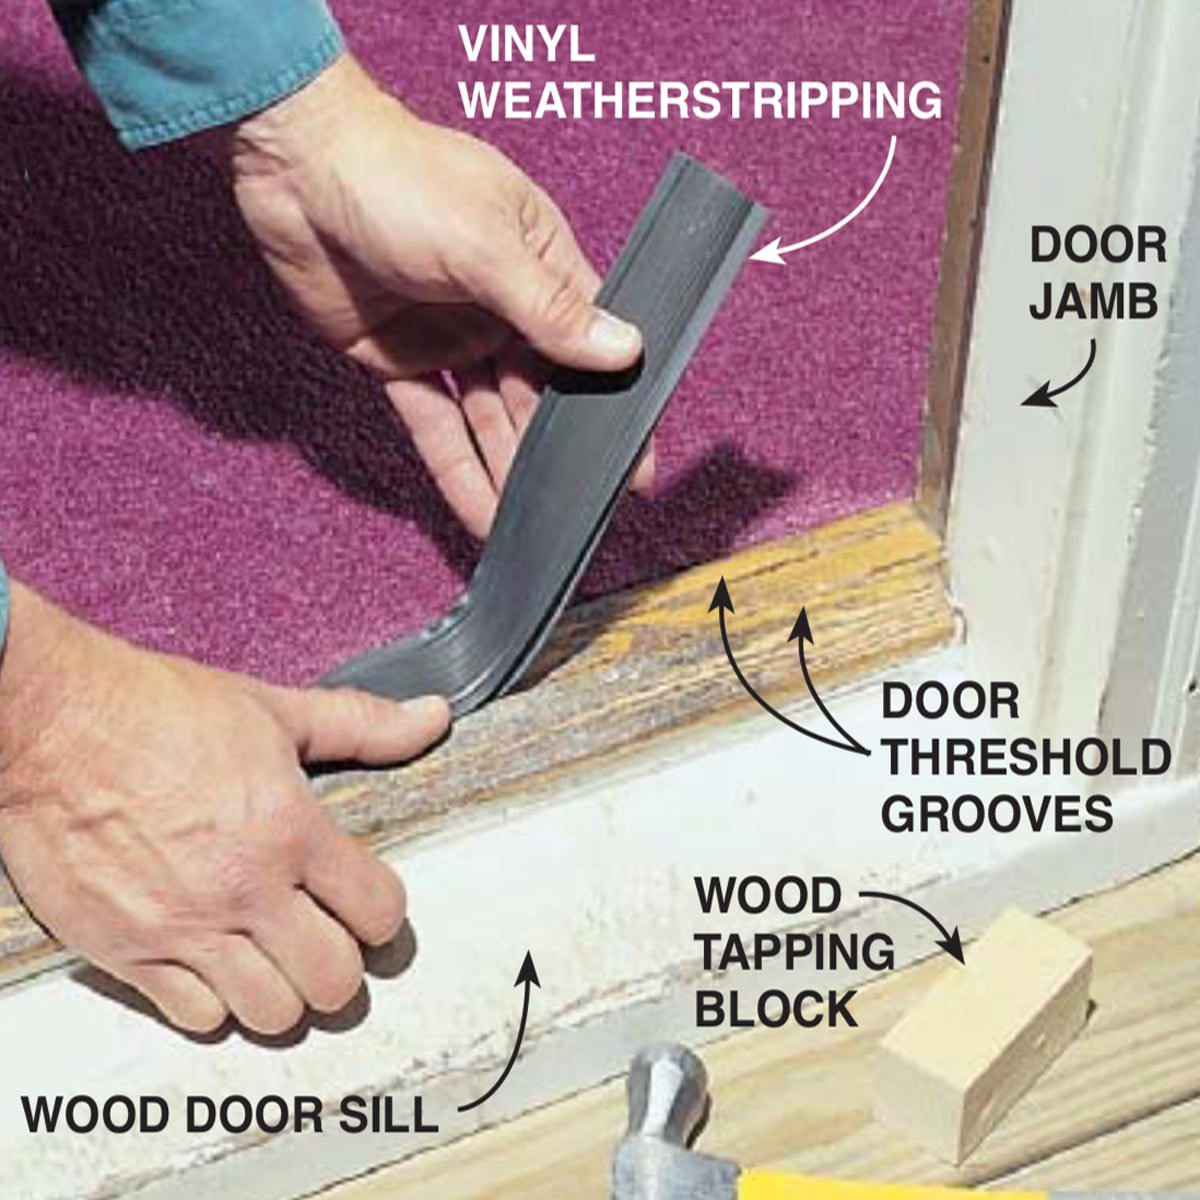
Figure out what kind of weather stripping you're dealing with. Is it nailed on? Glued on? Is it foam, rubber, or some alien technology you've never seen before? Don't panic! A quick trip to your local hardware store, armed with a sample, will set you straight. Just tell them "I need more of this!" and point dramatically. They'll understand.

Step 2: Acquire the Arsenal (a.k.a., Go Shopping!)
Alright, time for a field trip! Head to your local hardware store (or the online equivalent, if you're feeling particularly anti-social today). You'll need the following:
- New weather stripping (obviously!). Measure your door frame first! Nobody wants to buy too little.
- A utility knife (be careful, these are sharp!).
- Scissors (because sometimes a utility knife is overkill).
- A screwdriver (maybe, depending on the type of weather stripping).
- Possibly some adhesive (again, depending on the type).
- Maybe a damp cloth. Dust bunnies are the enemy of good adhesion.
Pro-tip: while you're there, grab a snack. All this DIY-ing is hungry work!
Step 3: The Removal Ritual (a.k.a., Out with the Old!)
Now, the fun begins! (Okay, maybe “fun” is a strong word, but it's definitely… a process!). Carefully remove the old weather stripping. If it's nailed, use a screwdriver or pliers to gently pry those nails out. If it's glued, a little gentle persuasion (and maybe a scraper) should do the trick.
If it's stuck on with the force of a thousand suns, don't despair! A little heat from a hairdryer can help loosen things up. Just don't melt your door frame. We’re trying to improve things here, not create a fiery inferno.
Clean the area where the old weather stripping used to be. Get rid of any gunk, grime, or stray dog hairs. A clean surface is a happy surface, and happy surfaces make for better adhesion.
Step 4: The Installation Improvisation (a.k.a., In with the New!)
This is where you unleash your inner artist! (Or, you know, just follow the instructions on the weather stripping package. That works too).

Cut the new weather stripping to the appropriate length. Remember that measuring tape thing we talked about earlier? Now's the time to use it! If you're using adhesive, apply it to the back of the weather stripping (or to the door frame, depending on the type). Press the weather stripping firmly into place, making sure it's snug and secure.
If you're using nails, carefully nail the weather stripping into place. Don't hammer too hard! You don't want to split the wood. Just enough to hold it firmly in place.
Go around the entire door frame, making sure there are no gaps or loose spots. If you find any, add more adhesive or nails as needed.

Step 5: The Draft-Dodging Dance (a.k.a., Test and Enjoy!)
Close the door. Feel that blissful silence? That absence of icy drafts? That's the sweet, sweet sound of victory!
Run your hand along the weather stripping again. Make sure it's sealing properly. If you still feel a draft, adjust the weather stripping as needed. Sometimes, a little tweaking is all it takes.
Congratulations! You've successfully replaced the weather stripping around your door! You are now a certified draft-dodging ninja! Go forth and enjoy your cozier, more energy-efficient home!