How To Remove Supports In Areas In Bambu Slicer

Okay, let's talk about 3D printing supports. You know, those scaffolding-looking things that your Bambu Lab printer diligently builds under your overhangs, like a tiny, hard-working construction crew? They’re essential, like the training wheels on a wobbly bike. But just like those training wheels, eventually, you gotta take them off, right?
And sometimes, those supports are like that one clingy friend who just won't let go. You try to gently pry them away, and they're all, "Nope, I'm part of the family now!" Leaving behind little bits and bobs that are about as welcome as glitter at a funeral. Ugh.
The Bambu Slicer to the Rescue!
Thankfully, Bambu Slicer has some tricks up its sleeve to help you selectively remove supports, giving you more control than a toddler with a crayon collection. It’s like being a sculptor, chipping away the unnecessary bits to reveal the beautiful art underneath. Except, instead of marble, it's… plastic.
Must Read
Here's the lowdown on how to tell Bambu Slicer exactly where you don't want supports, saving you hours of frustrated post-processing (and potential finger injuries).
Painting Away the Problem
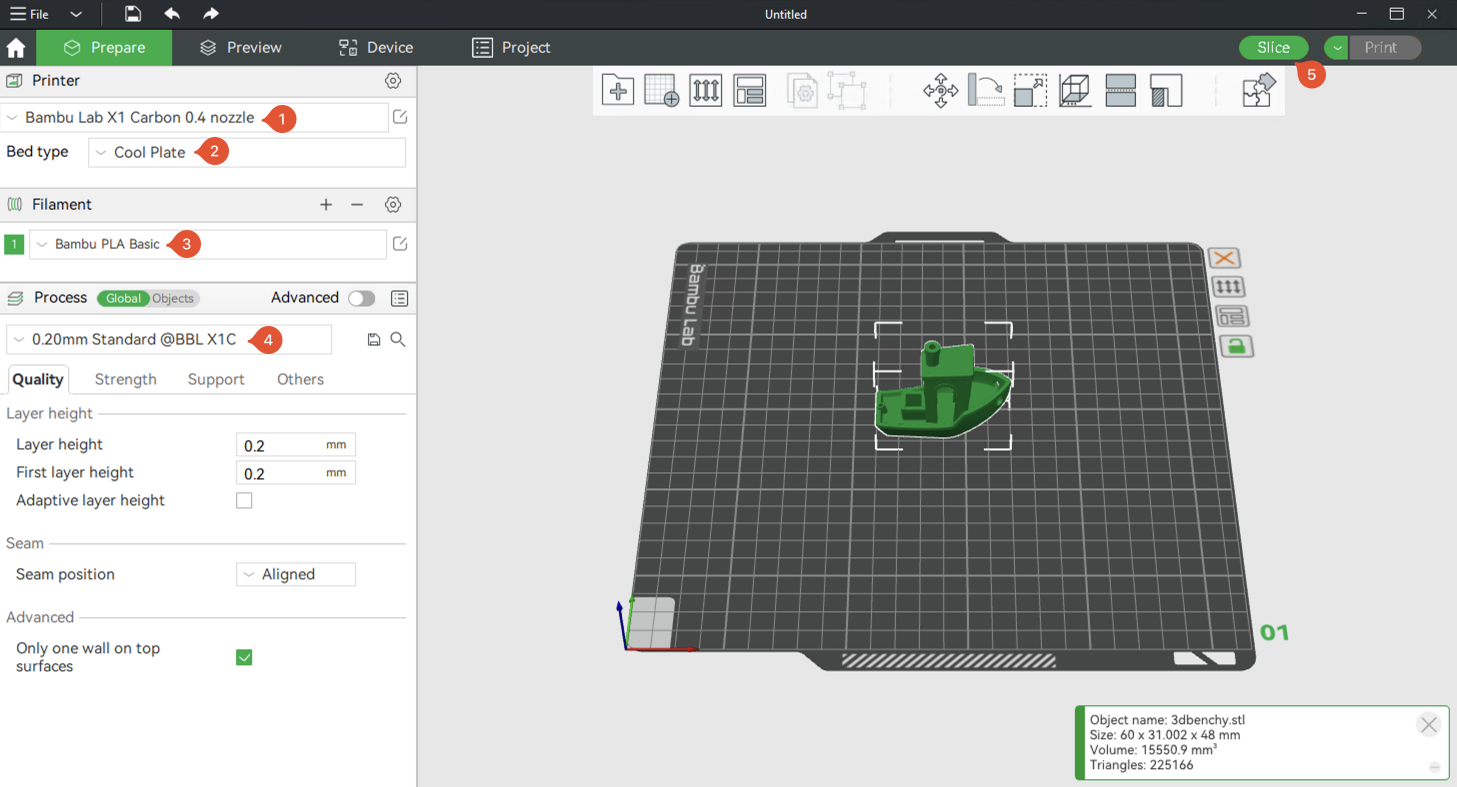
Bambu Slicer has a "Painting" function that you can find at the top of the screen. It's like having a tiny digital paintbrush. Here’s how it works:

- Load your model: Pretty straightforward. Drag and drop or use the "File" menu.
- Switch to "Prepare" mode: Find it at the top of your screen. Think of it as getting ready for battle.
- Select the "Supports" tab: Over on the left-hand side. Time to arm yourself.
- Engage the "Manual Support" feature, and look for the "Paint Support" tool.: Should be obvious but may require a click or two to expand the drop down menu.
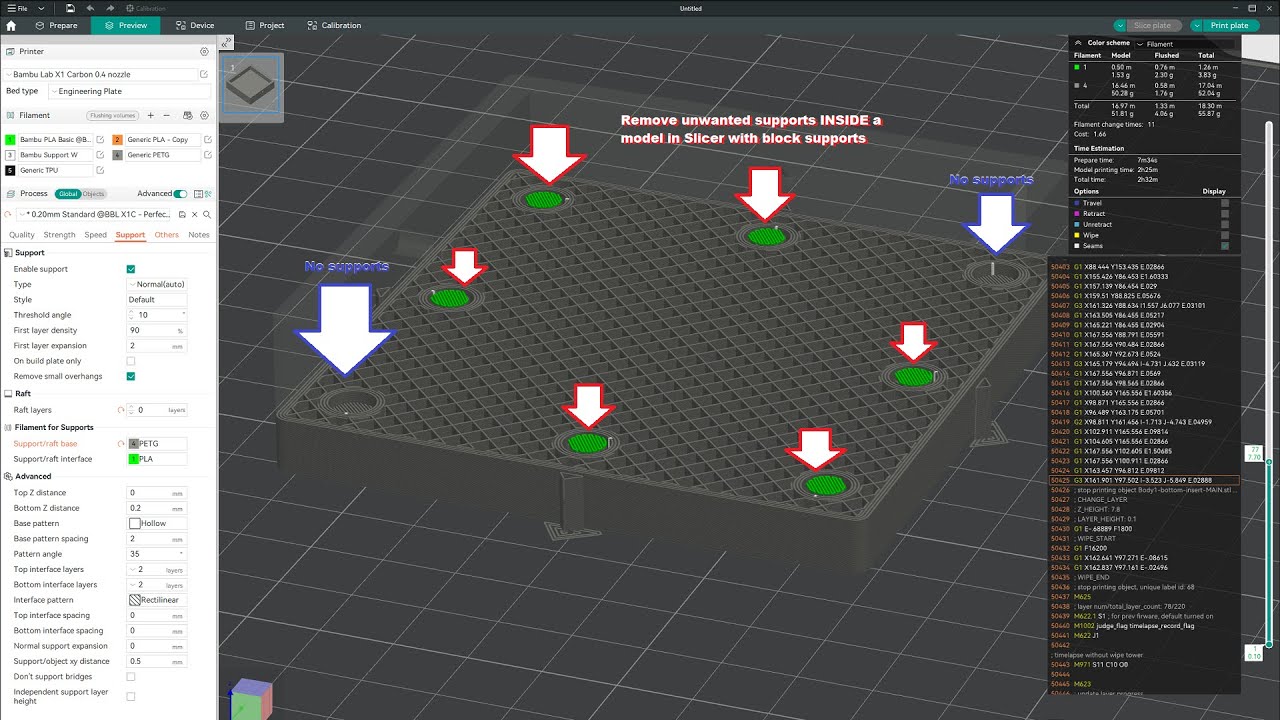
- Choose your weapon:
- Block: Paints large, rectangular areas. Good for broad strokes, like saying "No supports allowed near this entire wall!"
- Sphere: For more targeted areas. Like surgically removing a single pesky support.
- Paint the No-Support Zone: Click and drag on the model where you don't want supports. The area will be highlighted in a special colour, usually red. It’s like putting up a "Do Not Disturb" sign for support generation.
- Slice it, Slice it Good: Click the "Slice" button. Bambu Slicer will recalculate the supports, respecting your painted zones.
Advanced Tips and Tricks
- Brush Size Matters: Adjust the brush size in the settings to fine-tune your selections. A small brush is your friend when dealing with delicate details.
- Angle is Everything: Rotate the model to get a better angle for painting. Sometimes a slight shift in perspective makes all the difference.
- Preview, Preview, Preview: Before slicing, use the preview mode to see where the supports will actually be generated. This helps you catch any errors or missed spots before committing to the print.
Why bother with all this manual intervention?
Well, sometimes the slicer gets a little overzealous with the supports. It's like your grandma who insists on feeding you three helpings of dessert, even though you're already full. Painting away supports allows you to:

- Save Filament: Less support = less wasted material. Think of it as reducing your carbon footprint, one plastic filament at a time.
- Reduce Print Time: Fewer supports mean faster prints. More time for other hobbies, like… uh… more 3D printing?
- Improve Surface Finish: Minimizing support contact points leads to a smoother, cleaner final product. No more battling those stubborn little support nubs!
Final Thoughts
Removing supports in Bambu Slicer might seem a bit daunting at first, but with a little practice, it becomes second nature. You’ll be wielding that virtual paintbrush like a pro, creating flawless prints with minimal post-processing. So go forth, 3D printing warrior, and conquer those supports! Happy printing!