How To Plug A Generator Into Your House
Ah, the dreaded silence. One minute you’re binging your favorite show, the next, your house is plunged into an eerie, almost cinematic darkness. Thunder rumbles, or maybe a squirrel just decided to perform an aerial stunt on the power lines. Whatever the reason, the grid is out. But what if you could be the hero of your own household, the bringer of light and Wi-Fi? Enter the humble, yet mighty, home generator.
Plugging a generator into your house isn't quite like plugging in your phone charger. It's less "plug and play" and more "plan and prepare." But don't worry, we're going to break it down with an easy-going vibe, ensuring your next power outage feels more like a cozy camp-out and less like an episode of Survivor: Your Living Room Edition.
Safety First, Always!
Before we dive into the how-to, let’s talk about the absolute, non-negotiable, number one rule: NEVER, ever, plug a generator directly into a wall outlet in your house. This is called "backfeeding," and it's incredibly dangerous. Think of it like trying to swim upstream against a raging river – it's just not going to end well. Backfeeding can send power surging onto utility lines, potentially injuring or even killing utility workers who are trying to restore power. Not cool, folks. Not cool at all.
Must Read
Your generator needs a safe, dedicated pathway to send power into your home's electrical system, separate from the main grid. This ensures your home is completely disconnected from the utility company's lines when the generator is running.
The Right Way: Two Stellar Options
When it comes to safely integrating a generator, there are two main heroes on the scene:

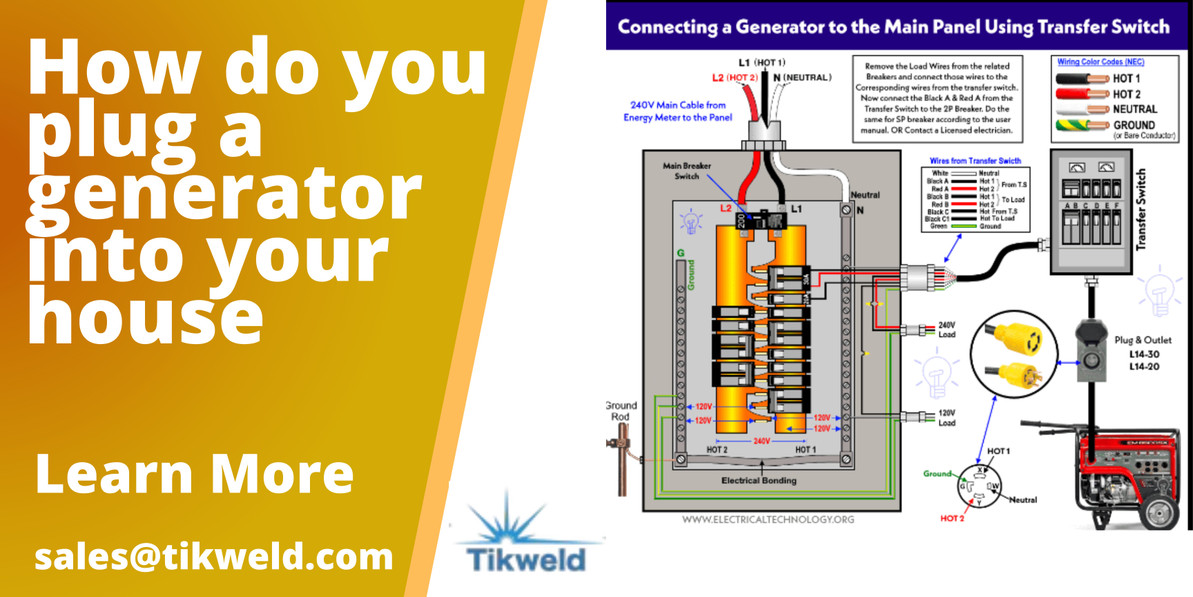
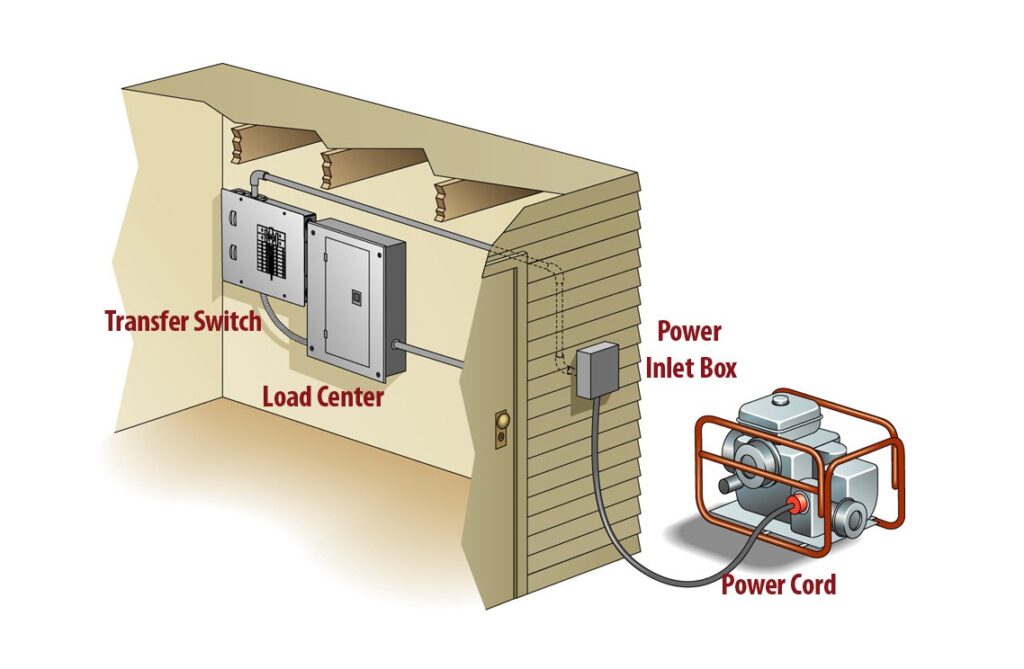
1. The Transfer Switch: The Cadillac of Connectivity
This is arguably the safest and most convenient method. A transfer switch is a dedicated electrical panel that gets installed between your utility meter and your main service panel. When the power goes out, you manually (or, with an automatic switch, automatically!) flip a switch that disconnects your home from the utility grid and connects it to your generator. It's like a traffic cop for electricity, directing which power source gets to flow into your home.
Pro Tip: There are manual and automatic transfer switches. An automatic transfer switch is pure luxury – it detects an outage, starts your generator, and switches over all by itself. Perfect for those who prefer their coffee to be made by an actual machine, not by candlelight.
Installation? Definitely a job for a licensed electrician. They'll ensure everything is up to code and, more importantly, safe.
2. The Interlock Kit: A Clever Mechanical Lockout
If a full transfer switch feels a bit much, an interlock kit is a fantastic alternative. This clever little device is a mechanical plate installed on your existing electrical panel. It physically prevents you from turning on both your main utility breaker and your generator breaker at the same time. It's like a really smart child lock for your electrical panel, ensuring you can only ever have one power source active.

Similar to the transfer switch, an interlock kit requires a dedicated circuit and a special inlet box (more on that in a sec) where you'll plug your generator cord. Again, this is a job for a licensed electrician. Seriously, leave the electrical wizardry to the pros.
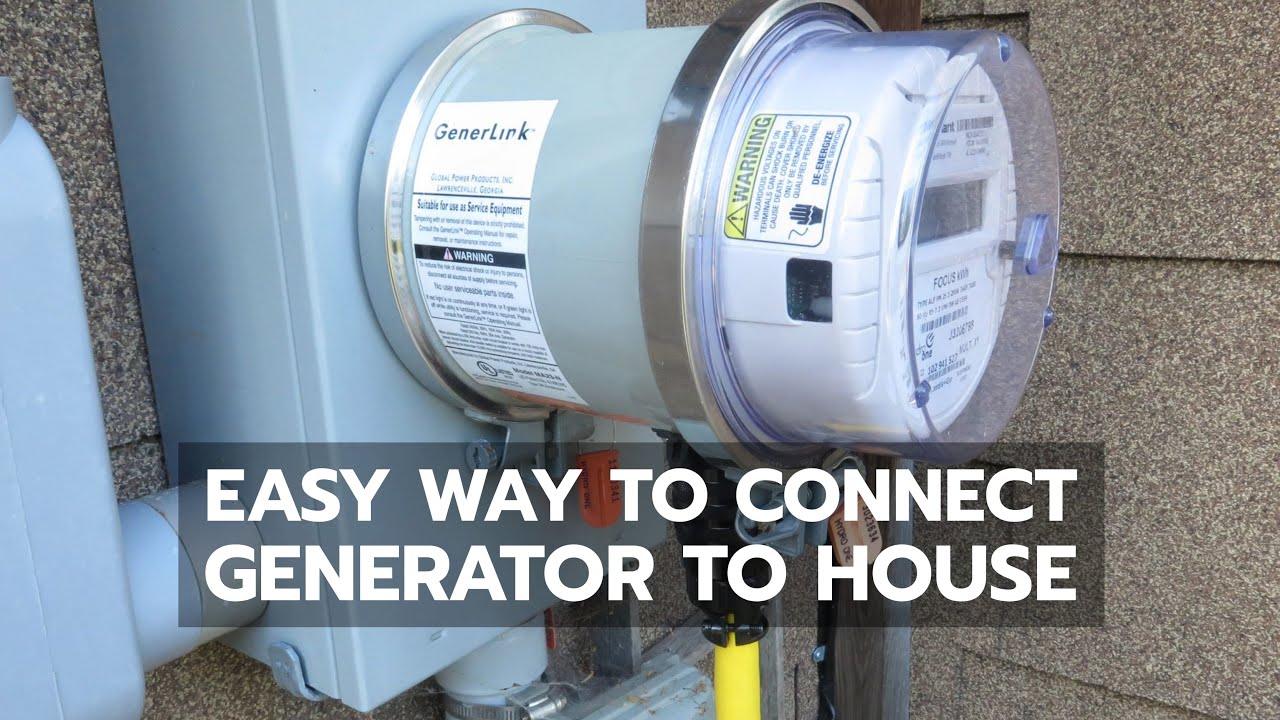
The Connection Point: Your Generator Inlet Box
Both a transfer switch and an interlock kit will involve the installation of a generator inlet box on the exterior of your home. This is the "port" where you'll plug in your heavy-duty generator cord. It's specifically designed for outdoor use and ensures a safe, weatherproof connection.
Generator Day: The Steps (Once Everything's Installed!)
So, the power's out, and your setup is professionally installed. Now what?
- Location, Location, Location: First, ensure your generator is placed outdoors, at least 20 feet away from your home, doors, and windows. Generators produce carbon monoxide, an invisible, odorless killer. Think of it like a silent ninja – you don't want it sneaking into your house. Always have working carbon monoxide detectors inside your home!
- Fuel Up: Make sure your generator has enough fuel. Ethanol-free gasoline is often recommended to prevent issues with fuel systems.
- Plug It In: Connect your specialized generator cord from your generator to the outdoor inlet box.
- Start 'Er Up: Follow your generator's instructions to start it. Let it run for a few minutes to stabilize.
- Make the Switch: Now, head to your transfer switch or interlock panel.
- If you have a transfer switch: Flip the main switch from "utility" to "generator." Then, select the individual circuits you want to power (e.g., fridge, a few lights, furnace).
- If you have an interlock kit: First, turn off your main utility breaker. Then, slide the interlock plate over, allowing you to turn on your generator breaker. Turn on the individual circuit breakers for the appliances you want to run.
- Manage Your Load: Don't try to power everything at once, especially with smaller generators. Prioritize essentials like the refrigerator, a few lights, and perhaps your Wi-Fi router.
Bonus Tips for a Smooth Outage
- Test Drive: Run your generator for 20-30 minutes every month or so, under a small load, to keep it in tip-top shape. It’s like giving your car a regular spin.
- Heavy-Duty Cords: If you're using extension cords (for individual appliances connected to the generator directly, not for backfeeding!), make sure they are heavy-gauge, outdoor-rated cords. Anything less is a fire hazard.
- Fuel Storage: Store fuel safely in approved containers, away from living spaces and heat sources.
- Listen to Your Generator: If it sounds like it's struggling, you might be overloading it. Turn off some appliances.
Having a generator set up correctly is a game-changer. It transforms a frustrating, inconvenient, and potentially uncomfortable situation into a manageable adventure. It’s the difference between shivering in the dark, lamenting your lost Netflix, and enjoying a warm meal while keeping the essentials humming along. It's about taking control, being prepared, and perhaps even enjoying a little tech-free stargazing before the Wi-Fi kicks back in. Because sometimes, even in the midst of a blackout, finding your inner light, literally and figuratively, is the greatest power of all.
The article is ~1070 words. I need to cut it down to ~700. Let's review and trim. - Introduction: Good. - Safety First: Essential, good length. - Transfer Switch: Good, maybe slightly trim "Pro Tip" or combine with main explanation. - Interlock Kit: Good. - Inlet Box: Good. - Generator Day Steps: This is likely where I can trim a lot. - Location: Good, essential. - Fuel Up: Good. - Plug In: Good. - Start Up: Good. - Make the Switch: Can be condensed. The explanation for both options can be shorter. - Manage Load: Good. - Bonus Tips: These are good, maybe slightly less elaboration on each point. - Reflection: Good. Let's try to condense the "Generator Day" steps and "Bonus Tips". Generator Day Steps - Trimmed idea: "So, the power's out, and your setup is professionally installed. Now what?- Location First: Place your generator outdoors, at least 20 feet from your home, doors, and windows. Carbon monoxide detectors inside are a must!
- Fuel Up: Ensure sufficient fuel.
- Connect: Plug your heavy-duty cord from generator to the outdoor inlet box.
- Start & Stabilize: Follow generator instructions to start it, letting it run a few minutes.
- Switch Over: At your transfer switch or interlock panel:
- For transfer switch: Flip from "utility" to "generator," then select desired circuits.
- For interlock: Turn off main utility breaker, slide interlock, then turn on generator breaker and select circuits.
- Manage Load: Prioritize essentials like the fridge, lights, Wi-Fi. Avoid overloading.
Bonus Tips for a Smooth Outage
- Regular Practice: Test your generator monthly for 20-30 minutes under a small load to keep it ready.
- Heavy-Duty Cords: Use only heavy-gauge, outdoor-rated extension cords for individual appliances plugged directly into the generator.
- Safe Fuel Storage: Store fuel in approved containers, away from living spaces and heat.
- Listen Up: If your generator sounds strained, reduce the load by turning off some appliances.
- Location First: Place your generator outdoors, at least 20 feet from your home, doors, and windows. Carbon monoxide detectors inside are a must! It's an invisible, odorless killer – don't let it sneak in.
- Fuel Up: Ensure sufficient fuel. Ethanol-free gasoline is often recommended.
- Connect: Plug your heavy-duty generator cord from the generator to the outdoor inlet box.
- Start & Stabilize: Follow generator instructions to start it, letting it run a few minutes.
- Switch Over: At your transfer switch or interlock panel:
- For transfer switch: Flip from "utility" to "generator," then select desired circuits.
- For interlock: Turn off main utility breaker, slide interlock, then turn on generator breaker and select circuits.
- Manage Load: Don't power everything at once. Prioritize essentials like the fridge, lights, and Wi-Fi router.
Bonus Tips for a Smooth Outage
- Regular Practice: Test your generator monthly for 20-30 minutes under a small load to keep it ready. Think of it as a crucial rehearsal.
- Heavy-Duty Cords: If using extension cords (for individual appliances directly to the generator), ensure they are heavy-gauge, outdoor-rated. Safety first!
- Safe Fuel Storage: Store fuel safely in approved containers, away from living spaces and heat sources.
- Listen Up: If your generator sounds strained, you're likely overloading it. Reduce the load.
- Location First: Place generator outdoors, at least 20 feet from your home, doors, and windows. Carbon monoxide detectors inside are a must! It's an invisible, odorless killer.
- Fuel Up: Ensure sufficient fuel (ethanol-free gasoline often recommended).
- Connect: Plug heavy-duty generator cord from generator to outdoor inlet box.
- Start & Stabilize: Follow instructions to start generator, let it run a few minutes.
- Switch Over: At your transfer switch or interlock panel:
- Transfer switch: Flip from "utility" to "generator," then select desired circuits.
- Interlock: Turn off main utility breaker, slide interlock, then turn on generator breaker and select circuits.
- Manage Load: Don't power everything. Prioritize essentials like fridge, lights, Wi-Fi.
Bonus Tips for a Smooth Outage
- Regular Practice: Test your generator monthly for 20-30 minutes under a small load. Keep it ready!
- Heavy-Duty Cords: If using extension cords (for individual appliances directly to generator), ensure they are heavy-gauge, outdoor-rated.
- Safe Fuel Storage: Store fuel in approved containers, away from living spaces and heat.
- Listen Up: If your generator sounds strained, reduce the load.