How To Make A Plaster Cast Mold

Okay, so you want to get into making plaster cast molds, huh? My friend, you’ve come to the right place! Because honestly, it sounds super intimidating, doesn’t it? Like, you picture some mad scientist in a lab coat, swirling chemicals. But nah, it’s actually really, really fun and surprisingly simple. Think of it as adult play-doh, but with a much cooler end product. We’re gonna break it down, no fancy jargon, just good old-fashioned chatting. You ready?
First Things First: Gather Your Loot (aka Materials!)
Before we get our hands metaphorically dirty, let's make sure you've got everything. No scrambling mid-mix, please! That’s a recipe for a plaster-y panic attack, and nobody wants that.
- Plaster of Paris: This is our star, obviously! You can grab this at most craft stores or hardware shops. Don't worry, it's not fancy.
- Water: Tap water is perfectly fine. No need for Fiji bottled water, unless you're feeling bougie.
- Mixing Bowls/Containers: Go for something disposable, seriously. Old yogurt containers, plastic take-out boxes, even a cut-up milk jug. Cleaning plaster out of your good Tupperware is a nightmare you don't need.
- Stirring Sticks: Old spatulas, paint stirrers, even sturdy plastic cutlery. Again, disposable is your friend here.
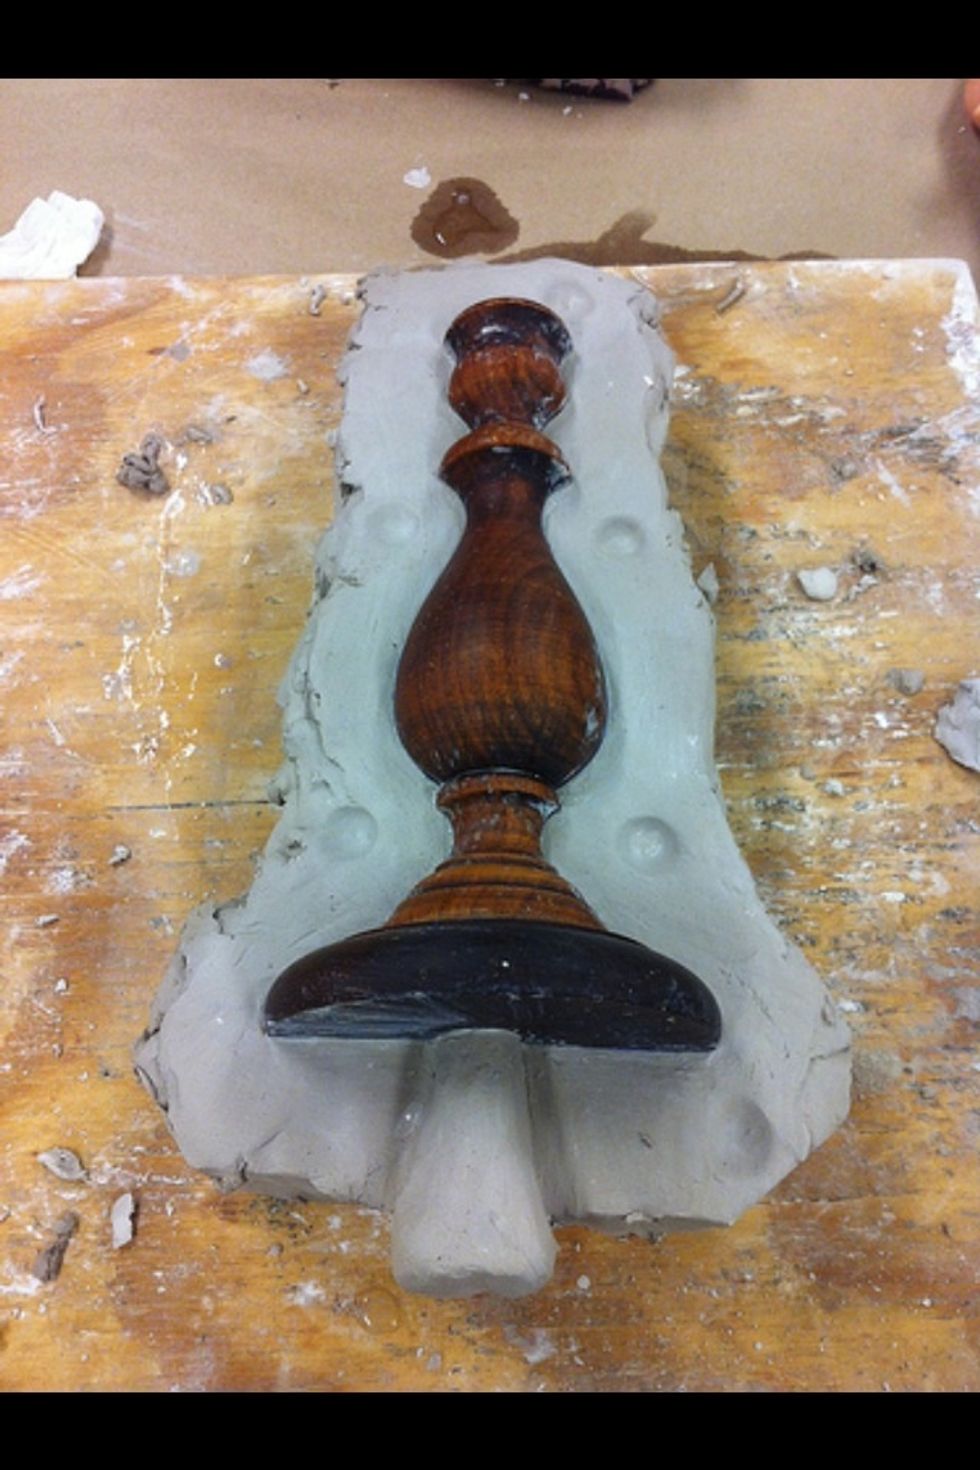
- Your "Original": This is the item you want to make a mold of. A cool rock, a small toy, a seashell, an interestingly shaped cookie cutter – anything! Just make sure it’s not porous or super delicate, because we’re going to get it a little messy.
- Release Agent: This is crucial. Think of it as sunscreen for your original. Petroleum jelly (Vaseline!), cooking spray, or even a bit of dish soap diluted in water works. Don't skip this, or your original will become one with the plaster. Forever.
- A Containment Wall: Something to build a little fence around your original. Cardboard strips, Lego bricks, play-doh, even modeling clay. It just needs to hold the liquid plaster in.
- Gloves: Optional, but highly recommended if you don't want plaster-hands for the next few hours.
Prep Your Original (No, Seriously, Prep It!)
Okay, you’ve got your cool little thingy you want to immortalize (well, mold-alize?). Now, we need to get it ready. This step is super simple but also, dare I say, non-negotiable.
Must Read
First, give your original a quick wipe down. We don’t want any rogue dust bunnies ruining our perfect mold, right? Then, and this is where the magic happens, apply that release agent generously. If it’s petroleum jelly, slather it on! Make sure you get into all the nooks and crannies. If it's cooking spray, give it a good, even coat. This ensures your original can say "see ya!" to the plaster once it's set.
Next, place your original on a flat, protected surface (wax paper or an old placemat works wonders). Build your little containment wall around it. You want enough space for about half an inch to an inch of plaster all around your original, and at least half an inch over the top. This little wall will stop our liquid plaster from running all over your table, which, trust me, is a mess you want to avoid.
Mixing That Plaster! (The "Tricky" Part, But You Got This!)
Alright, deep breaths! This is often where people get a bit nervous, but it’s totally fine. The key here is consistency, like a good pancake batter, or maybe thick cream. Not too watery, not too lumpy-chunky.
Pour some water into one of your disposable mixing bowls first. Always add plaster to water, not the other way around. Why? Science, probably. Or just less lumpy mess, which is good enough for me!
Now, slowly start sprinkling the plaster of Paris into the water. Don't just dump a huge pile in! Sprinkle it evenly, letting it sink naturally. Keep sprinkling until little "islands" of plaster start to form on the surface, and it looks a bit like melting ice cream. Stop sprinkling then.
Let it sit for about a minute or two. This is called "slaking" – fancy, huh? It just lets the plaster absorb the water properly. Then, grab your stirring stick and gently, slowly mix. Don't whisk it like you're making meringue! That introduces air bubbles, and air bubbles are the enemy of a smooth mold. Mix until it's smooth and lump-free, like that perfect pancake batter we talked about. You want it thick enough to coat your stirring stick, but still pourable. If it's too thick, add a tiny bit more water. Too thin? Sprinkle in a smidge more plaster.
The Grand Pour!
This is the exciting bit! Your original is prepped, your plaster is perfectly mixed. Now, gently and slowly pour the plaster over your original. Start at one end of your containment wall and let it flow over the object. This helps avoid trapping air bubbles underneath. Make sure your original is completely submerged, with that half-inch to an inch of plaster covering the highest point.

Once poured, give your table a few gentle taps, or lightly wiggle your container. This helps any trapped air bubbles rise to the surface. See those tiny bubbles popping? That’s good! You’re getting a smoother mold.
The Waiting Game & The Big Reveal
Now, we wait. Plaster sets pretty quickly, usually within 15-30 minutes, depending on the brand and how thick your mix was. How do you know it’s ready? It'll start to feel warm to the touch – that's a chemical reaction happening! It will also feel hard and solid, not gummy or squishy.
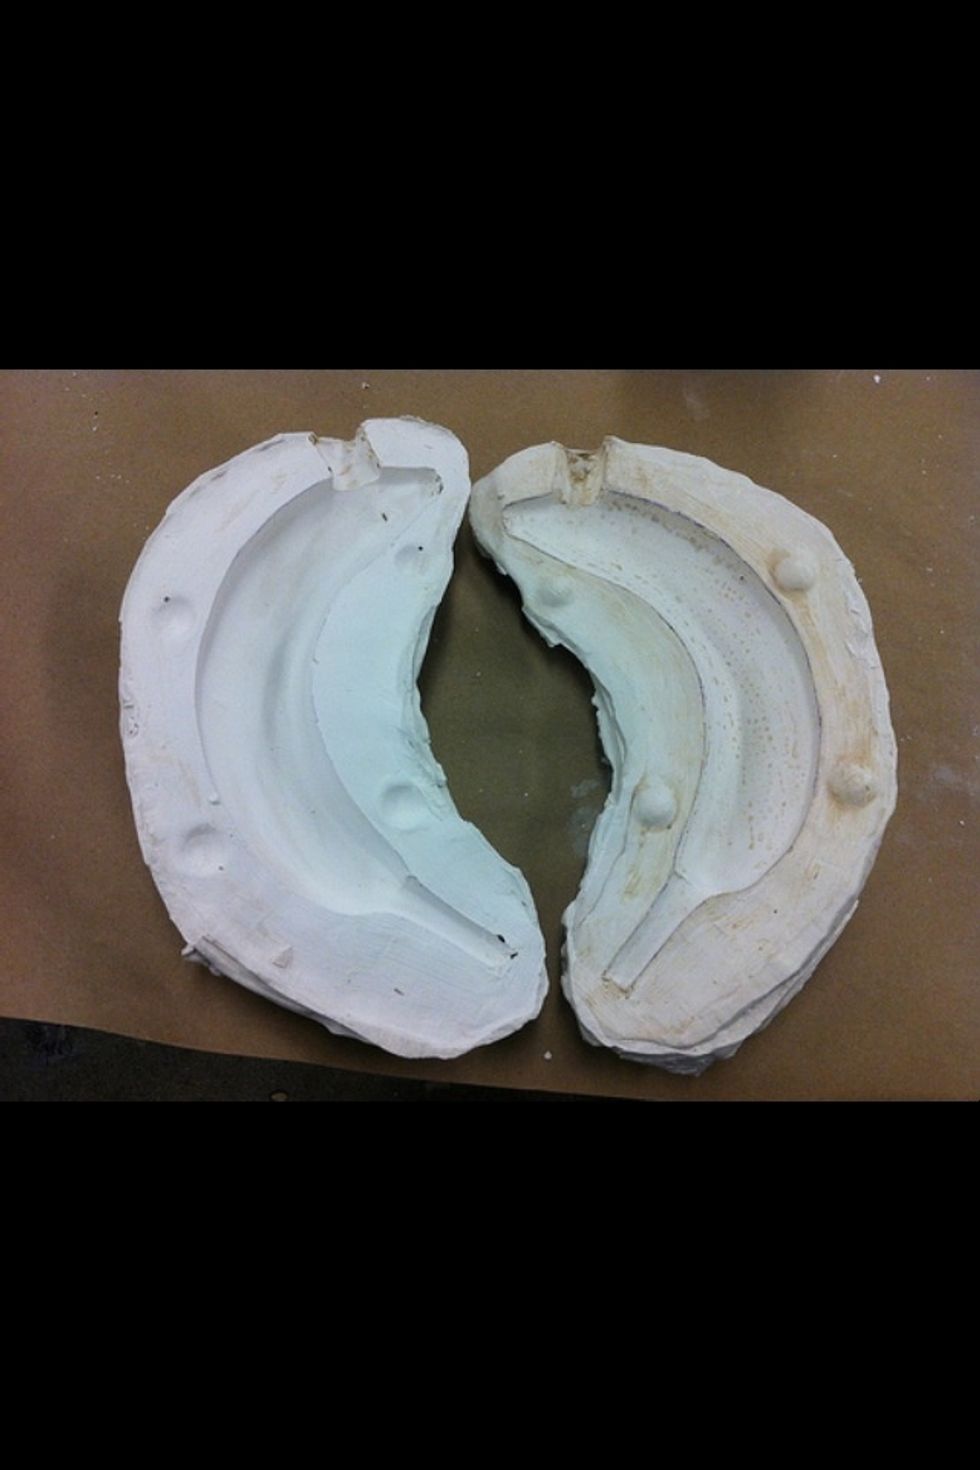
Once it’s firm and cool to the touch, it’s demolding time! Carefully remove your containment walls. Now, for the moment of truth. Gently, gently pry your original out of the plaster. If you were generous with that release agent, it should pop right out. If it’s stubborn, use a plastic tool or even an old credit card to carefully wiggle it free. Don't force it! You don't want to break your new mold (or your original!).

And there you have it! A perfect negative impression of your original. Look at you, you master mold-maker!
So, What Now?
Congratulations, you’ve made a mold! Now you can use this mold to cast new objects out of... well, more plaster, obviously! Or resin, or soap, or even chocolate if it's food-safe plaster (check your plaster type for that!). Just remember to apply a release agent to your new plaster mold before pouring in your casting material, just like you did with your original.
Wasn't that way less scary than you thought? See? I told you! Go forth and mold, my friend. The world is your oyster... or, well, your plaster casting mold of an oyster!