How To Install Pv Panels On Roof

Alright, folks, gather 'round! Ever stare at your electricity bill and feel like you're personally funding a small country's power grid? Or maybe you've had a sudden urge to hug a tree and tell it you're doing your part? Welcome to the wonderful, sun-kissed world of installing PV panels on your roof! It sounds like a job for astronauts or people with very specific engineering degrees, but trust me, with a bit of elbow grease and a healthy dose of common sense, it's more like a really satisfying, giant LEGO project.
Let's be real, the idea of DIY solar can feel a bit like deciding to bake a soufflé after only ever making toast. Intimidating! But think of it less as rocket science and more like assembling IKEA furniture, but on your roof. You'll definitely need more than an Allen key, though, and probably less Swedish meatball breaks. Unless you're into that. No judgment here.
First, the Safety Chat (Seriously, It's Important!)
Before we even dream of climbing a ladder, let's talk safety. This isn't just about avoiding a scraped knee; we're talking about working at heights and with electricity. So, please, treat your roof like it's made of buttered ice (especially if it's wet or mossy). Get a good, sturdy ladder, wear appropriate safety gear – gloves, safety glasses, and sturdy shoes with good grip are your new best friends. And maybe, just maybe, tell someone what you're up to. Think of it as having a spotter for your epic roof-climbing adventure. We're aiming for superhero status, not hospital visits!
Must Read
Phase One: The Brains Before the Brawn (Planning, Planning, Planning!)
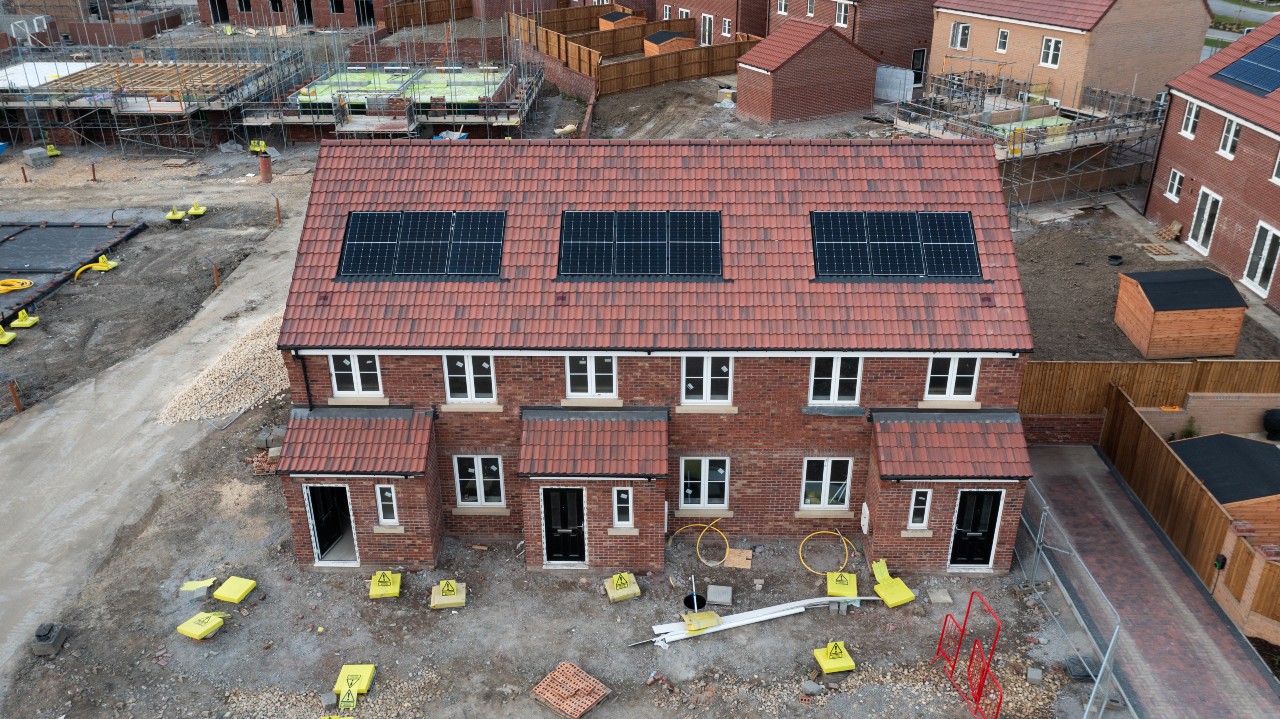
You wouldn't start a road trip without knowing where you're going, right? Same deal here. First up, site assessment. Look at your roof. Does it get good sun all day, or is it constantly overshadowed by that one ridiculously tall oak tree your neighbor refuses to prune? You'll want to avoid shade like it's a tax audit. Next, permits. Yes, the dreaded paperwork. This varies wildly by location, but trust me, you want to get this sorted before you're up there looking like a confused squirrel with a drill. Check with your local authorities. It'll save you headaches later.
Then, measurements! Get up there (safely, please!) and measure your roof space. Figure out how many panels you can realistically fit. Think of it like arranging furniture in a new apartment; you want to maximize space efficiently without making it look crammed. Most panels are a standard size, so you can draw out a rough plan. Don't forget to factor in fire setbacks – spaces around the edge of your roof that need to stay clear.

Gathering Your Solar Arsenal (Tools & Materials)
This is where your inner handy-person comes out. You'll need the panels themselves, of course. Then there's the mounting system (racks and rails that hold the panels), an inverter (which converts the DC power from the panels to AC power your home uses), and various electrical bits like wiring, connectors, and a disconnect switch. Tools? A good drill, wrenches, a tape measure, caulk gun, stud finder (for finding rafters), and maybe a level. Oh, and a very patient attitude for those inevitable multiple trips to the hardware store. It's like a scavenger hunt, but the prize is free electricity!
Phase Two: Building the Foundation (Racking & Rails)
This is where you start making permanent changes, so take your time. First, you'll need to locate your roof rafters. This is where your stud finder earns its keep! You'll be drilling pilot holes and attaching flashing (to prevent leaks, super important!) and then your mounting brackets or feet. These are like the sturdy little pedestals that your whole system will rest upon. Then, you attach the aluminum rails to these brackets. Think of these rails as the train tracks for your panels. They need to be straight, level, and incredibly secure. This is the backbone of your entire solar array, so make it strong!
The Big Reveal: Placing the Panels
This is the moment! With the rails firmly in place, you can start lifting your panels. Be careful! These things can be surprisingly awkward and heavy. It's definitely a two-person job, especially on a sloped roof. Gently slide them into position on the rails and use the clamps provided by your mounting system to secure them. Work systematically, one panel at a time, making sure each one is snug and secure. It’s like putting the last pieces of a giant, high-tech puzzle together. Feel that sense of accomplishment yet?
Wiring it Up (But Maybe Call a Friend... a Licensed One!)
Now for the juicy bits! Most modern panels have simple, "plug-and-play" connectors (MC4 connectors). You'll string your panels together in series or parallel, depending on your system design, connecting them like a long daisy chain. These wires then run down to your inverter. This is where I'd strongly suggest you consider bringing in a licensed electrician for the final hookup to your home's electrical panel and the grid. While connecting the panels themselves can be DIY-friendly, messing with your main electrical panel is playing with fire... literally. It’s better to be safe, legal, and have a professional ensure everything meets code.
The Moment of Truth: Flipping the Switch!
Once everything is connected, inspected, and signed off (if needed), it's time to fire it up! Your inverter will likely have a display showing you how much power you're generating. Watching that number climb, knowing it's coming from your very own roof, is a feeling like no other. You've officially harnessed the sun! You're basically a wizard now, creating electricity from thin air (and a lot of hard work).
So, there you have it. Installing solar panels on your roof isn't a walk in the park, but it's certainly not scaling Mount Everest either. It's a challenging, rewarding project that can save you money, boost your home's value, and give you serious bragging rights at the next barbecue. Just remember: plan well, prioritize safety, and don't be afraid to ask for help with the electrical bits. Happy sun-harvesting!
