How To Clean Lint From Dryer
:max_bytes(150000):strip_icc()/How-to-Correctly-Clean-Your-Dryer-8642-01-8e7181fcfad54cc89605cefed4fc0aad.jpg)
Ah, the dryer. That magical box in our laundry room that takes soaking wet clothes and, with a bit of tumble and heat, turns them into snuggly, ready-to-wear goodness. It’s one of those modern miracles we often take for granted, isn't it? But lurking beneath its hardworking exterior, and even beyond that ever-present lint trap, is a fluffy, fuzzy, and frankly, a bit of a dangerous secret: a whole lotta lint.
You know the lint trap drill. Every load, you pull out that thin sheet of compressed fuzz, sometimes admiring the sheer volume, other times wondering if your missing socks have simply disintegrated into these fibrous remains. But what if I told you that little lint trap is just the tip of the iceberg? The real lint party, the one that makes your dryer work harder and even poses a fire risk, happens out of sight. It's time to become a lint detective, my friend.
Why Does Lint Go Rogue?
Think of your dryer as a zealous fluff factory. Every time it tumbles, tiny fibers detach from your clothes. Most are caught by the lint trap, but some, like mischievous little dust bunnies on a mission, manage to sneak past. They travel through the dryer's internal workings, down the exhaust vent, and can accumulate, building up like a furry, highly flammable sediment. It’s like the dryer’s arteries getting clogged, only instead of cholesterol, it’s sweater fuzz.
Must Read
This build-up doesn't just look gross; it’s a big deal. When lint clogs the vent, hot air gets trapped, making your dryer overheat. This leads to longer drying times, higher energy bills, and worst of all, a significant fire hazard. Nobody wants a house fire started by rogue sock lint, right?
How Do You Know Your Dryer Has a Lint Problem?
Your dryer usually drops hints, like a passive-aggressive housemate leaving dirty dishes. Here are the tell-tale signs:
- Your clothes are taking an eternity to dry. Seriously, another cycle?
- They feel damp even after a full run.
- The dryer feels super hot to the touch on the outside.
- You might notice a faint, slightly burning smell. That's your dryer's cry for help!
- The lint trap still collects lint, but the clothes just aren't drying right.
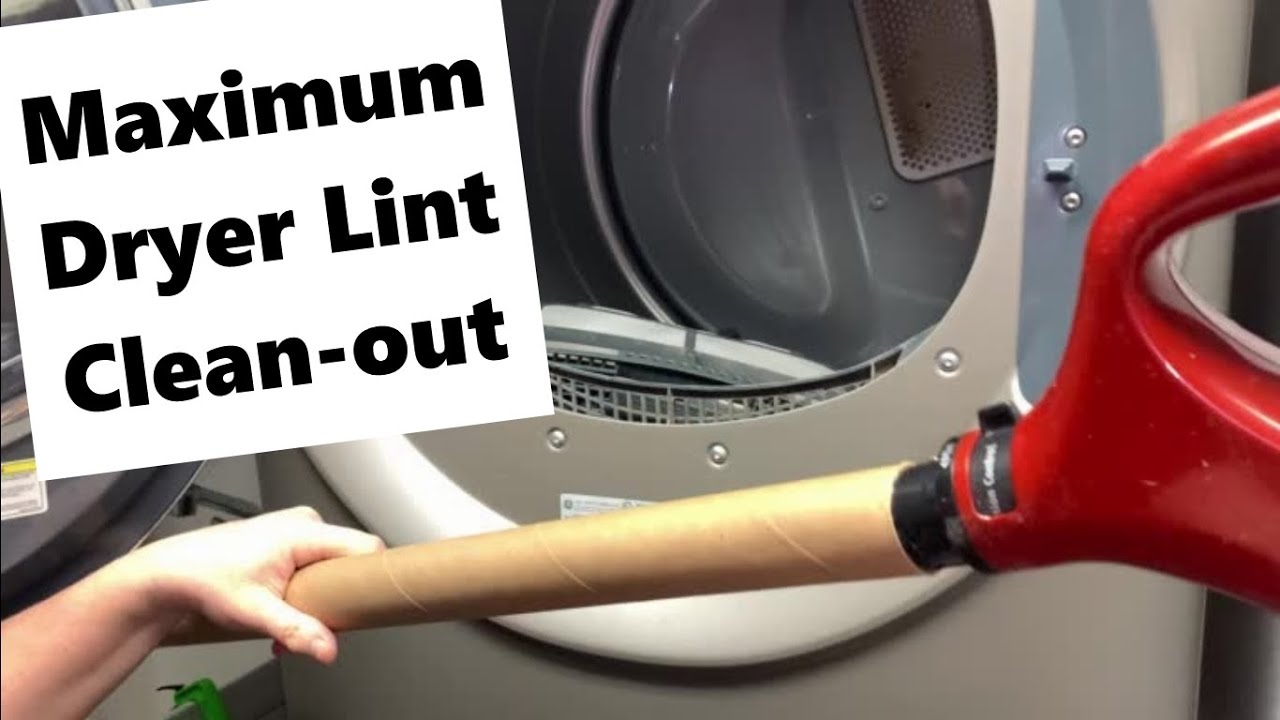
Your Lint-Busting Arsenal
Don't worry, you don't need fancy gadgets or a degree in appliance repair. Here’s what you'll need:
- A vacuum cleaner with a hose attachment.
- A specialized dryer vent cleaning brush. These are usually long, flexible, and look a bit like a giant pipe cleaner. You can find them at most hardware stores or online.
- Maybe a screwdriver, just in case you need to unhook a clamp.
- A trash bag (for the glorious lint harvest!).
- And perhaps a sense of adventure, or at least a good podcast.
The Grand Lint Extraction: A Step-by-Step Comedy
Let's get this fluffy party started!

1. Unplug It! (Seriously)
This isn't just a suggestion; it's a commandment. Before you stick any part of yourself or any tool into your dryer, pull the plug. We’re dealing with electricity and heating elements here. Safety first, always!
2. The Lint Trap Deep Dive
You've cleaned the screen, good job! Now, peer into the slot where the lint trap slides in. See all that fuzz clinging to the sides, deep down in the abyss? Use your vacuum’s crevice tool to get down there and suck it all out. You’d be surprised how much calls that place home.
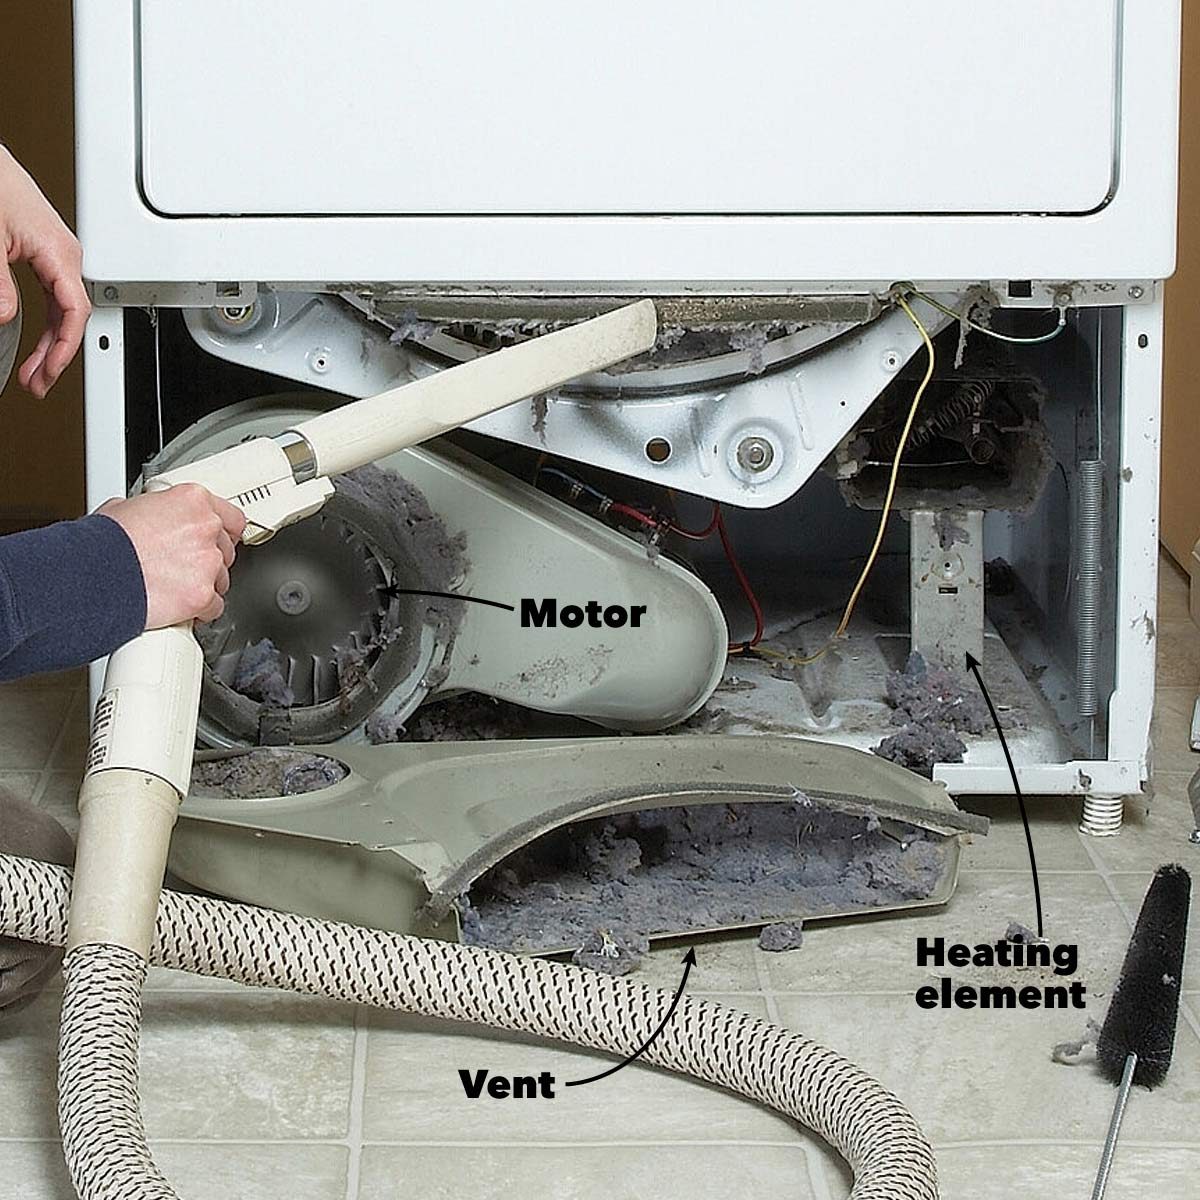
3. The Big Reveal: Behind the Dryer
This is where the real fun begins. Carefully pull your dryer away from the wall. Prepare yourself; this area can be a bit of a dust bunny wonderland. Locate the exhaust vent – it’s usually a big, flexible hose connecting your dryer to a hole in the wall.

4. Disconnect and Conquer the Hose
Gently disconnect the vent hose from both the dryer and the wall. It might be held by clamps; if so, loosen them with your screwdriver. Now, gaze into the hose. Is it packed tighter than a sardine can with lint? Probably! Take your dryer vent brush and snake it through the hose, pushing and rotating. Prepare for an impressive fluff-nado. You'll be amazed at the sheer volume of lint that emerges. It’s like discovering a new species of dryer furball.
5. Attack the Dryer's Exhaust Port
Once the hose is clear, turn your attention to the exhaust port on the back of the dryer itself. Use your brush to carefully clean inside, pulling out any accumulated lint. Do the same for the wall vent opening.
6. Don't Forget the Outside!
Head outside to where your dryer vents. Check the outside vent cover – it might be clogged with lint too. Give it a good clean, making sure the flap opens and closes freely. This is crucial for proper airflow.
7. Reassemble and Rejoice
Once everything is gloriously lint-free, reattach the vent hose securely to both the dryer and the wall. Make sure there are no kinks in the hose – a smooth path means happy airflow. Push your dryer back into place, plug it in, and stand back. You've done it!
The Sweet Rewards
The next time you do a load of laundry, notice the difference. Your clothes will dry faster, your energy bills might see a slight dip, and most importantly, you'll have the peace of mind knowing you've significantly reduced a fire hazard. You're not just doing chores; you're being a domestic superhero. So go ahead, give yourself a pat on the back. You've just saved your dryer, and maybe even your home, from the insidious grip of the lint monster. And who knows, maybe this time, that missing sock will finally reappear, having seen the light!