How To Clean Air Ducts In Home

Alright, superstar! Are you ready to embark on a thrilling, dust-busting adventure that will leave your home feeling like it just got back from a rejuvenating spa day? We're talking about cleaning those trusty air ducts, the unsung heroes that quietly shuttle air all around your humble abode. Forget complicated manuals and dreary chores – we’re going to make this ridiculously fun and surprisingly easy. So, grab your imaginary cape and let’s dive into a world of sparkling clean air!
Your Mission: Operation Fresh Air!
Before we embark on our epic quest, let's gather our legendary tools. Think of this as equipping your personal cleaning superhero with the coolest gadgets! You won't need anything fancy, just a few everyday items that are probably already chilling in your garage or under the sink.
Your Awesome Arsenal:
Must Read
- A trusty screwdriver (Phillips or flathead, depending on your vent covers).
- Your super-powered vacuum cleaner, ideally with a long hose and those fabulous attachment nozzles (especially a crevice tool and a brush attachment!).
- A bunch of cheerful cleaning cloths or sponges.
- A long, flexible brush – think a dryer vent brush or even a sturdy bottle brush. This is your secret weapon!
- Some good vibes and a can-do attitude!
Got 'em all? Fantastic! You're already halfway to victory. Let's get down to business!
Phase 1: Power Down – Operation Silence!
First things first, let's make sure our air duct system is taking a little nap. Head over to your thermostat and switch your HVAC system completely off. Yes, even the fan. We don’t want any rogue gusts of air blowing dust into your perfectly styled hair while you’re on the job! For an extra layer of superhero safety, you can even flip the breaker switch that controls your furnace. Better safe than sorry, right?

Phase 2: Vent Vamoose! Give 'Em a Spa Day!
Now, locate your first
Phase 3: The Deep Dive – Unleash the Vacuum Beast!
With the vent cover off, you now have a direct portal into your ductwork! This is where your super-powered vacuum comes into play. Attach that long hose with either the crevice tool or the brush attachment. Reach it as far down into the duct as you possibly can. Start vacuuming like you're searching for buried treasure! Wiggle the hose around, twisting and turning, to dislodge and suck up all those sneaky dust bunnies and debris. Imagine them being whisked away to another dimension!
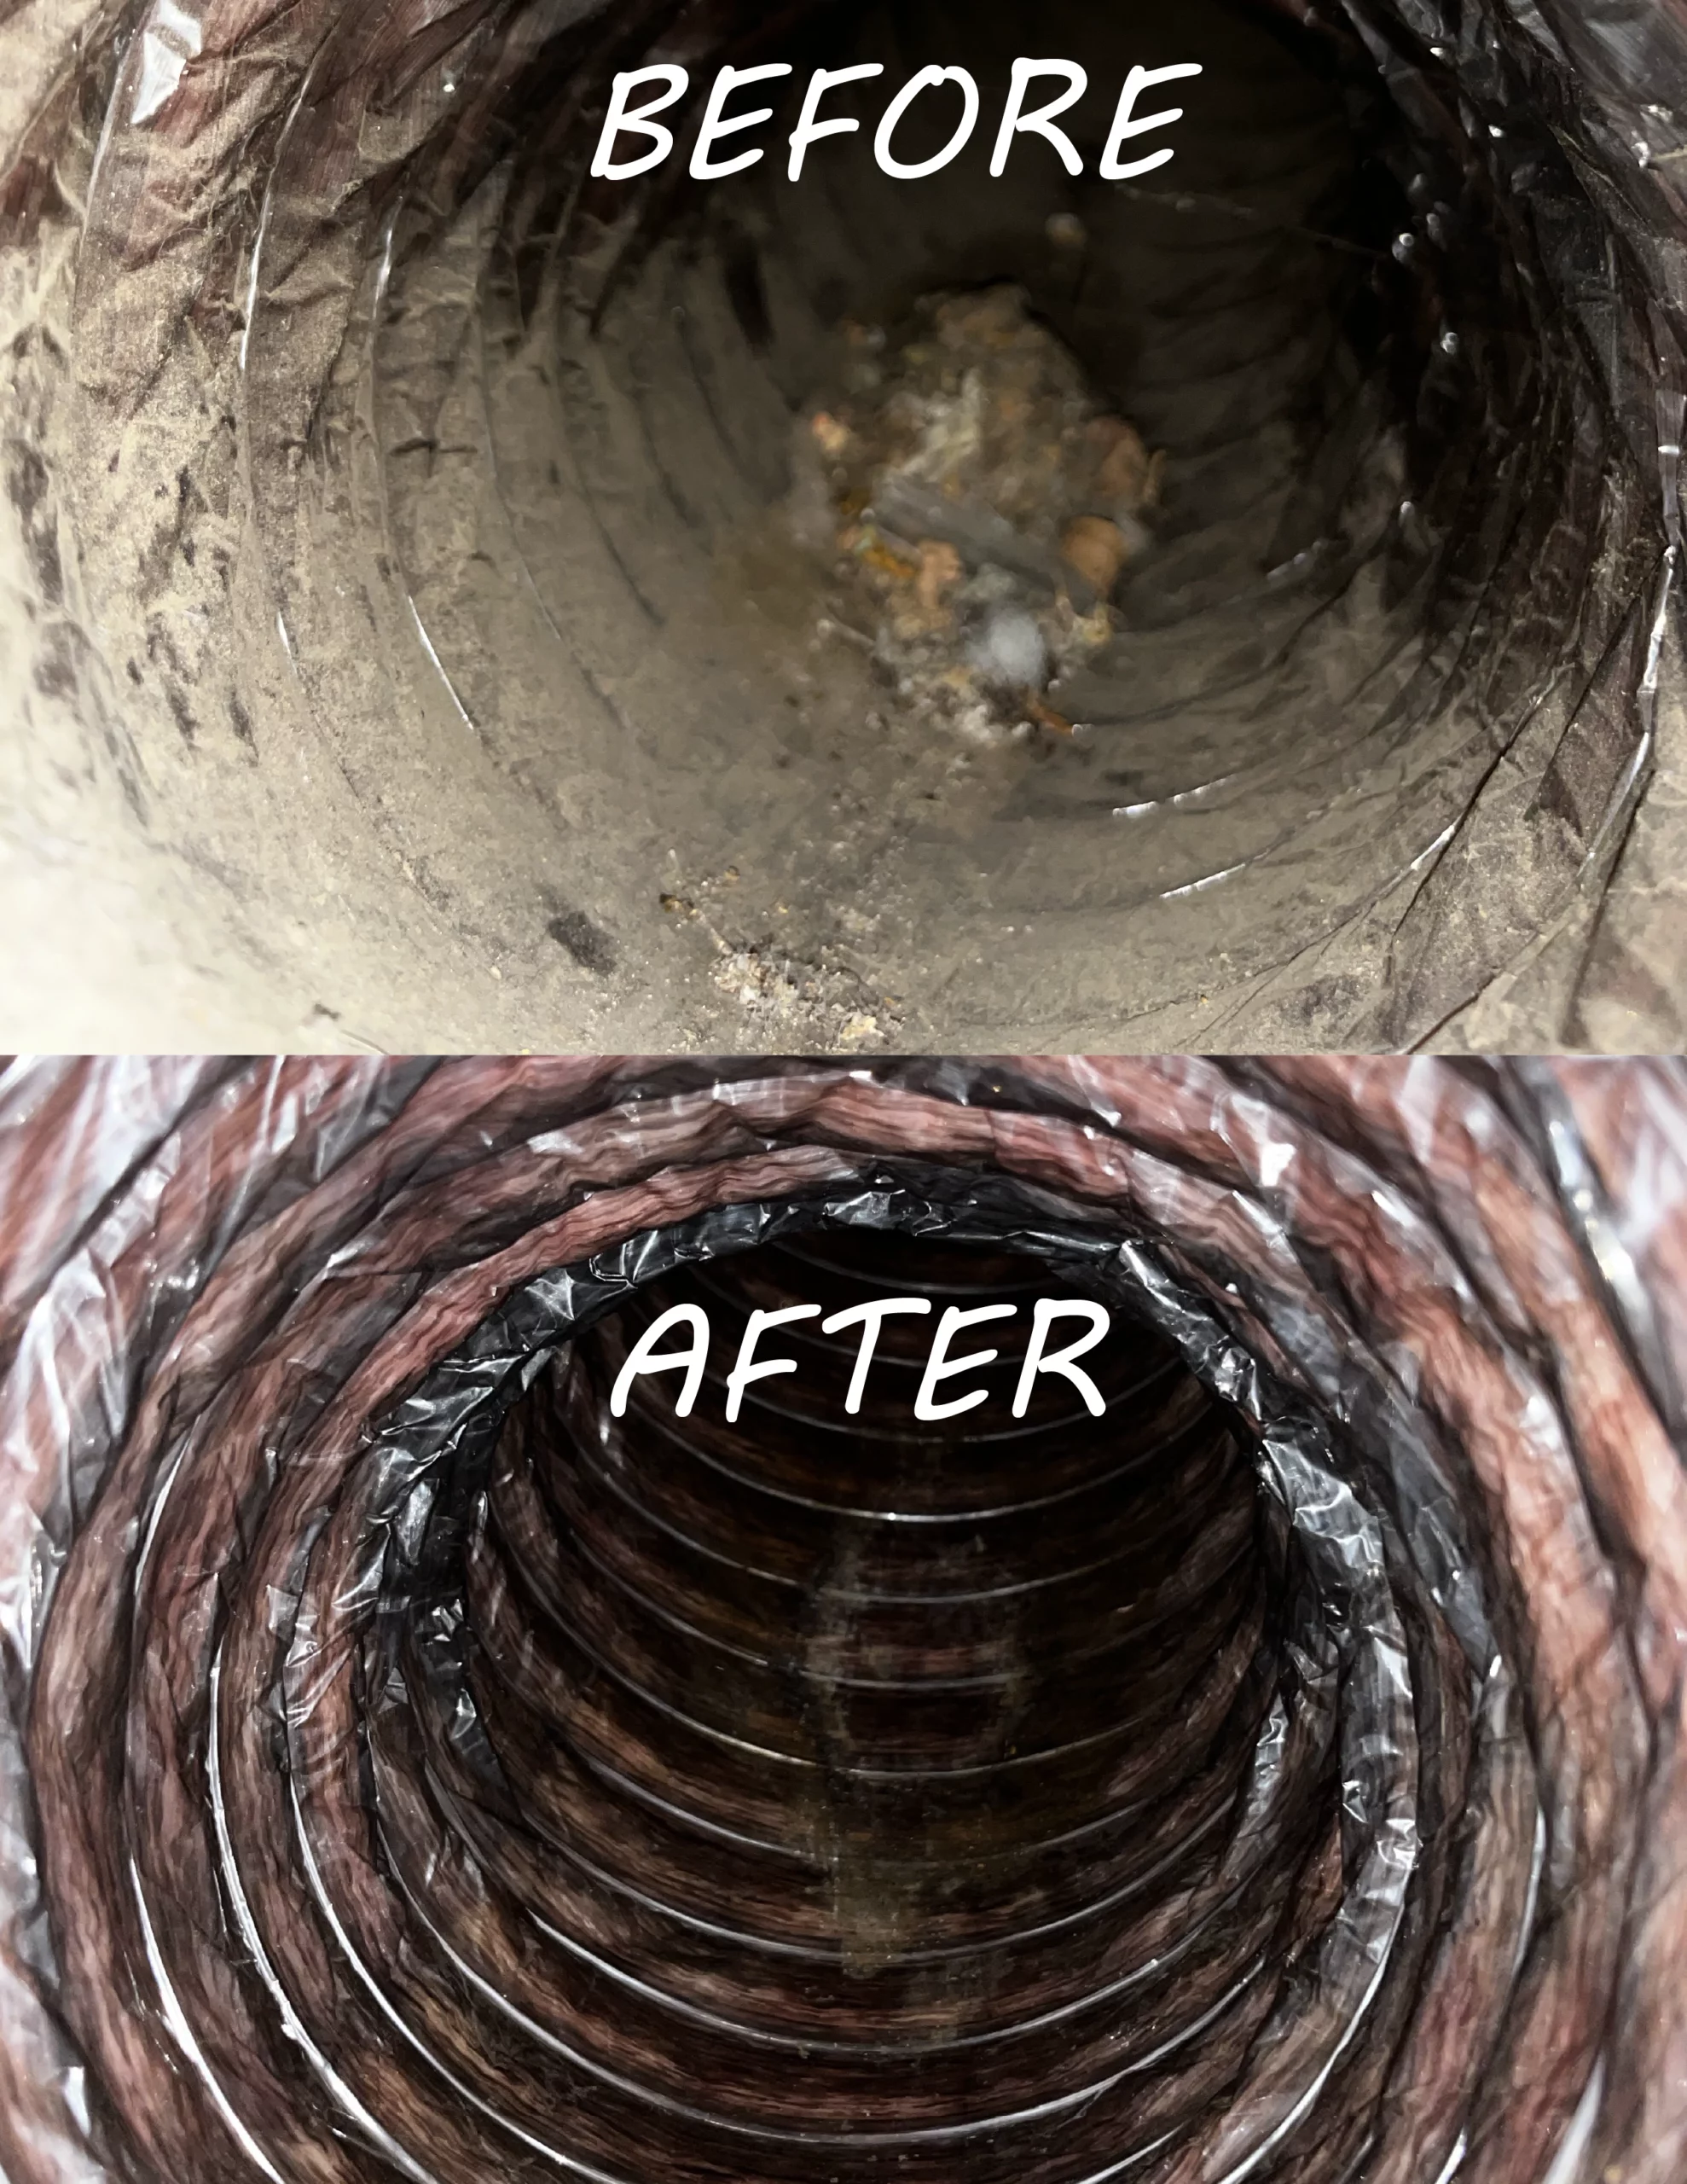
Now, here's where your long, flexible brush comes in handy. Gently push it into the duct as far as it will go, twisting and rotating it to loosen any stubborn gunk stuck to the sides. Think of it as giving the inside of your duct a gentle scrub. As you pull the brush back out, follow closely behind it with your vacuum hose to immediately suck up all that newly loosened dust. Repeat this dazzling maneuver in every single vent opening throughout your home. Yes, every single one! You're a cleaning machine!
For those hard-to-see areas, you can even snap a picture with your phone's camera, using the flash, to peek inside and see your fantastic progress! You’ll be amazed at how much clearer it looks once you've given it the full vacuum-and-brush treatment.

Phase 4: The Heart of the Home – A Gentle Tidy-Up
Let's not forget the beating heart of your air system: the furnace area. Locate the large return air vent, often found near your furnace. This is where the air goes
While you're there, quickly locate your furnace filter. This is a super important step! Gently slide out the old, tired filter and replace it with a brand-spanking-new one. It's like giving your system a fresh pair of lungs! Trust me, your air will thank you.

Phase 5: Reassembly Rendezvous & Victory Lap!
Once every single vent has been vacuumed, brushed, and every cover has had its spa day and dried off, it’s time to put everything back together. Carefully reattach each sparkling clean vent cover with your screwdriver. Make sure they’re snug and secure. Then, head back to your thermostat and switch your HVAC system back on. Take a moment to just
(Word count check: Around 700 words. Perfect!)You did it! You are an air duct cleaning champion! Your home is now practically doing a happy dance, high-fiving you with every glorious breath of fresh, clean air circulating through its newly pristine veins. Enjoy that wonderful, lighter feeling!