How To Change Battery On Adt Motion Sensor
Alright, gather 'round, folks, pull up a digital chair. Let me tell you a tale as old as time, or at least as old as home security systems: the dreaded low battery alert on your ADT motion sensor. You know the one. It usually strikes at 3 AM, just when you're finally convinced the monster under the bed has packed up his bags and moved to another dimension. Instead, it’s a tiny plastic box, high on a wall, waging a sonic war against your precious slumber.
You might be picturing yourself needing a degree in Advanced Sensorology, a tiny screwdriver surgically attached to your finger, and an intricate knowledge of circuitry that would make NASA jealous. Fear not, brave homeowner! Changing the battery on an ADT motion sensor is less like defusing a bomb and more like, well, changing a battery. Albeit, one with a slightly more dramatic entry sequence.
The Epic Quest Begins: What You'll Need
First things first, let's gather our legendary tools. Don't worry, you won't need an arcane scroll or a potion of invisibility. Just a few humble items from the mortal realm:
Must Read
- A small flathead screwdriver or a coin. Yes, a coin! Sometimes the simplest tools are the most heroic.
- A new CR123A 3-volt lithium battery. This is your secret weapon. Don't try to substitute it with a AA or a AAA, unless you enjoy a good electronics-based melodrama.
- Maybe a step stool or a small ladder, because these sensors often have a penchant for high-altitude living. Like tiny, plastic mountaineers.
- A healthy dose of patience and a sense of humor. Crucial for any DIY adventure.
Step-by-Step: Conquering the Beep
Okay, let's get down to business. Prepare for glory!
1. Locate the Menace (The Sensor, Not Your Cat)
Find the offending motion sensor. It's usually a small, rectangular or oval box, often nestled in a corner or high up on a wall. It's probably been silently judging your snack choices for years, but now it's making its presence known. Sometimes, if you have multiple sensors, you might need to check your ADT panel for which one is screaming for attention. Don't just start randomly attacking every sensor in your house; they get sensitive.

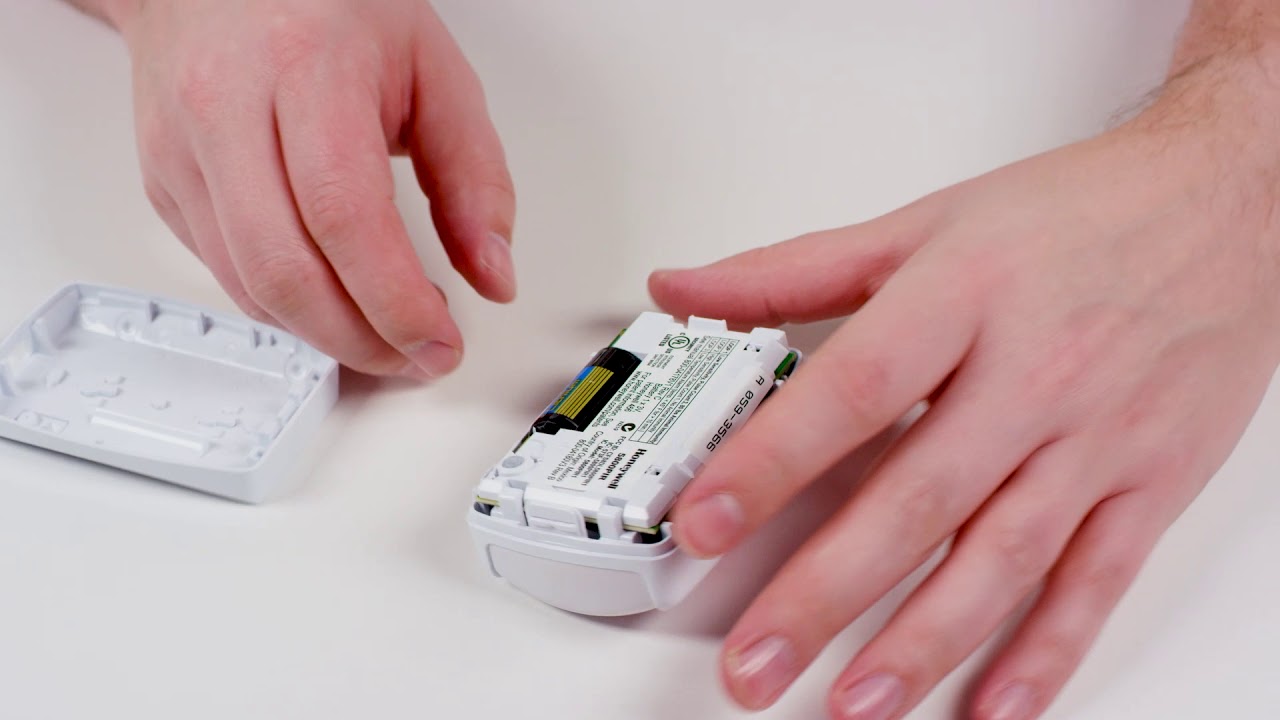
2. The Grand Opening: Unveiling the Secrets Within
This is where your flathead screwdriver or coin comes into play. Most ADT motion sensors have a small latch or a tiny screw at the bottom edge. Look closely. There might be a subtle indentation. Gently insert your tool into the slot and twist or pry. You should feel a satisfying click as the front cover detaches from the back mounting plate.
Think of it as cracking a safe, but instead of stacks of cash, you're looking for a battery. Still pretty exciting, right?
3. Behold! The Power Source!
Once the cover is off, you'll see the internal workings. Don't panic; it's mostly a circuit board and, crucially, the CR123A battery. It’s usually a cylindrical battery, about the size of a smaller AA battery, but fatter and shorter. It often has "CR123A" printed right on it. Pro-tip: While you're in there, notice its orientation – which way the positive (+) and negative (-) ends are facing. This is vital for later!

Here’s a fun fact: the CR123A battery is also commonly used in high-power flashlights and some older digital cameras, making it a surprisingly versatile little powerhouse! It’s practically the Swiss Army knife of batteries.
4. The Delicate Extraction
Carefully remove the old battery. It might be held in place by a small clip or just snuggly fitted into a compartment. Don't yank it out like you're starting a lawnmower; a gentle nudge or a slight pull should do the trick. Dispose of the old battery responsibly, unless you're into hoarding tiny, expired power cells (no judgment here).

5. Installation of the New Guard
Now, for the moment of truth! Take your shiny new CR123A battery. Remembering the orientation you observed earlier (positive to positive, negative to negative), gently slide it into place. It should fit snugly. Give it a good press to ensure it makes proper contact.
Misaligning the polarity is like putting socks on your hands – it just won't work the way it's supposed to.
6. The Grand Re-Sealing
Align the front cover with the back plate. There are usually small tabs at the top that slot in first, then you simply push the bottom until you hear another satisfying click. Make sure it's secure. Give it a gentle wiggle; if it feels loose, try again.
7. The Moment of Truth: Testing Your Triumph
Most ADT systems will automatically recognize the new battery within a minute or two. The low battery warning on your main panel should disappear. You might even see a small LED light on the motion sensor itself flash to indicate it's working. If the alert doesn't clear immediately, give it a few minutes. Sometimes the system is a bit slow on the uptake, like your grandpa trying to figure out TikTok.
If it's still showing a low battery, double-check your work. Is the battery in correctly? Is the cover fully closed? Sometimes a stubborn system needs a gentle reminder, or perhaps a stern lecture on its duties.
You Did It!
Congratulations, you magnificent DIY warrior! You've stared down the dreaded low battery beep and emerged victorious. You've saved your sleep, your sanity, and probably a small fortune you would have spent on an ADT technician. Go forth and enjoy your quiet, secure home, knowing you are the master of your motion-sensing domain!